 Blog
 Podcast
 Unterstützung
 Kunden-Login

Wie Sie Ihre Website mit MemberMouse und Elementor erstellen
Design is one of the most important stages of building a membership site. Whether you’re starting from scratch or have an existing website, you want to create a beautiful, enjoyable, and functional experience for your members.
Wir wissen das, weil wir fast jede Woche Fragen von unseren Kunden bekommen, wie sie die Kernelemente ihrer Websites gestalten sollen - Dinge wie Checkout-Seiten, Mitglieder-Dashboards, Bereiche für die Bereitstellung von Inhalten und mehr.
While MemberMouse is an incredibly powerful membership tool, it’s essentially design agnostic. That means it works “behind the scenes” to handle everything that goes into running a membership site and lets your WordPress theme determine how things look. And unless you’re a WordPress developer or have some serious design chops, it can be frustrating to get your site to look exactly the way you want.
That’s why page builders have become so popular. These are wonderful tools that allow you to build visually, rather than with code. And out of all the page builders on the market, Elementor ist mit Sicherheit einer der bekanntesten.
(Don’t worry if you use Divi – we have das Richtige für Sie)
To help you build a site that looks great and works well, we created this in-depth tutorial video. In it, we’ll show you how to build your site using Elementor and MemberMouse. You’ll learn how to use the core functionality of both tools so that you know how to make them work for your business. We’re really excited to share this with you and hope it helps make designing your site much less of a headache.
Bereit zum Eintauchen? Klicken Sie auf "Play" im Video unten.
Video-Übersicht
| 0:00 | Intro & Overview |
|---|---|
| 2:50 | Aufbau der Mitglieder-Homepage mit MemberMouse |
| 13:34 | Wie man mit SmartTags für Mitgliederdaten arbeitet, um ein personalisiertes Erlebnis zu schaffen |
| 24:42 | So verwenden Sie den SmartTag "Mitgliederentscheid", um Inhalte dynamisch anzuzeigen |
| 46:52 | Wie man eine Kassenseite gestaltet |
| 54:00 | Einpacken |
What You’ll Learn In This Video
In this over-the-shoulder tutorial, we’ll show you how to combine the power of MemberMouse and Elementor. After you watch it, you’ll know how to use the powerful features of MemberMouse and design a site you love. In this example, we’ll start by building a member homepage from scratch.
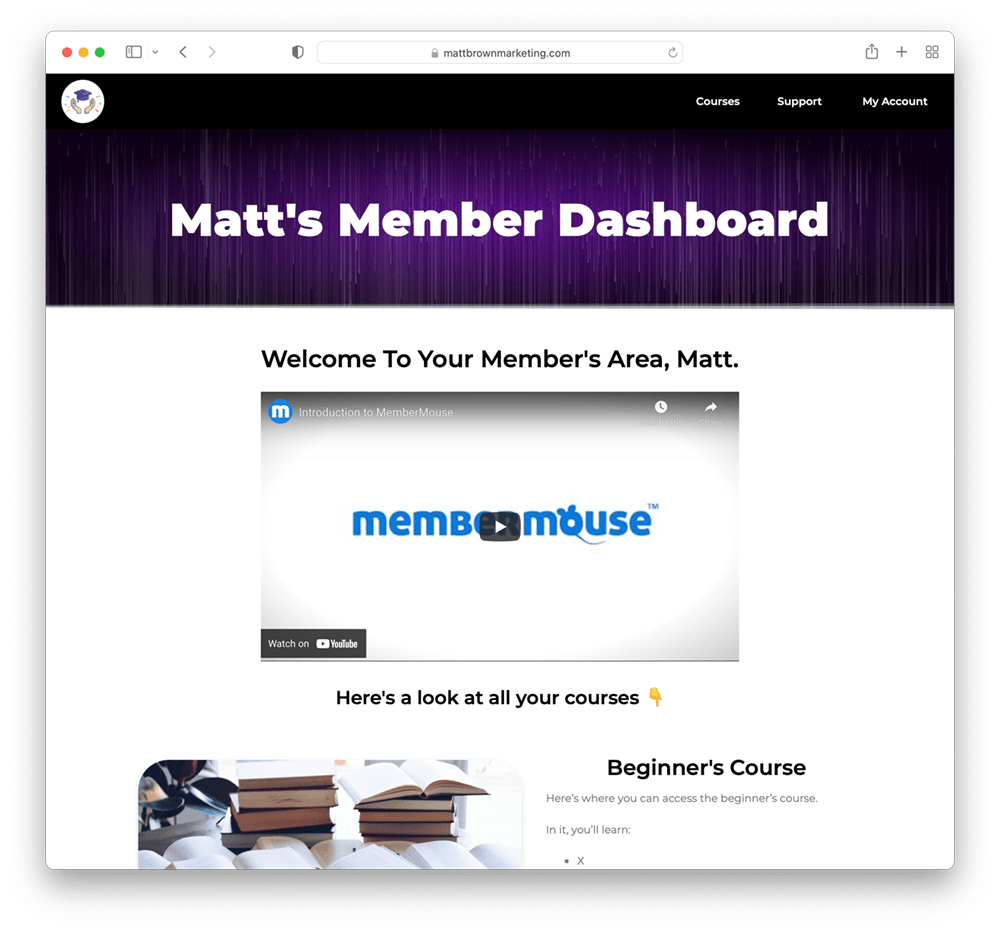
Plus, you’ll see how you can use MemberMouse SmartTags — like the Mitgliedsdaten SmartTag & Mitgliederentscheid SmartTag — to personalize your members’ experience and dynamically display content. It’s pretty fun stuff (in our humble opinion).
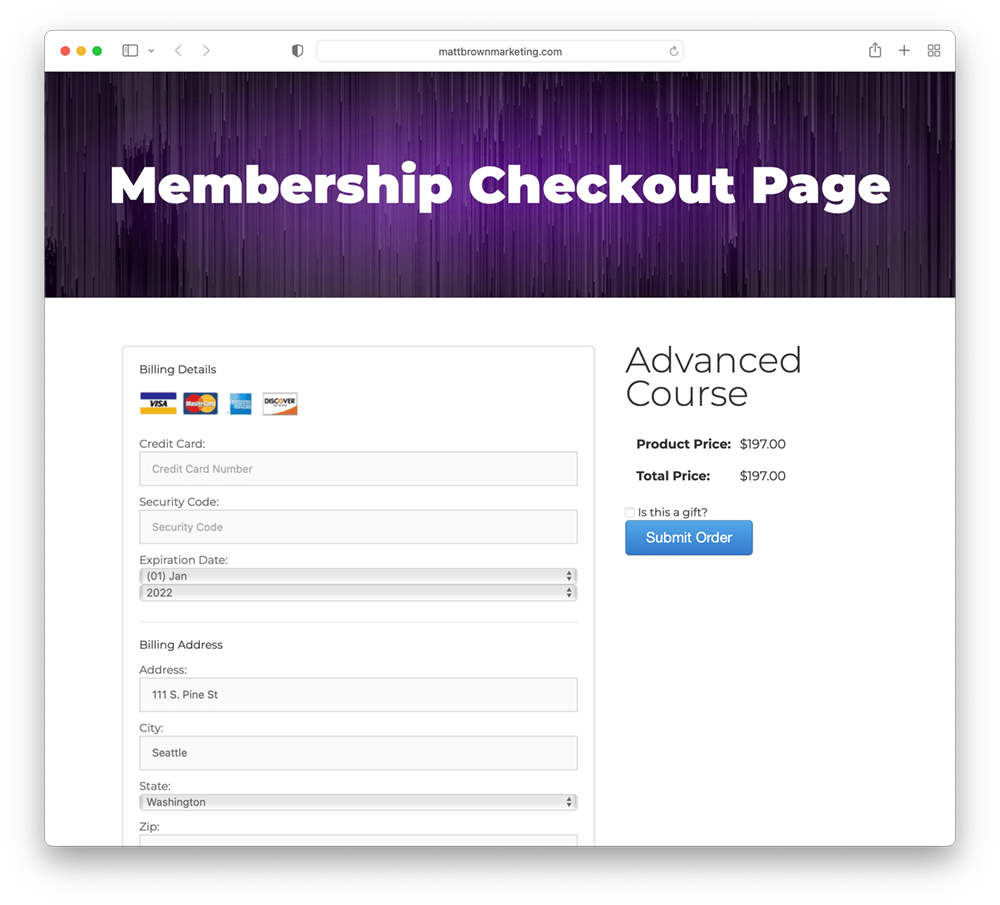
And in the second part of the video, we’ll also take a look at how you can design a checkout page that matches the look and feel of your site:
Below, you’ll find more information and resources about some of the key concepts we cover in the video. If you get stuck or have questions, we’re here to support you. Just leave a comment below in this post and we’ll help you out as soon as we can.
So verwenden Sie den SmartTag für Mitgliederentscheidungen
Unter 24:40 in diesem Tutorial zeigen wir Ihnen, wie Sie den SmartTag "Mitgliederentscheidung" verwenden können, um dynamisch Inhalte anzuzeigen, die darauf basieren, ob jemand ein bestimmtes Produkt besitzt oder nicht.
Wie wir in dem Video erwähnen, here’s the link to the support article mit allen Informationen, die Sie benötigen, um diese Funktionen auf Ihrer Website zu nutzen.
Here’s an example of the code snippet you’d paste into an HTML block to implement this on your site:
Just be sure to update your bundle ID number to match the bundle you’re working with.
So passen Sie Ihre Kassenseite an
We often get asked about how to make a MemberMouse checkout page conform to the styling of your theme or page builder. That’s why in this section (at 46:52 im Tutorial) zeigen wir Ihnen, wie Sie eine beliebige Kassenseite an das Erscheinungsbild Ihrer restlichen Website anpassen können. Und die gute Nachricht ist, dass Sie nur einen winzigen Codeschnipsel kopieren und in den Abschnitt einfügen müssen, den Sie in Elementor ändern möchten.
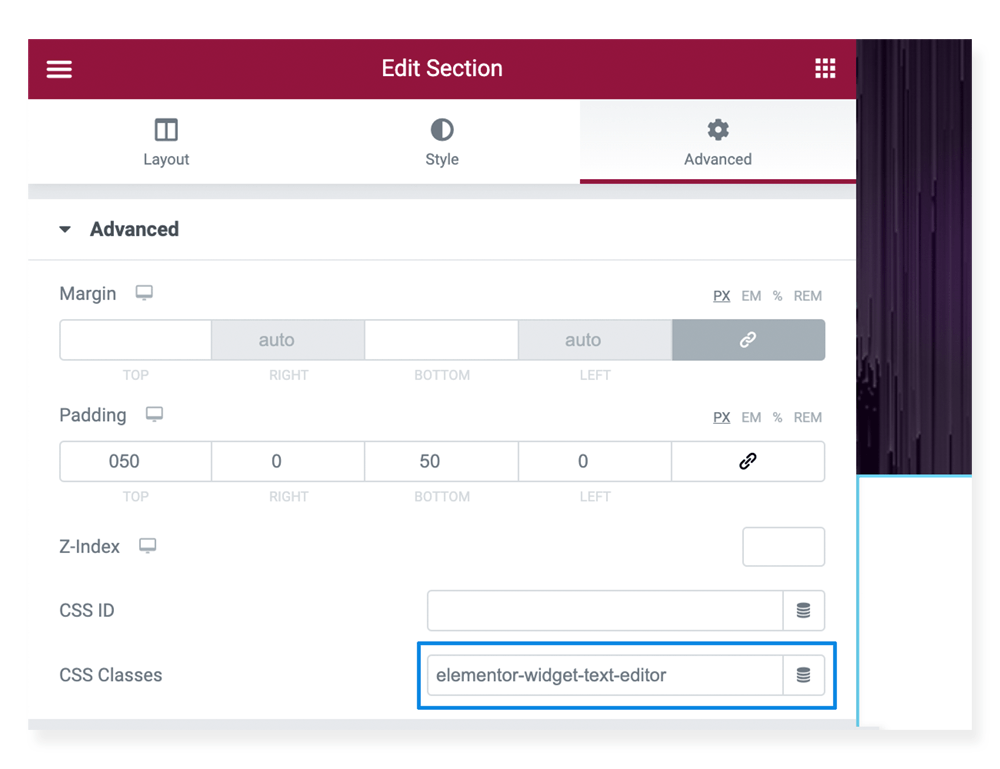
Fügen Sie im Abschnitt CSS-Klassen einfach diesen Codeausschnitt ein, wie ich es unter 50:25 im Video:
elementor-widget-text-editor
Dadurch wird das Standarddesign der Kassenseite außer Kraft gesetzt und sichergestellt, dass Ihre Kassenseiten dem Design Ihrer Website entsprechen.
Wo Sie alle Hauptseitenvorlagen finden
Depending on the version of WordPress you’re using, you might not be able to directly insert all the different MemberMouse Core Page templates from your content editor:
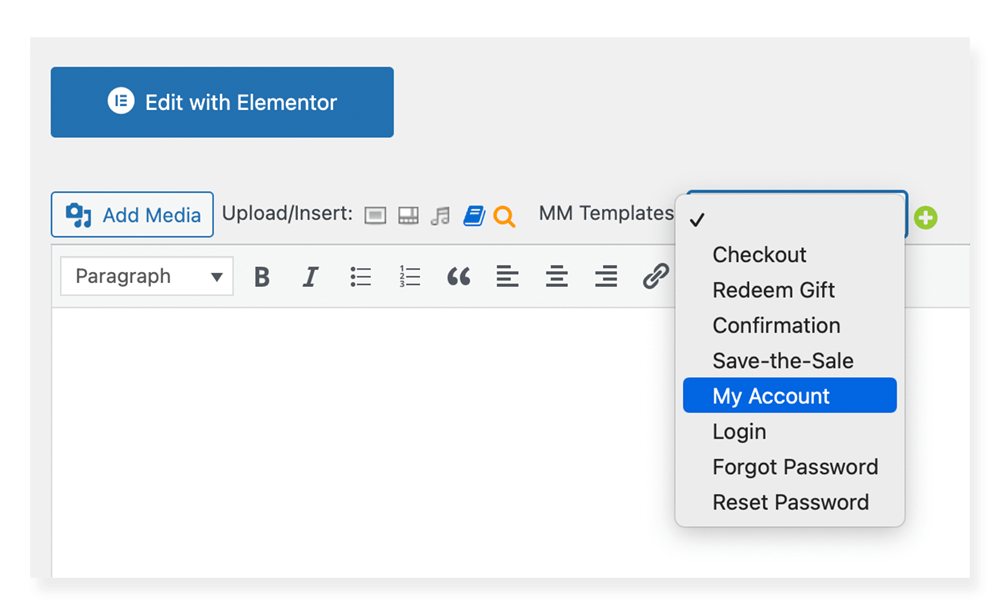
This isn’t a problem, though. All you’ll need to do is visit the page below to find all of the templates you need:
From there, you can simply find the page template you want to work with, copy it, and paste it into the HTML block you’re designing in Elementor.
Einpacken
Thank you for checking out this MemberMouse and Elementor tutorial video. We get how overwhelming it can be when you first start to build your site. If you have any questions about what we’ve covered here, please let us know in the comments below. We love helping people build powerful and profitable membership sites and would be happy to assist you.
Zusätzliche Ressourcen


Blair Williams
Von MemberMouse erstelltes Mitarbeiterkonto




 DE
 EN
 ES
 FR
 PT


Ich frage mich, wo ich dieses Video finden kann? Es wird derzeit als "nicht verfügbar" angezeigt.
Hallo Jodi! Bitte aktualisieren Sie das Video, es sollte jetzt aktualisiert werden. Sie können sich gerne an uns wenden, wenn wir Ihnen sonst noch helfen können.
Super hilfreich, Matt. Ich danke dir.
Ganz genau! Wenn Sie noch etwas brauchen, können Sie sich gerne melden, Mike.