 Blog
Blog Podcast
 Support
 Customer Login

How To Build Your Site With MemberMouse & Elementor
Design is one of the most important stages of building a membership site. Whether you're starting from scratch or have an existing website, you want to create a beautiful, enjoyable, and functional experience for your members.
We know this because we get questions nearly every week from our customers about how to style the core elements of their sites – things like checkout pages, member dashboards, content delivery areas, and more.
While MemberMouse is an incredibly powerful membership tool, it's essentially design agnostic. That means it works “behind the scenes” to handle everything that goes into running a membership site and lets your WordPress theme determine how things look. And unless you're a WordPress developer or have some serious design chops, it can be frustrating to get your site to look exactly the way you want.
That's why page builders have become so popular. These are wonderful tools that allow you to build visually, rather than with code. And out of all the page builders on the market, Elementor is definitely one of the most prominent.
(Don't worry if you use Divi – we have the perfect thing for you)
To help you build a site that looks great and works well, we created this in-depth tutorial video. In it, we'll show you how to build your site using Elementor and MemberMouse. You'll learn how to use the core functionality of both tools so that you know how to make them work for your business. We're really excited to share this with you and hope it helps make designing your site much less of a headache.
Ready to dive in? Click play on the video below.
Video Overview
| 0:00 | Intro & Overview |
|---|---|
| 2:50 | Building The Member Homepage With MemberMouse |
| 13:34 | How To Work With Member Data SmartTags To Create A Personalized Experience |
| 24:42 | How To Use The Member Decision SmartTag To Dynamically Display Content |
| 46:52 | How To Design A Checkout Page |
| 54:00 | Wrapping Up |
What You'll Learn In This Video
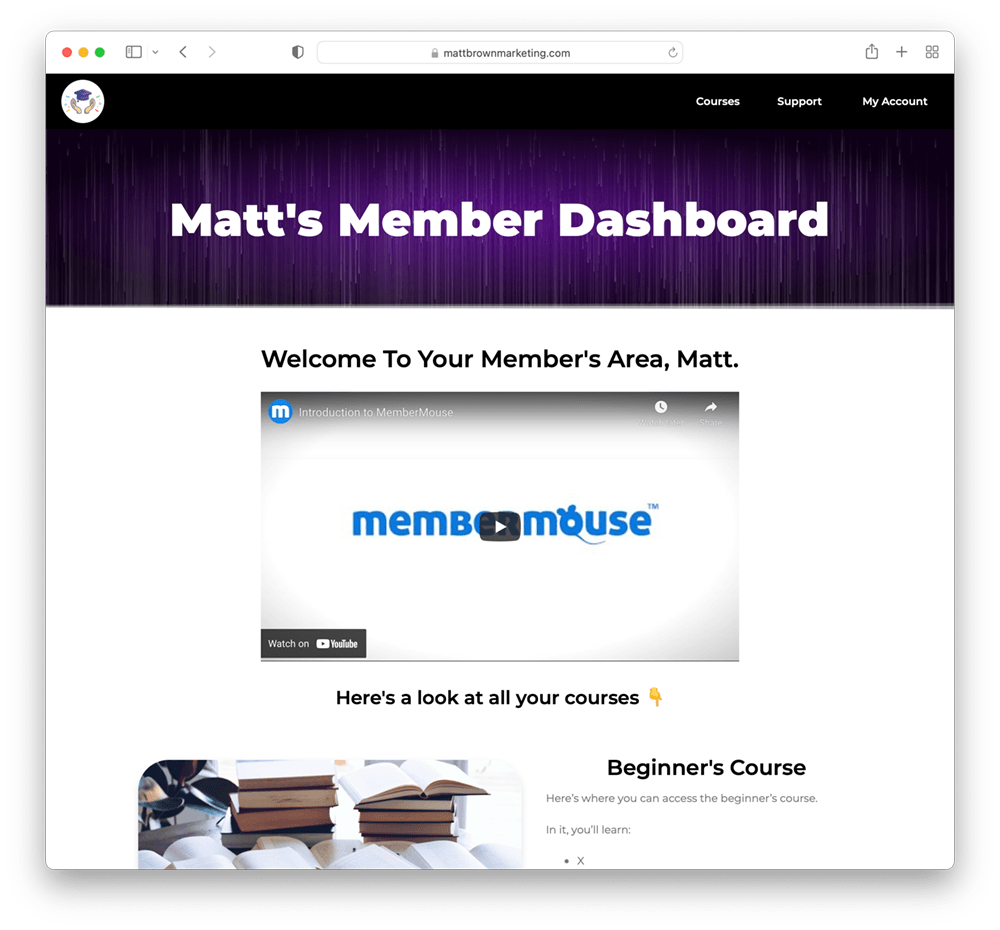
In this over-the-shoulder tutorial, we'll show you how to combine the power of MemberMouse and Elementor. After you watch it, you'll know how to use the powerful features of MemberMouse and design a site you love. In this example, we'll start by building a member homepage from scratch.
Plus, you'll see how you can use MemberMouse SmartTags — like the Member Data SmartTag & Member Decision SmartTag — to personalize your members' experience and dynamically display content. It's pretty fun stuff (in our humble opinion).
And in the second part of the video, we'll also take a look at how you can design a checkout page that matches the look and feel of your site:

Below, you'll find more information and resources about some of the key concepts we cover in the video. If you get stuck or have questions, we're here to support you. Just leave a comment below in this post and we'll help you out as soon as we can.
How To Use The Member Decision SmartTag
At 24:40 in the tutorial, we show you how you can use the Member Decision SmartTag to dynamically display content based on whether or not someone owns a particular product.
As we mention in the video, here's the link to the support article with all the information you need to put these features to work on your site.
Here's an example of the code snippet you'd paste into an HTML block to implement this on your site:
Just be sure to update your bundle ID number to match the bundle you're working with.
How To Customize Your Checkout Page
We often get asked about how to make a MemberMouse checkout page conform to the styling of your theme or page builder. That's why in this section (at 46:52 in the tutorial) we show you how to make any checkout page match the look and feel of the rest of your site. And the good news is that all you need to do is copy and paste in one tiny code snippet into the section you want to change in Elementor.
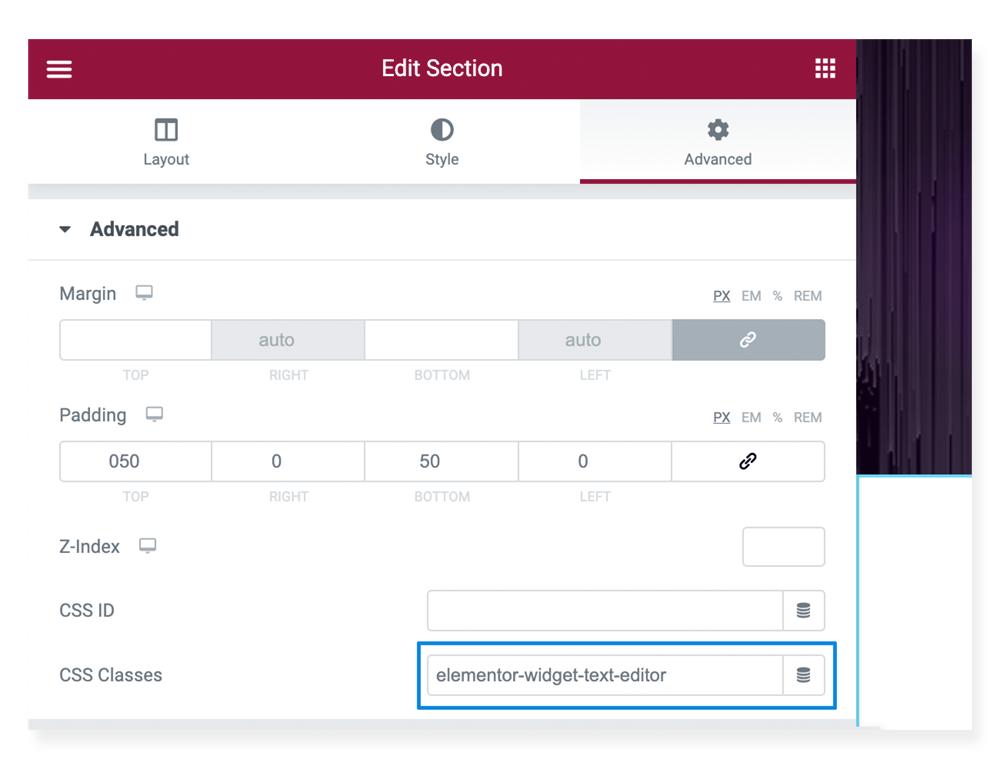
In the CSS Classes section, simply paste in this code snippet like I do at 50:25 in the video:
elementor-widget-text-editor
This will override the default checkout page styling and ensure your checkout pages matches the design of your site.
Where To Find All The Core Page Templates
Depending on the version of WordPress you're using, you might not be able to directly insert all the different MemberMouse Core Page templates from your content editor:
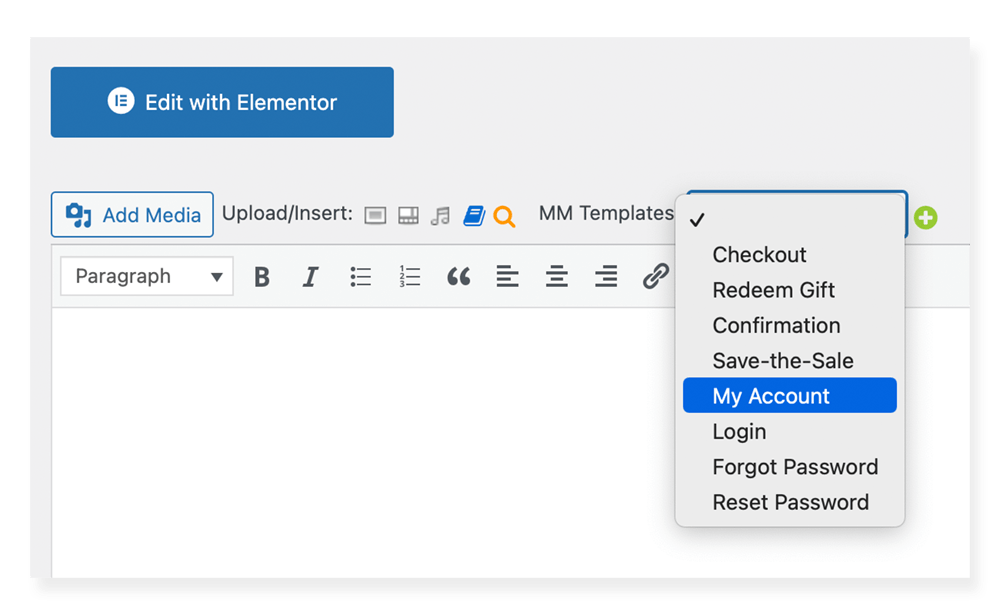
This isn't a problem, though. All you'll need to do is visit the page below to find all of the templates you need:
From there, you can simply find the page template you want to work with, copy it, and paste it into the HTML block you're designing in Elementor.
Wrapping Up
Thank you for checking out this MemberMouse and Elementor tutorial video. We get how overwhelming it can be when you first start to build your site. If you have any questions about what we've covered here, please let us know in the comments below. We love helping people build powerful and profitable membership sites and would be happy to assist you.
Additional Resources

Blair Williams
Employee account created by MemberMouse


I’m wondering where I can find this video? It currently shows as “unavailable”.
Hi Jodi! Please refresh, the video should be updated. Feel free to reach out if there’s anything else we can help you with.
Super helpful, Matt. Thank you.
Absolutely! Feel free to reach out if you need anything else, Mike.