In this article we'll show you how to integrate MemberMouse with ClickBank.
After integrating with ClickBank, MemberMouse will create accounts and grant the appropriate access when purchases are made through ClickBank. You'll also be able to initiate refund and cancellation requests right from MemberMouse. Once you've configured ClickBank, read this article to learn how to make test purchases.
Configure Clerk and Developer API Keys
- From the MemberMouse menu, click on Payment Settings and then click on the Payment Methods tab.
- Scroll down to the Offsite Payment Methods section and check off the box next to ClickBank. The ClickBank configuration form will show up.

- Now we're going to retrieve the necessary credentials from ClickBank and copy them here. Open up a new browser window and log into your ClickBank account.
- Click on the Account Settings tab in the main menu.

- Scroll down to the Clerk API Keys section and click the Edit link in the upper right corner of that table.

If you don't see the Edit link in the upper right corner and you see something like the image below this means that your site is linked to a master account and you'll need to create the Clerk API key within the master account. See our troubleshooting section for step-by-step instructions on creating the Clerk API key from the master account.
- On the following page, click the Create New Clerk User API Key button.
- On the following page, give your API key a short description and check off the boxes next to Orders/Tickets Write and Products API. If you don't see the Orders/Tickets Write option, see our troubleshooting section for more information.

- Click the Save button.
- Go back to the Account Settings page by clicking the Account Settings tab in the main menu.

- Scroll down to the Developer API Keys section and click the Edit link in the upper right corner of that table.

- On the following page, click the Create New Developer Key button.
- On the following page, give your API key a short description.

- Click the Save button.
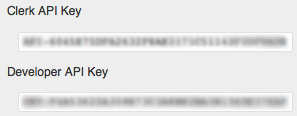
- Go back to the Account Settings page and scroll down to the Clerk API Keys section. Now you should see that both the Clerk and Developer API keys are set.

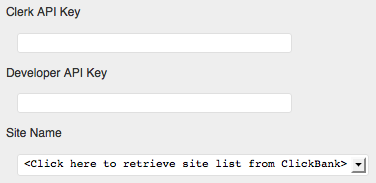
Copy each key individually, go back to the ClickBank configuration form in MemberMouse and paste each key into its respective field.
- Now that the Clerk and Developer API keys are set, click the drop down underneath Site Name to retrieve the list of sites from ClickBank. If you need help with this, see our troubleshooting section for more information.

- Select the site you want to connect to from the list (in most cases there will only be one site in the list).
Configure the Instant Notification URL
- Click on the Vendor Settings tab in the main menu.

- Click the My Site tab if it is not already active.

- Scroll down to the Advanced Tools section and click the Edit link in the upper right corner of that table.

- On the following page in the Advanced Tools Editor, enter a secret key for instant notification URL. The secret key can be up to 16 letters or digits and must be in ALL CAPS.

- Copy the secret key you just entered, go back to the ClickBank configuration form in MemberMouse and paste it into the Secret Key field.

- While on the ClickBank configuration form in MemberMouse, copy the URL in the field labelled Notification URL.

- Scroll down to the bottom of the form and click the Save Payment Methods button to save your ClickBank settings.
- Go back over to ClickBank and in the Advanced Tools Editor, paste the notification URL from MemberMouse into the field labelled Instant Notification URL.

- Make sure that the version drop down to the right of the Instant Notification URL field is set to Version 7.0.
- Click the Save Changes button.
Configure ClickBank Products
All purchases for ClickBank products will happen from a checkout form on ClickBank.
Following a purchase, ClickBank will call the notification URL we configured in a previous step to inform MemberMouse of the purchase and then redirect the customer to the thank you page associated with the ClickBank product purchased.
In order for MemberMouse to know what to do when it receives the notification, we must map ClickBank products to MemberMouse products. This lets MemberMouse know that when it's notified of a particular ClickBank product being purchased it should handle it as if the MemberMouse product it's mapped to was purchased. If a ClickBank product is purchased and it's not mapped to a product within MemberMouse, then it will be ignored.
Even though the pricing and subscription settings associated with the ClickBank product will be used to actually charge the customer, we need to ensure that the pricing and subscription settings of the MemberMouse product we map it to are the same. This is because this information will be displayed to the member on their My Account page and will be used in any reports within MemberMouse. If the product configuration for the ClickBank product is different from the MemberMouse product it's mapped to, it will likely cause confusion.
The following steps should be taken for each ClickBank product you want MemberMouse to be able to recognize:
- In ClickBank, click the Vendor Settings link in the main menu.

- From here, click the My Products tab in the secondary menu.

- On the following page you can either click on the Standard Products tab or the Recurring Billing Products tab. Following that you'll see a list of products you have defined in ClickBank.

- In the Actions column, click the edit icon on the row associated with the product you want to connect with MemberMouse.
- On the following page, locate the Thank You Page field listed under the Product Delivery Details section.
- In another browser window, go to the ClickBank configuration form in MemberMouse by going to Payment Settings > Payment Methods and copy the URL in the field labelled Confirmation Page URL.

- Go back to the browser window with ClickBank loaded and paste the confirmation page URL into both the Thank You Page and Mobile Thank You Page fields.

- Click the Save Changes button.
- Return to the ClickBank configuration form in MemberMouse and scroll down to the Product Mappings section.
- Click the Configure ClickBank Products button.
- In the dialog that pops up, locate the ClickBank product we just configured in the column on the left. Then select the MemberMouse product from the drop down on the right that should be mapped to this ClickBank product. If you need help with this, see our troubleshooting section for more information.

- Click the Save Product Mappings button.
Create a Fallback Confirmation Page
Read this article to learn more about creating a fallback confirmation page.


