 Blog
Blog Podcast
 Support
 Customer Login

How To Build A Stunning Membership Site With Divi (In 6 Steps)
Do you want to build a stunning membership site, without paying a web developer or investing lots of time learning the basics of web design? If so, you might want to consider building a membership site with Divi and WordPress.
As a Content Management System (CMS), WordPress is very user-friendly and doesn't require a ton of special knowledge or skills. Using it to create a membership site is a simple process, especially when you add key tools such as the Divi Builder and Theme. Plus, if you use MemberMouse, you’ll get a free Divi Layout Pack that serves as an accessible starting point.
In this post, we’ll discuss why you might want to build a membership site with Divi. Then we’ll show you how to get the job done in six simple steps. Let’s get started!
Why You Might Want to Build a Membership Site with Divi
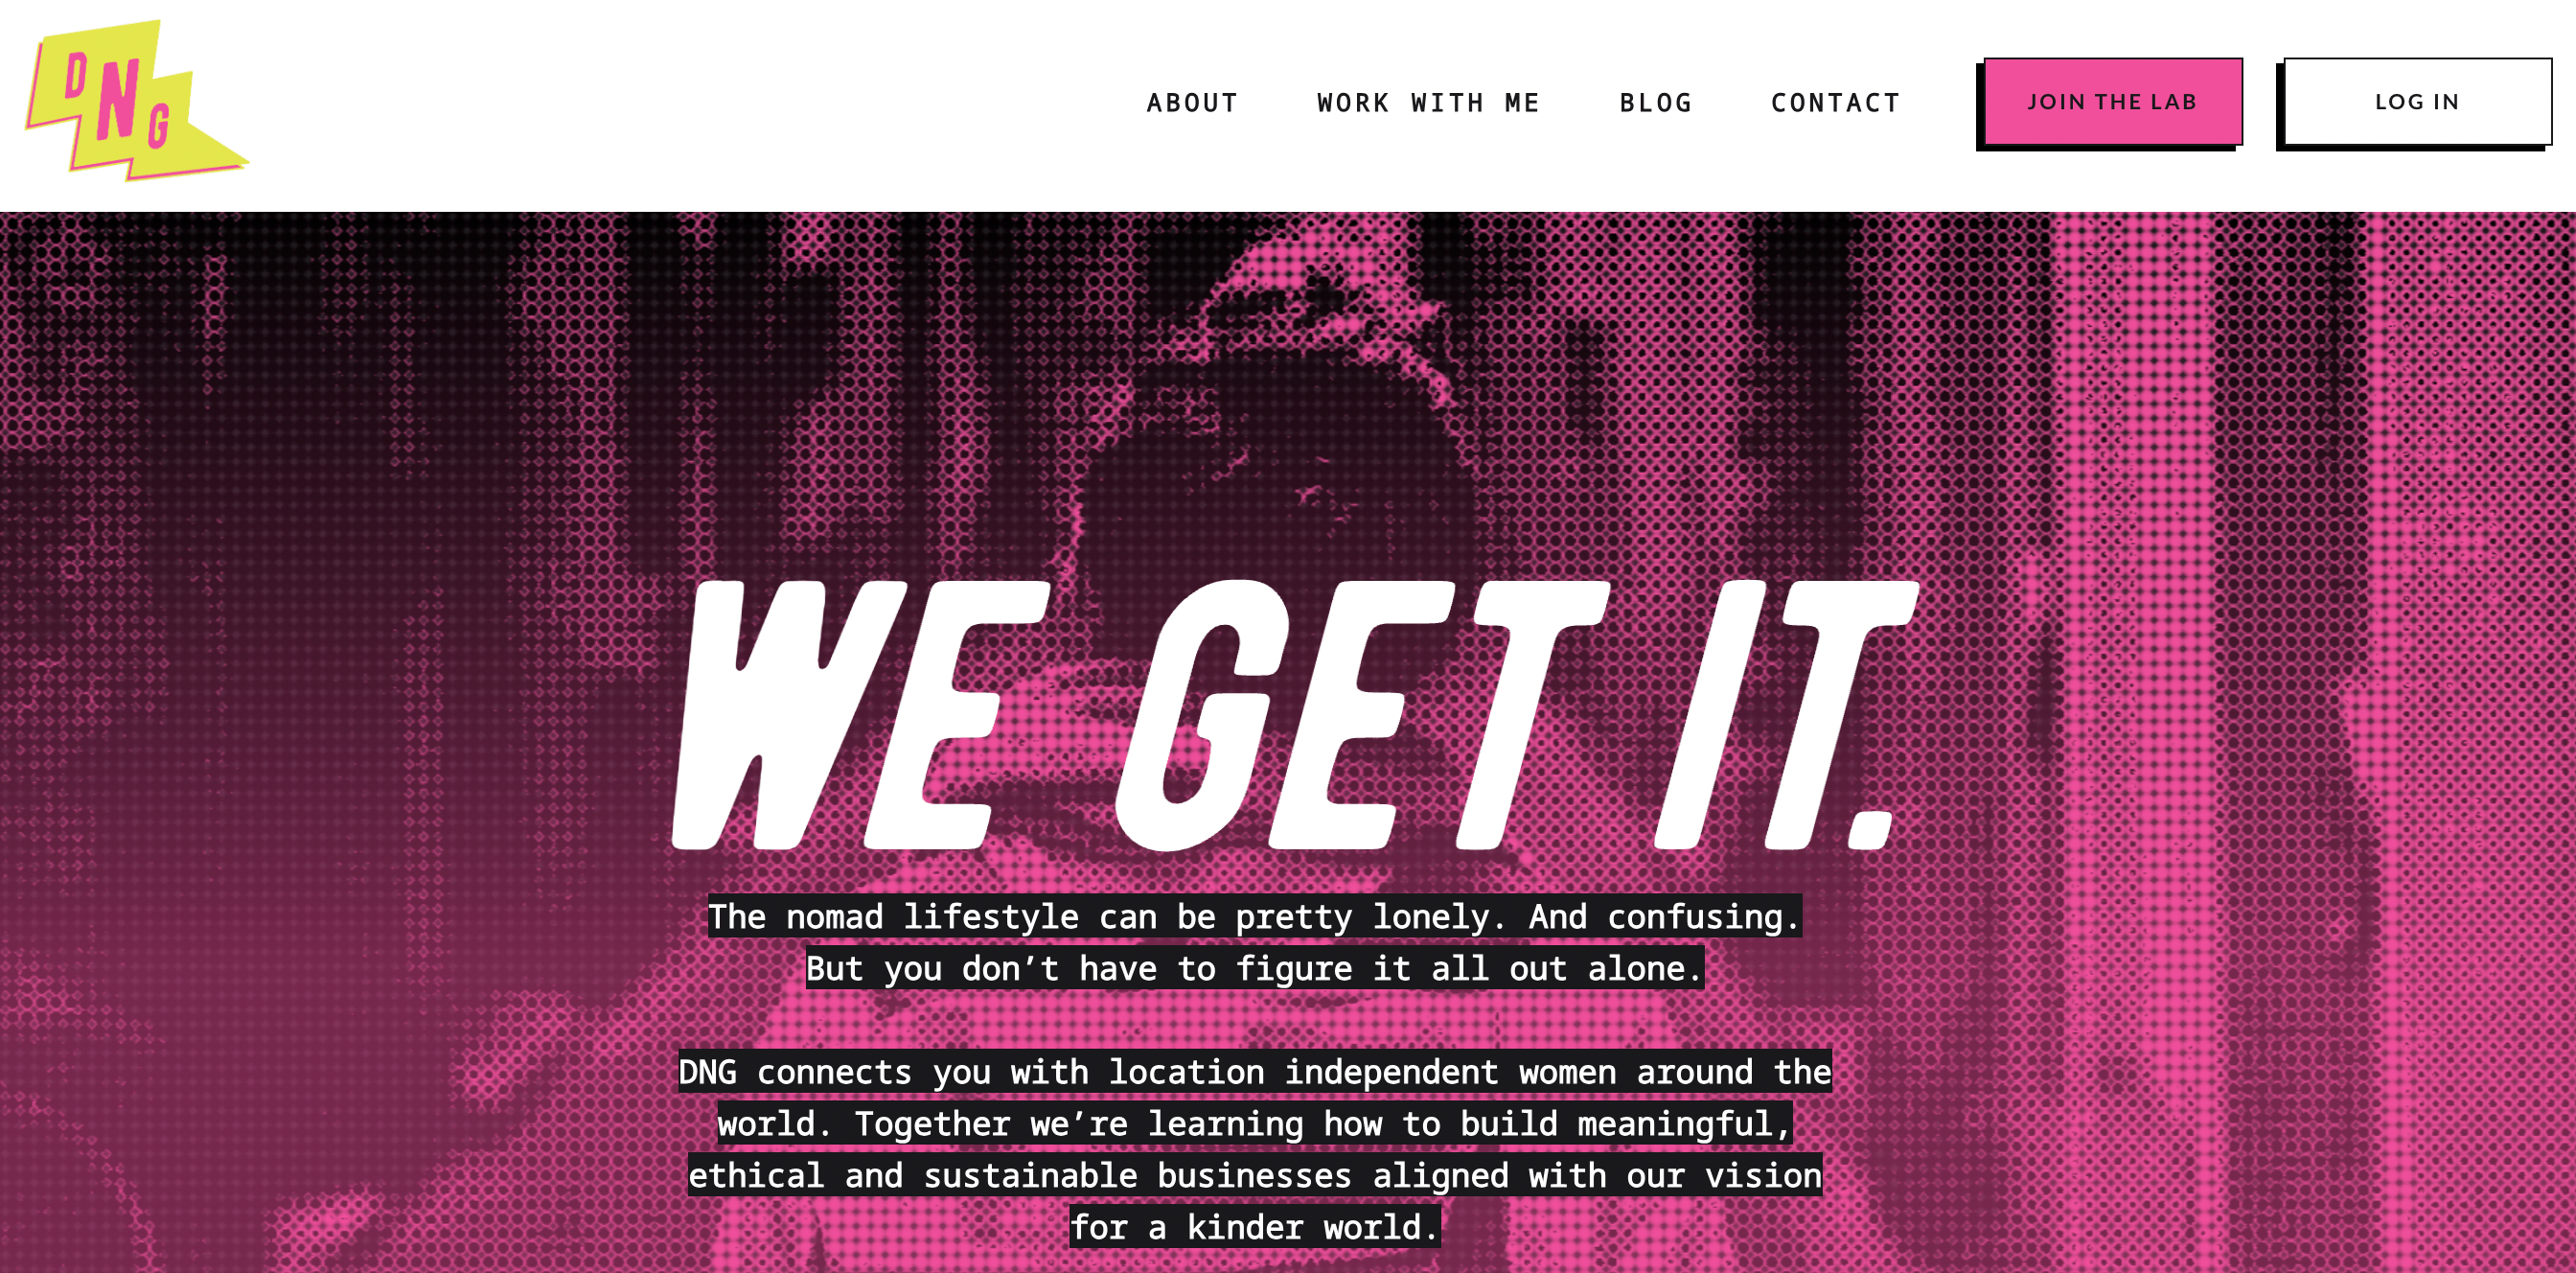
Before we show you how to build a Divi membership site, let's discuss why you may want to do so. First, launching a membership site offers a lot of value. It can help you cultivate relationships and build a community around an idea or a subject, such as clean skincare or a particular lifestyle:
Alternatively, it could serve as an informal knowledge base or resource where you provide paywalled, premium content.
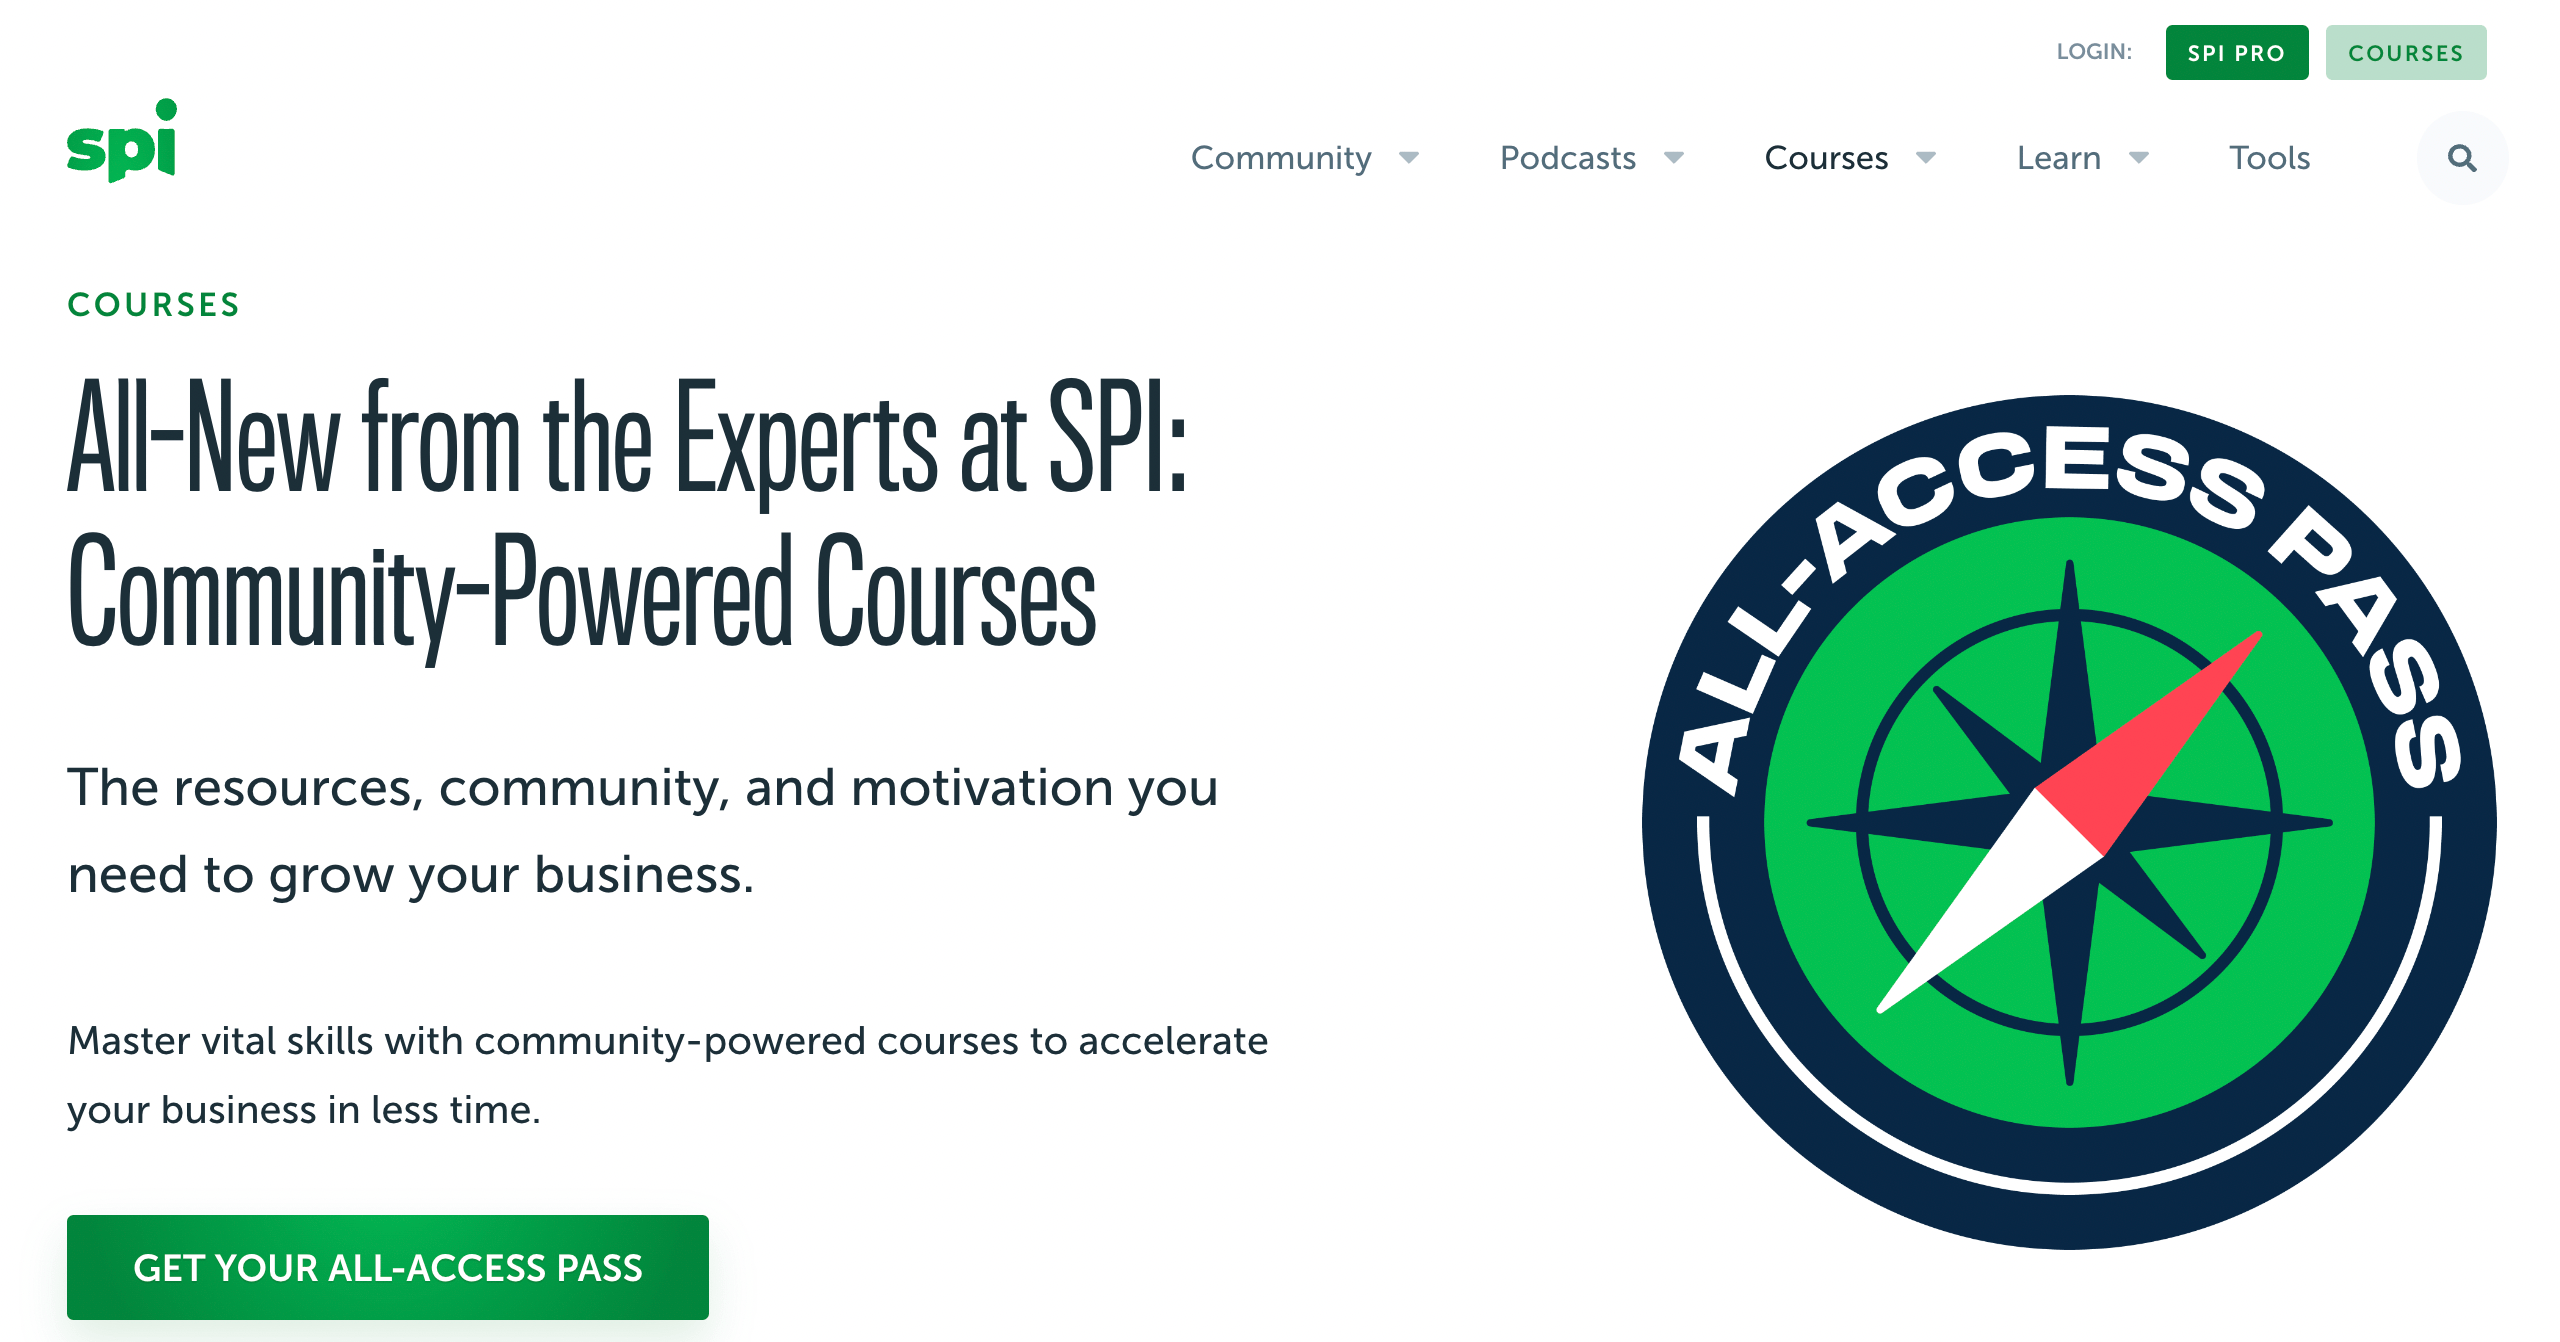
A membership site can even be a more formal space for learning, offering online classes, webinars, and more:
Furthermore, charging for memberships is stable way to monetize a website and retain full control over the process. Alternative monetization methods like affiliate marketing and sponsored content are often less predictable and more outside of your control.
In order to build an effective membership website, you'll need the right tools. WordPress doesn't provide the needed functionality by default, but you can add it in with a few key plugins.
For example, the Divi Builder is a beginner-friendly page builder tool that enables anyone to create unique websites using drag-and-drop technology:

It comes with 200+ modules and customization options. Plus, it gives you global style elements, custom CSS control, and much more.
When you couple the Divi Builder with the Divi Theme, you'll be able to maximize this tool's potential. That's because you'll get many useful layouts that can further fast-track the design process. This way, you can launch your Divi membership site in record time.
How to Build a Divi Membership Site (In 6 Steps)
Now that you know why you may want to build a membership site with Divi, we're going to show you how in just a few simple steps!
Step 1: Choose a Web Host and Install WordPress
If you want to build a Divi membership site, the first thing you'll need to do is choose a web host and install WordPress.
There are plenty of quality hosting providers out there. However, you'll want to make sure that you choose one that meets the requirements for membership sites (and for MemberMouse).
If you're not sure where to start, Kinsta's managed WordPress hosting plans will offer everything you need for your Divi membership site:
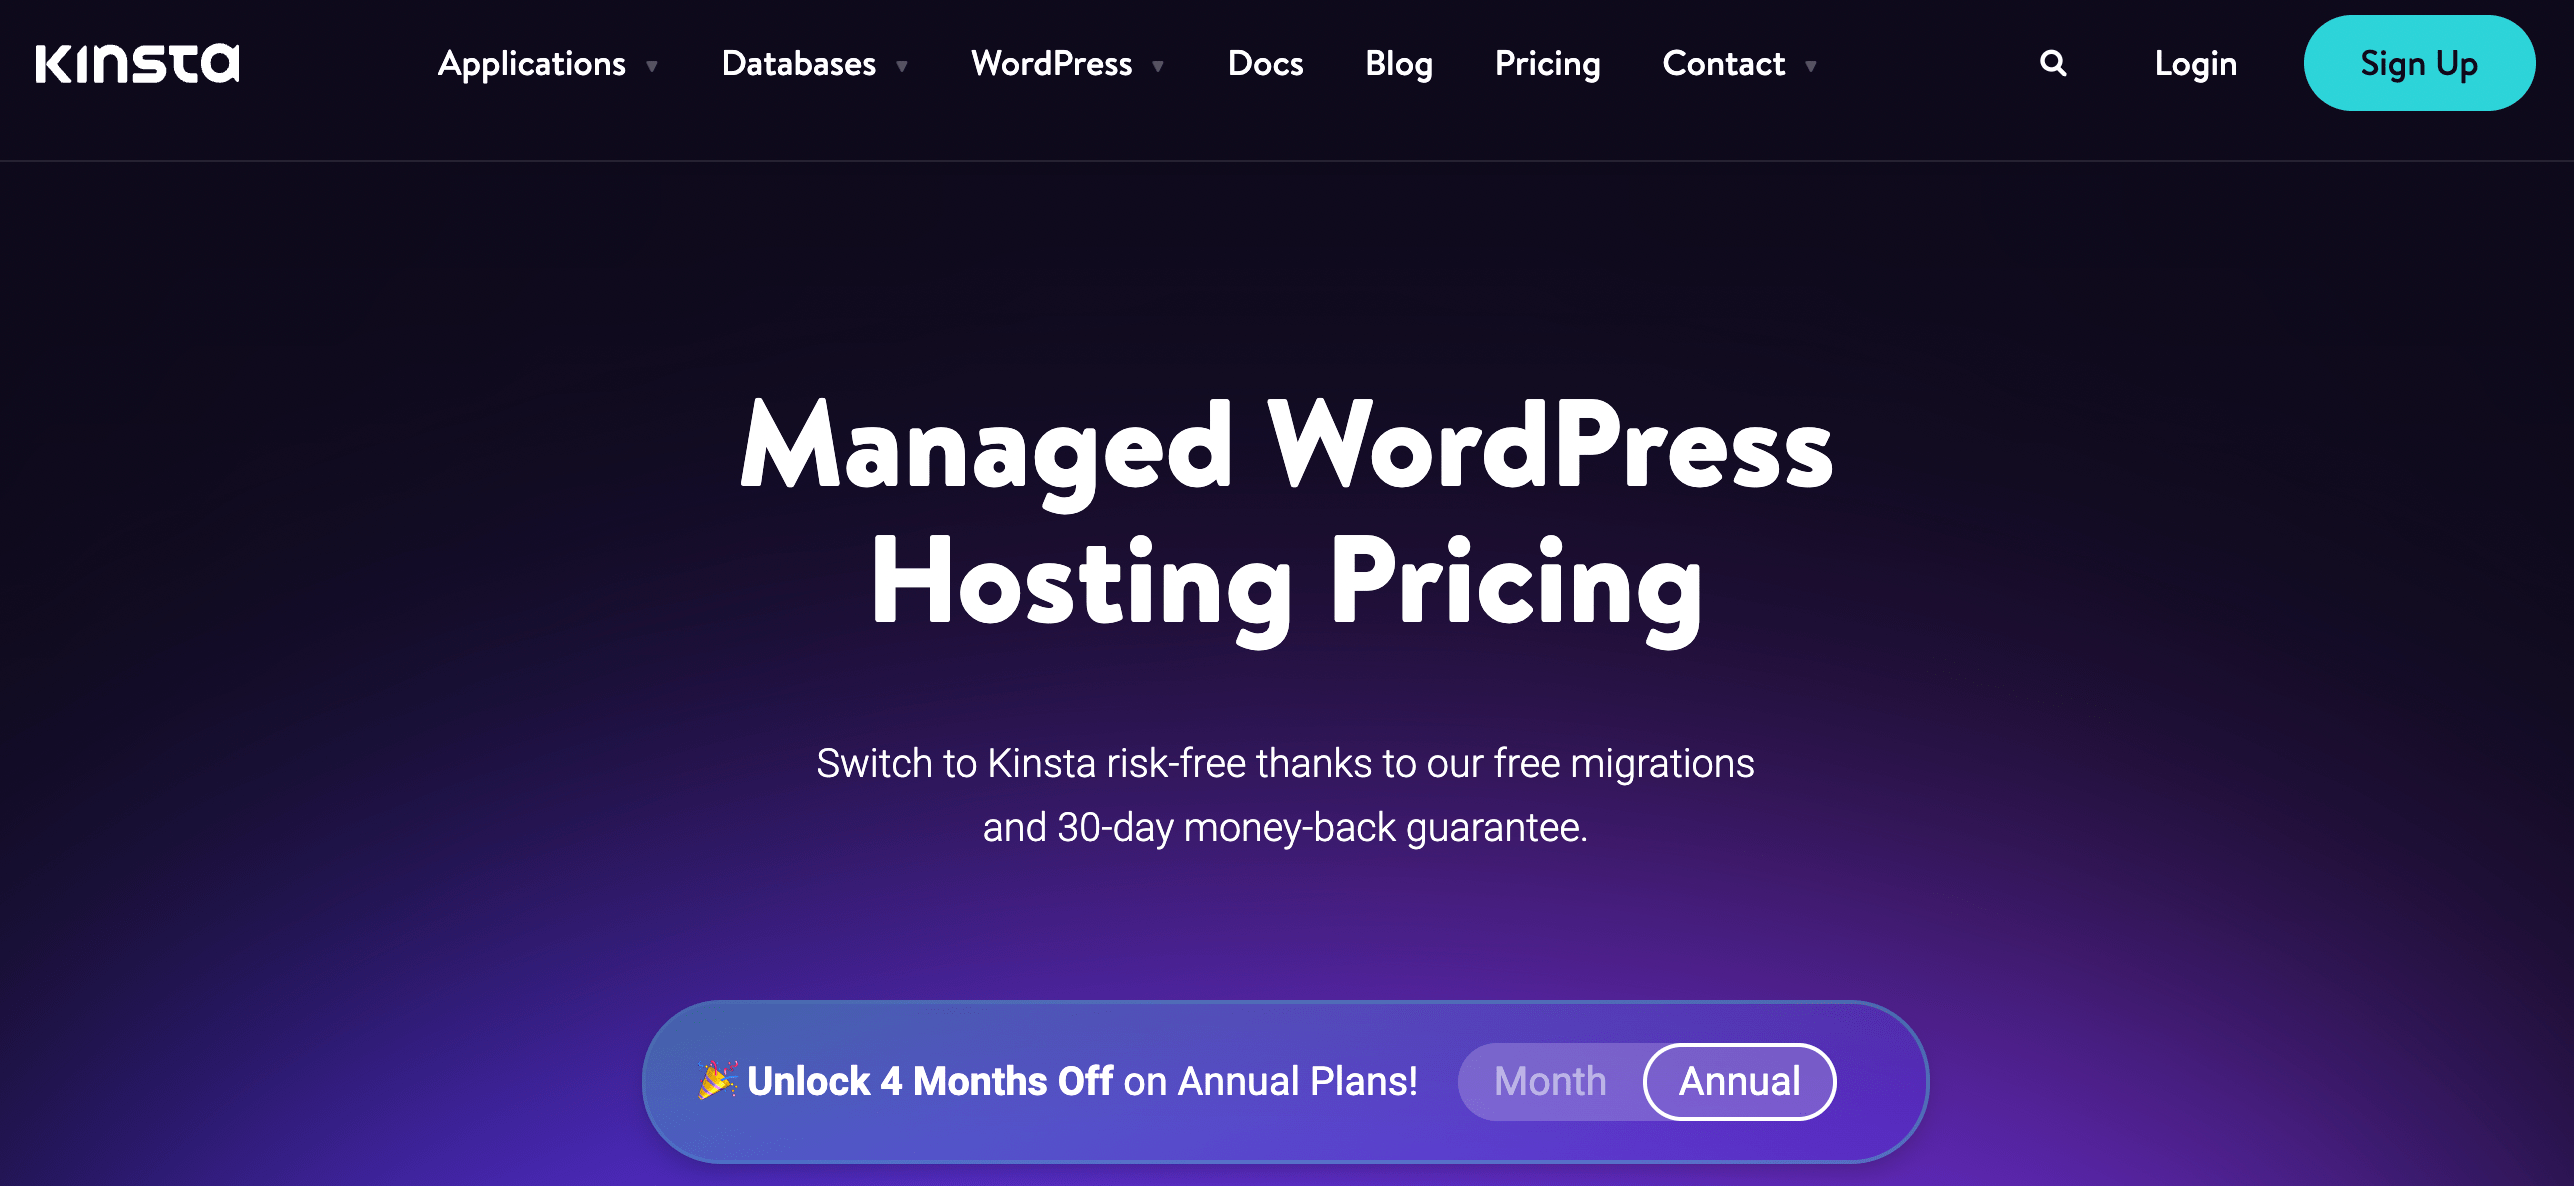
Plus, managed WordPress hosting is an excellent option if you're not very tech-savvy, you don't have a lot of time, or you simply aren't interested in managing the tedious back-end tasks required to keep your site functioning at its best.
With a managed plan, your hosting provider will take care of essential day-to-day tasks such as creating regular backups of your site, carrying out maintenance work (like plugin/theme updates), and more. You'll also typically be offered a way to install WordPress in just a few clicks.
Step 2: Download the Divi Theme and Builder
Once your website is up and running, you'll need to choose a Divi plan so you can download the theme and accompanying builder:

You can purchase a yearly plan or opt for lifetime access.
Once you've signed up for Divi, download the .zip file from your Divi user profile. Then navigate to your WordPress dashboard. Go to Appearance > Themes > Add New > Upload Theme:
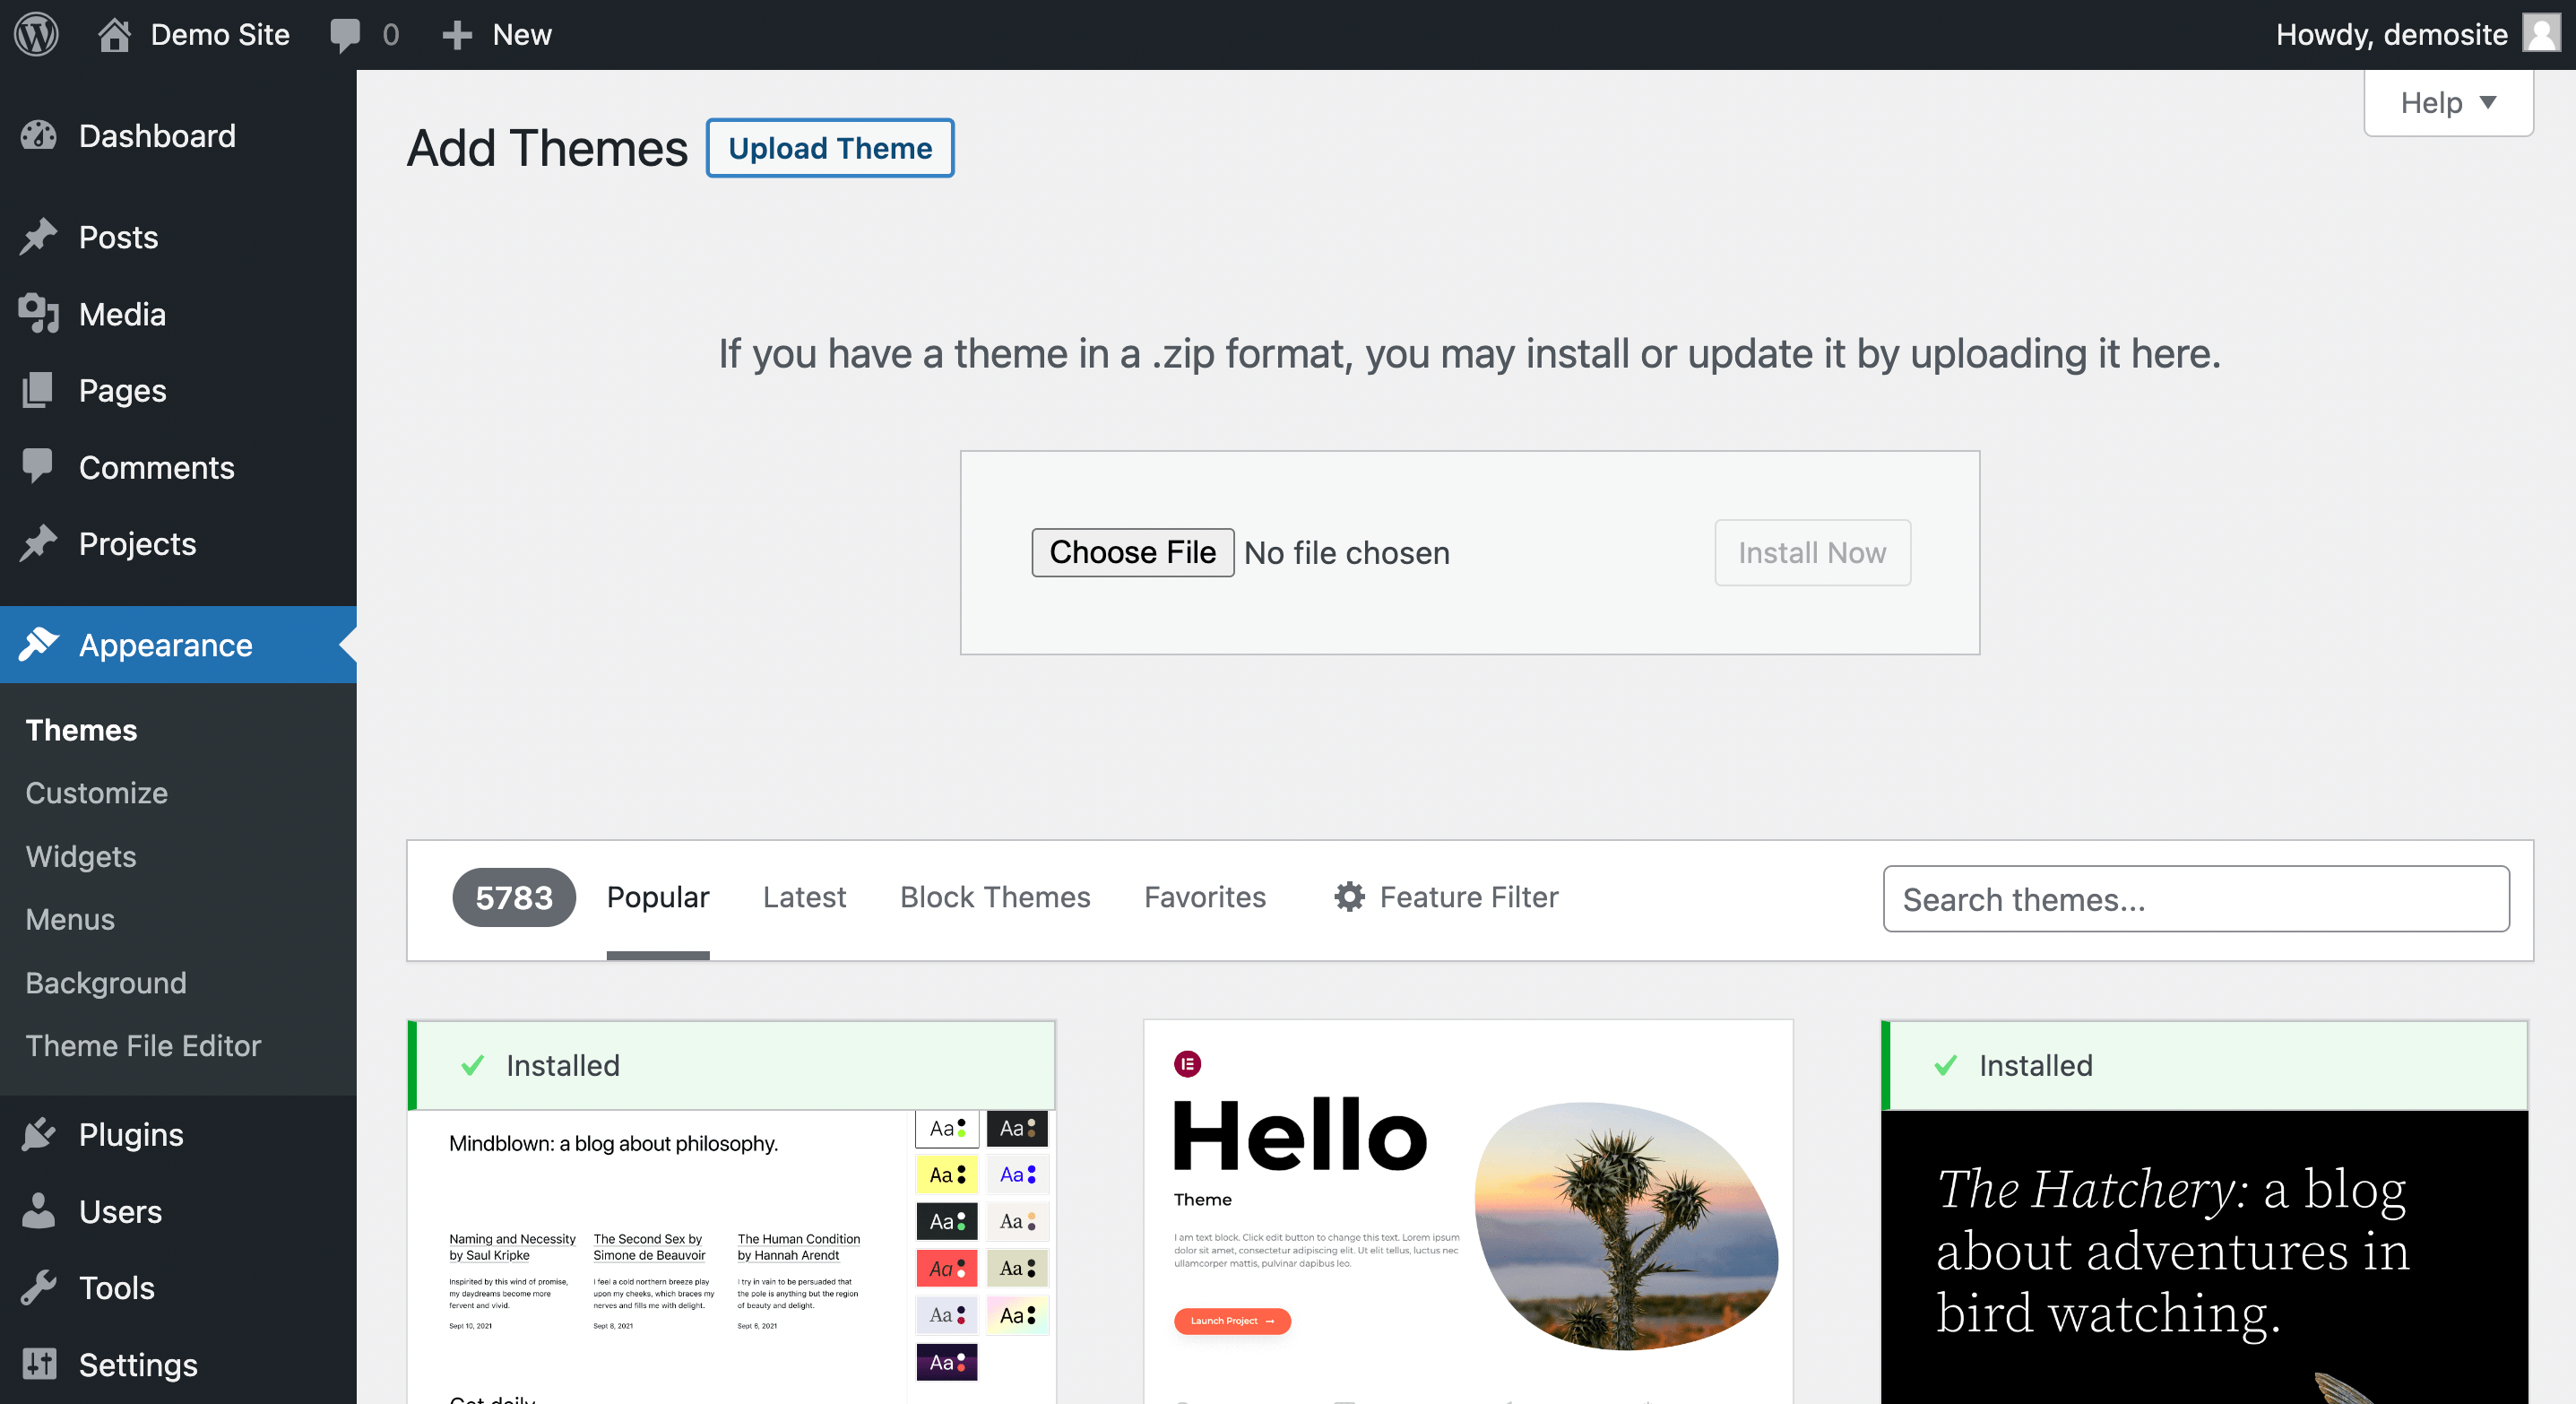
Select the Divi zip file you downloaded previously, and then click on Install Now. After that, you should see a page like this:
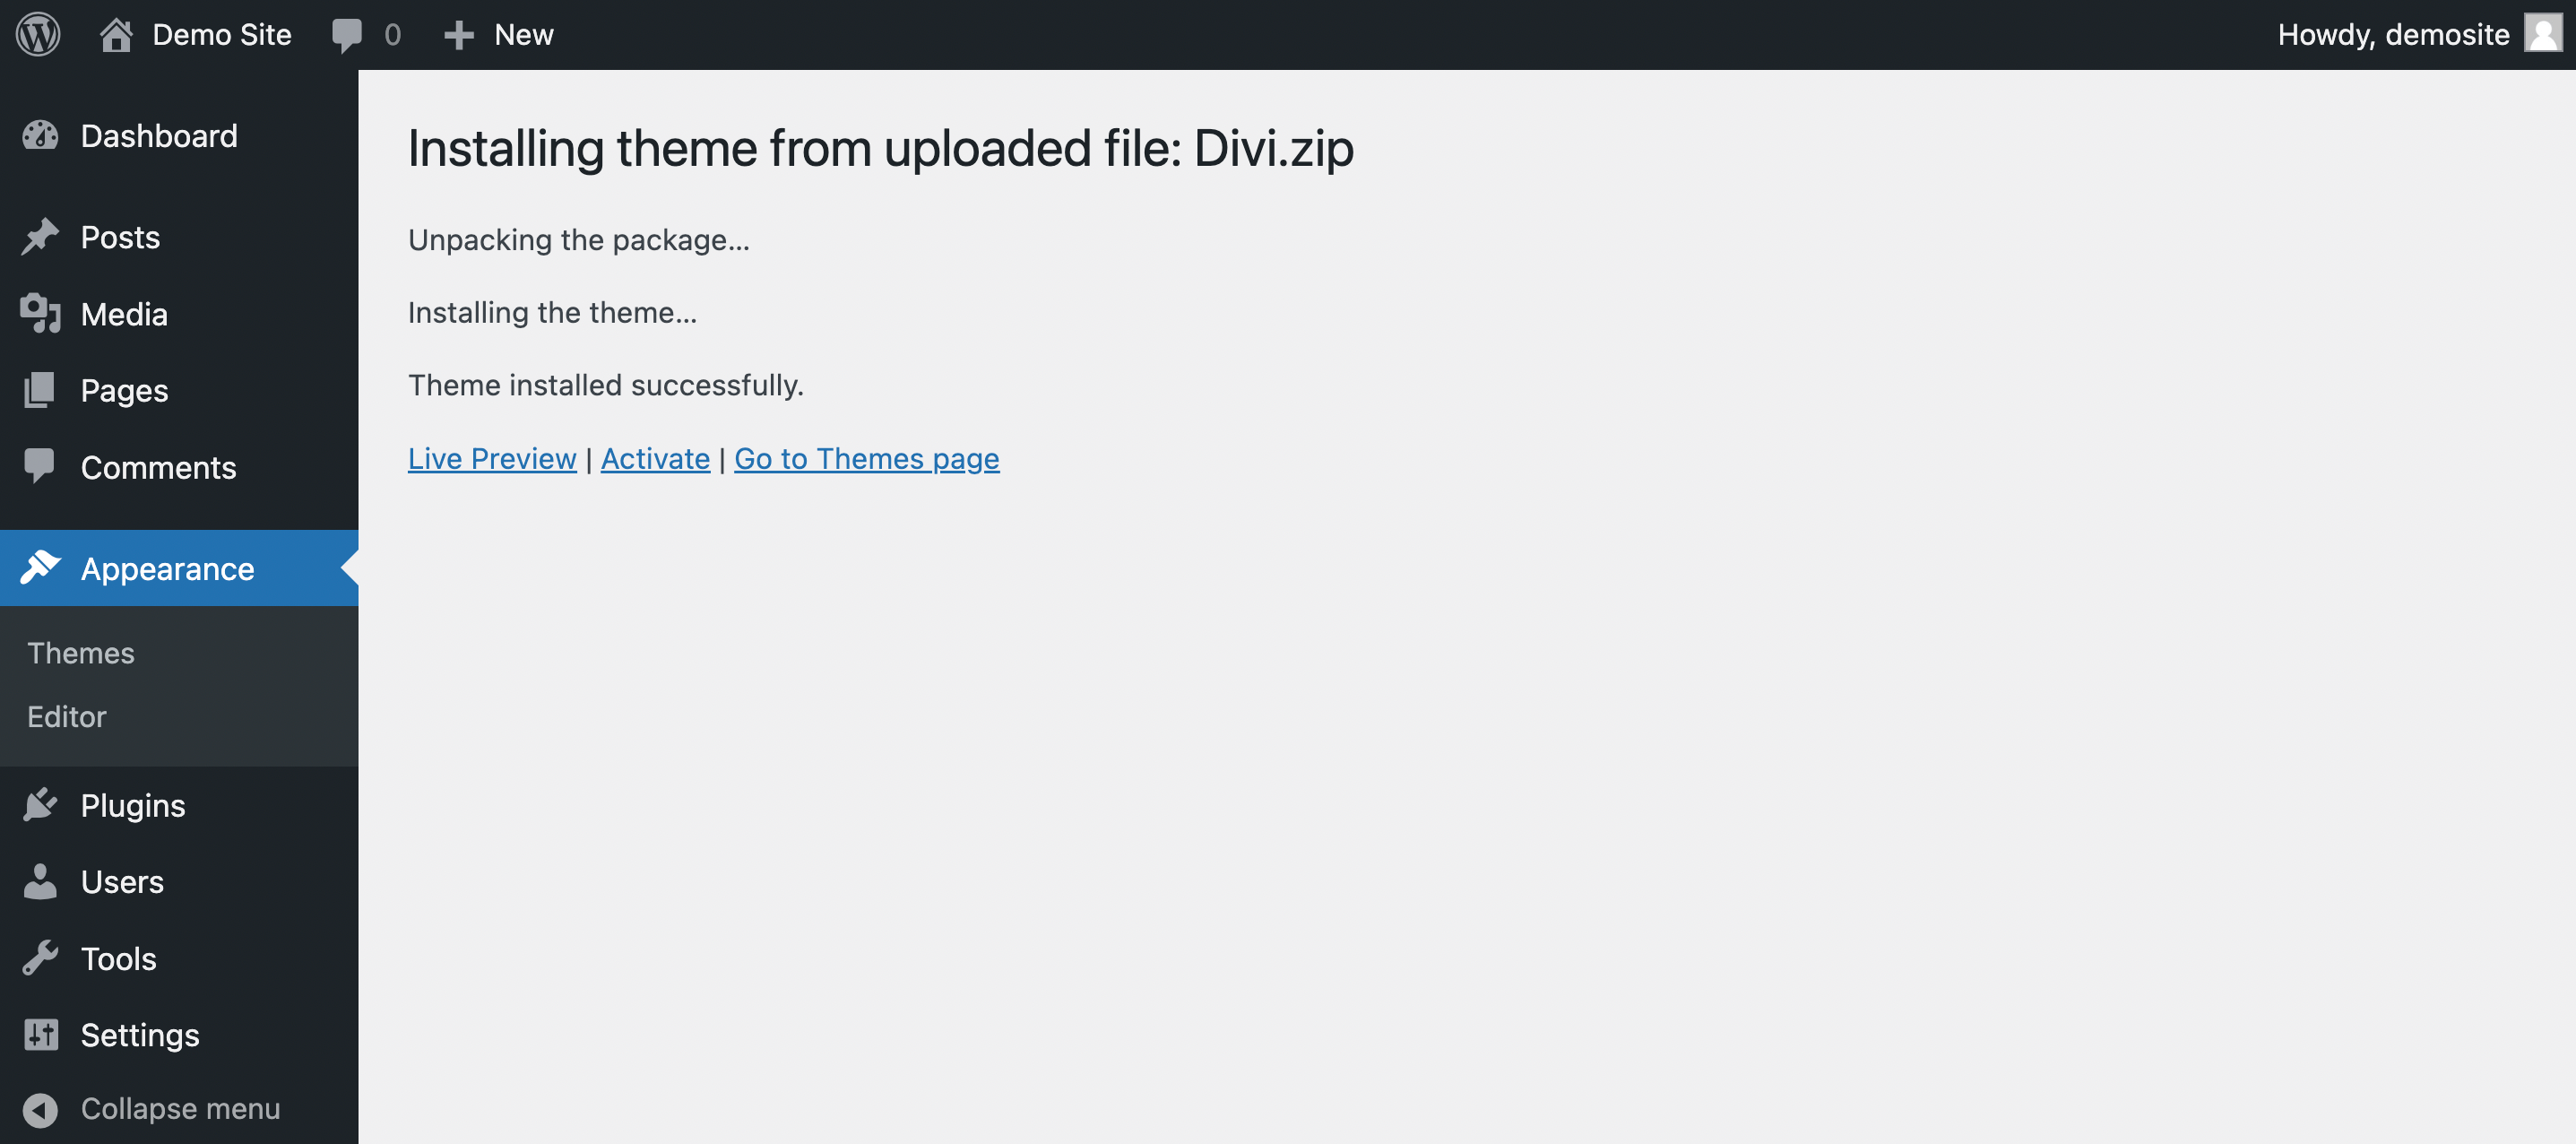
Click on Activate. Now the Divi Theme and Divi Builder should be active on your site! You'll see a new Divi tab in your site's left-hand menu.
Step 3: Install the MemberMouse Plugin
Once your main Divi tools are ready to go, you'll need to install the MemberMouse plugin. Our plugin transforms your WordPress installation into a membership site. Plus, Divi offers a membership site layout pack just for MemberMouse (which we'll discuss in the next step).
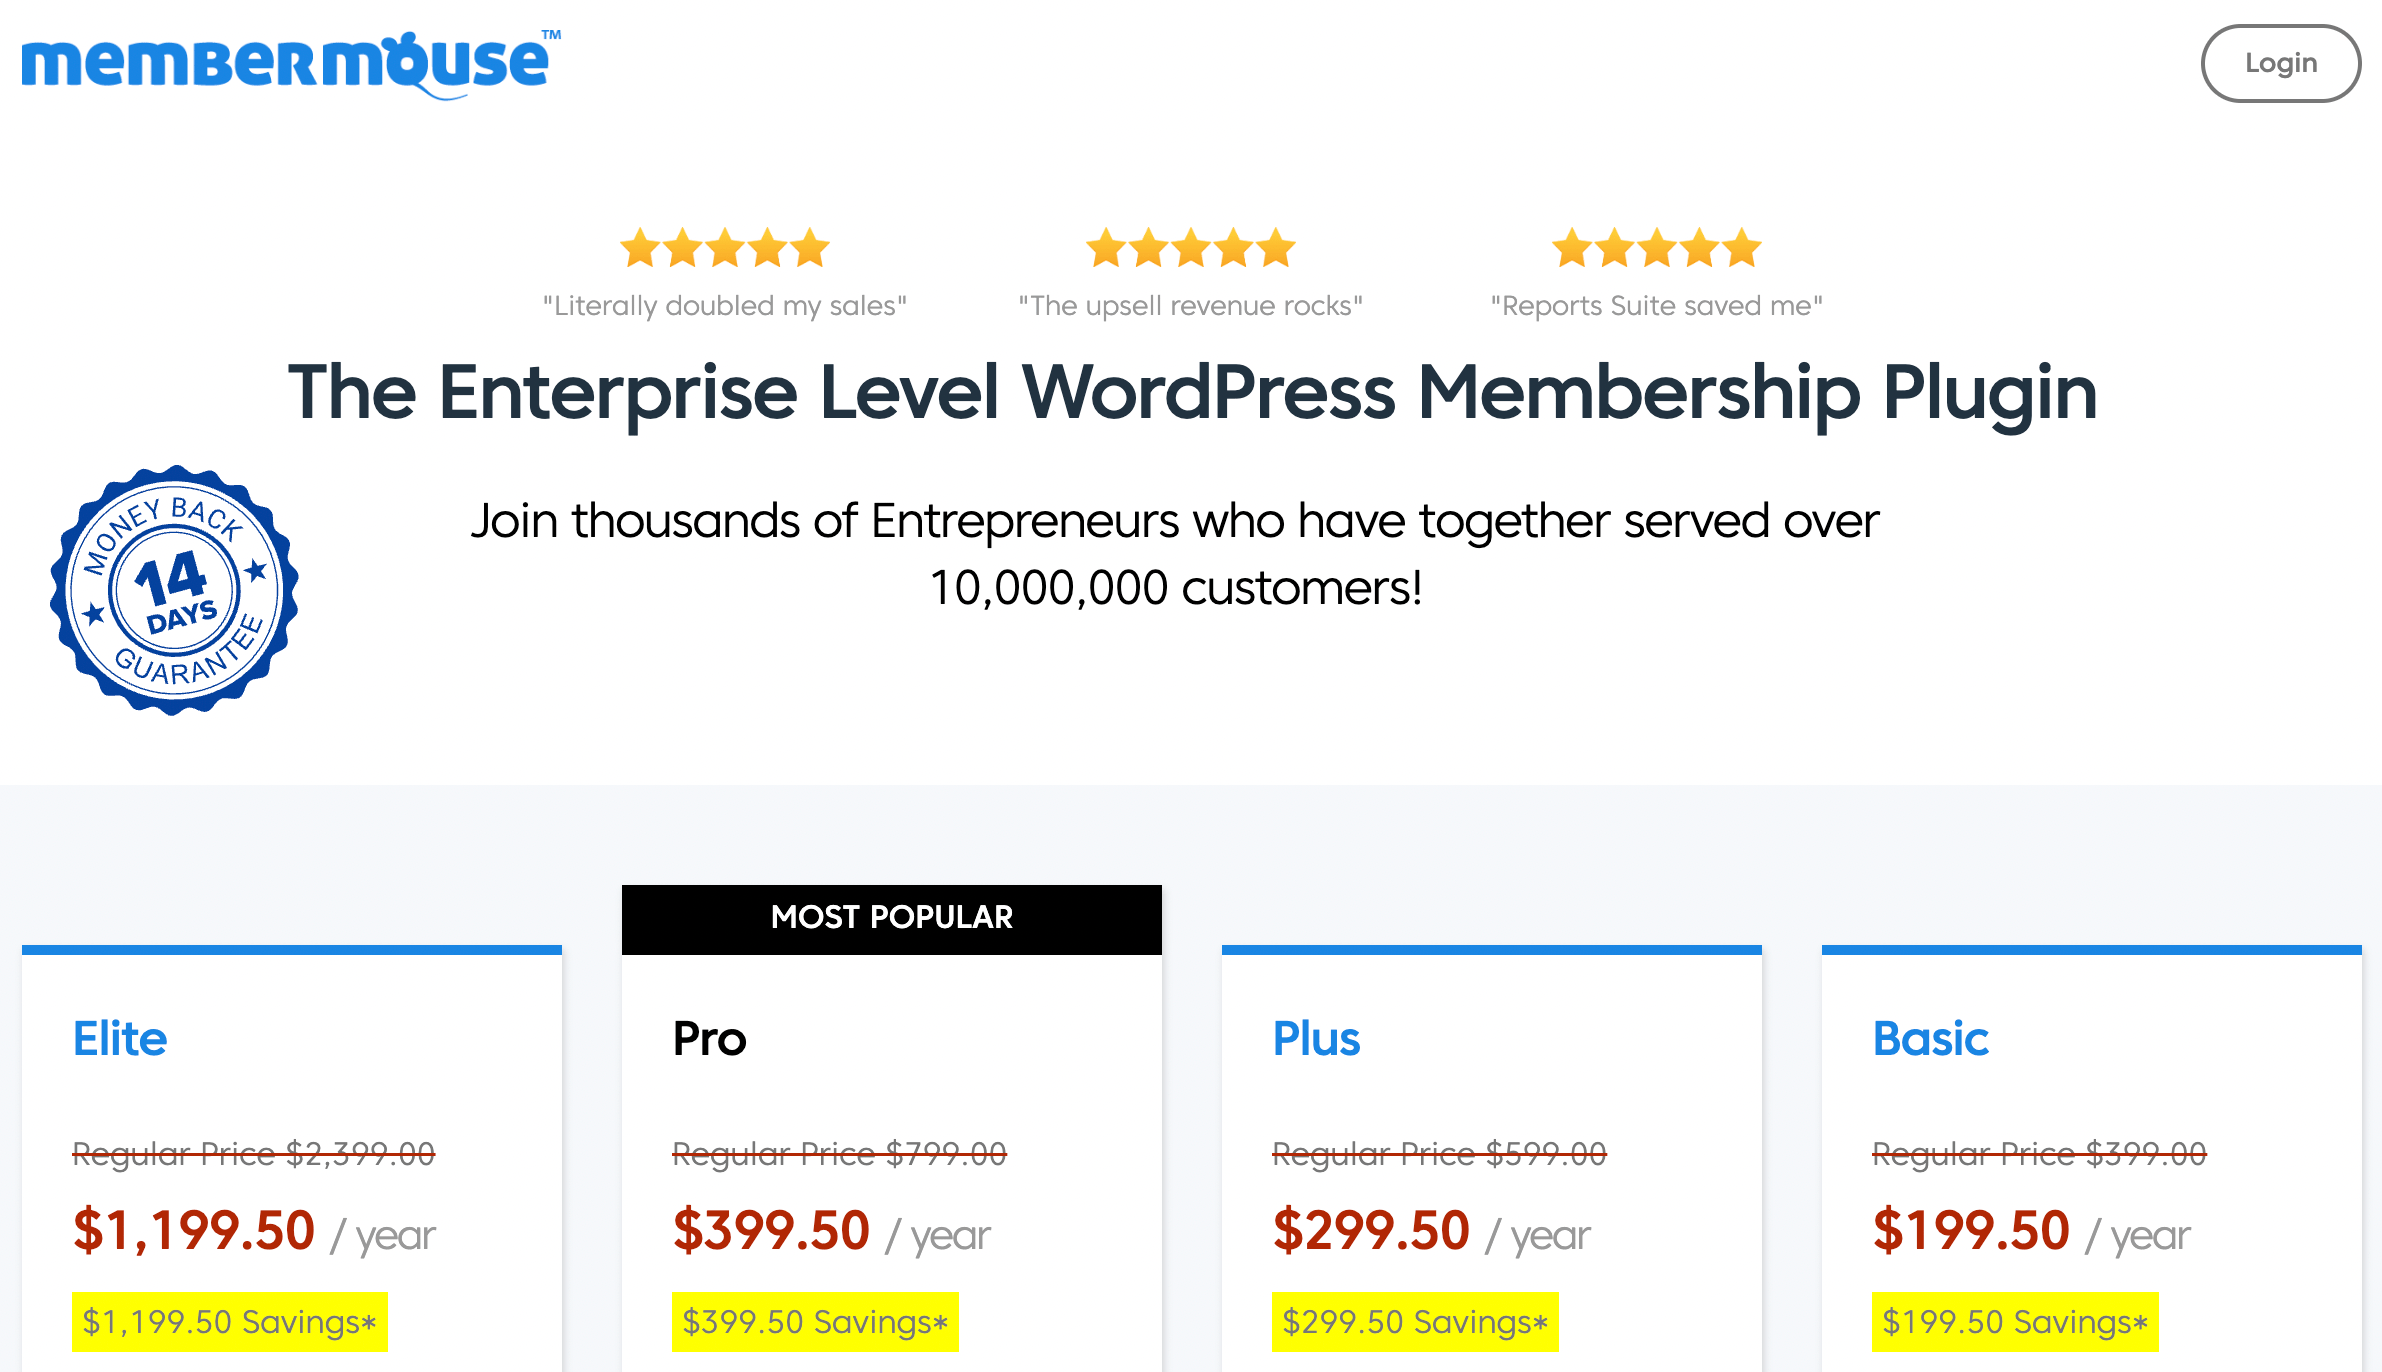
To install MemberMouse, you'll first need to choose and purchase a plan:
After that, go to your MemberMouse dashboard and download the plugin file.
While you're there, you'll also need to make sure you add an authorized URL for the plugin license:
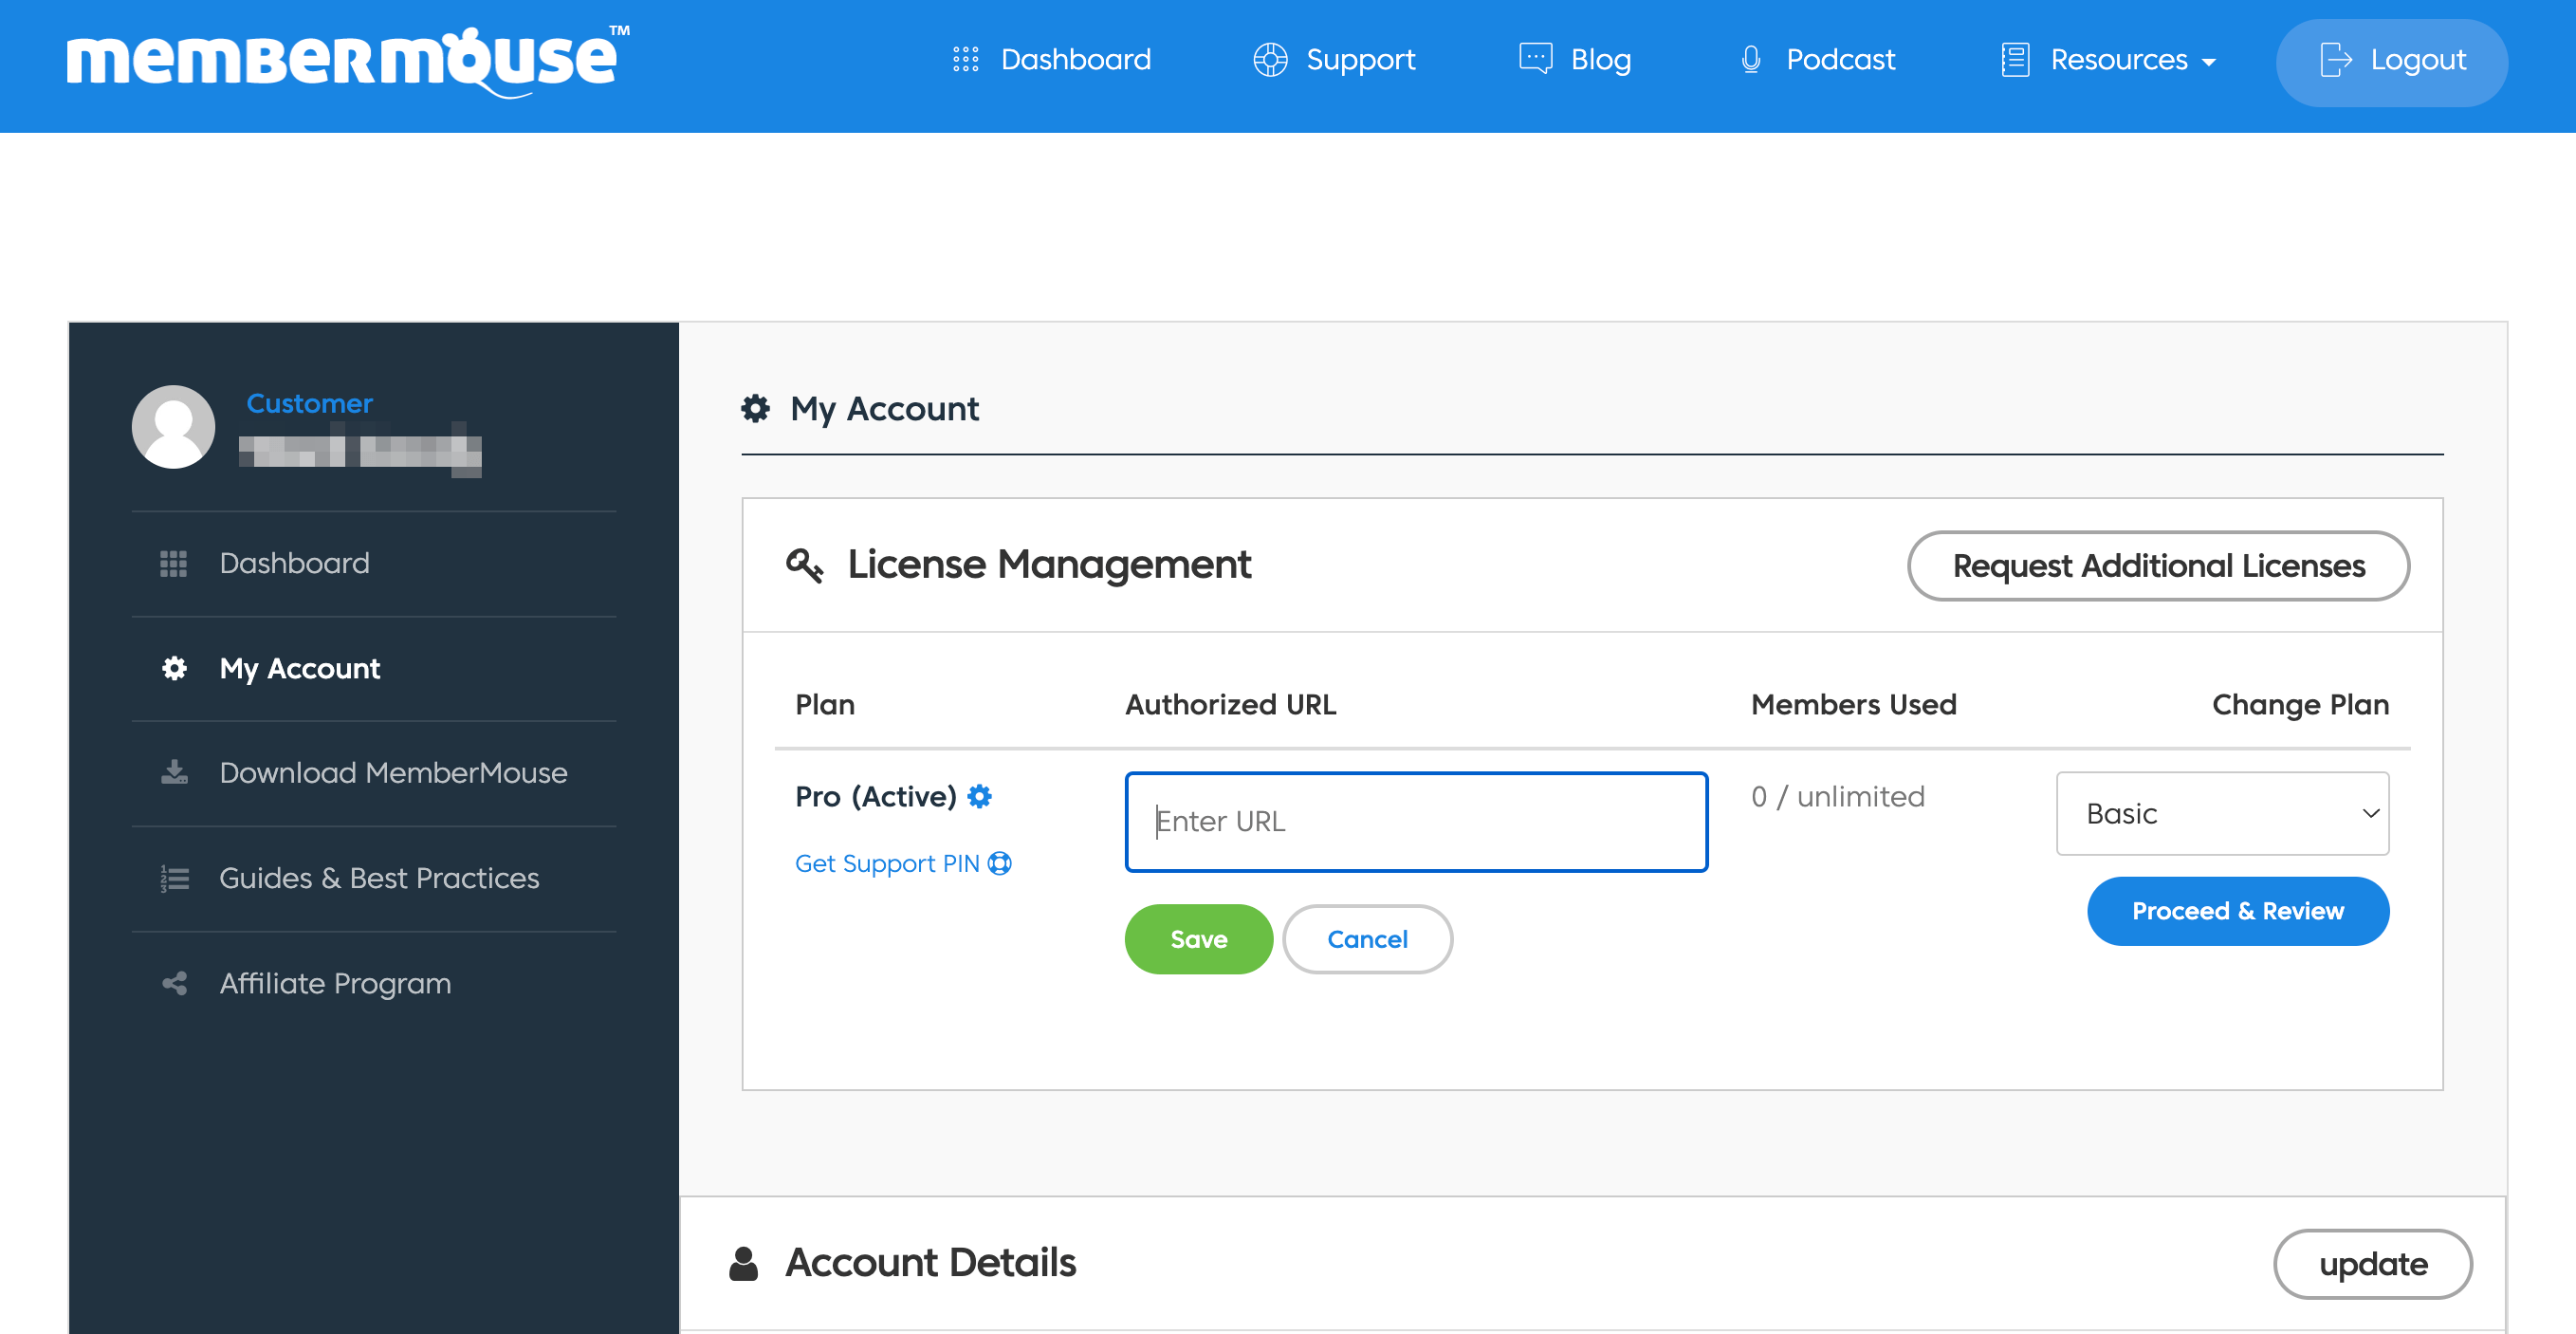
This should be the URL of the website you'll be using the plugin on. This is a crucial step, so be sure not to skip it. Click on Save when you're done.
Then navigate to your WordPress dashboard. Go to Plugins > Add New > Upload Plugin:
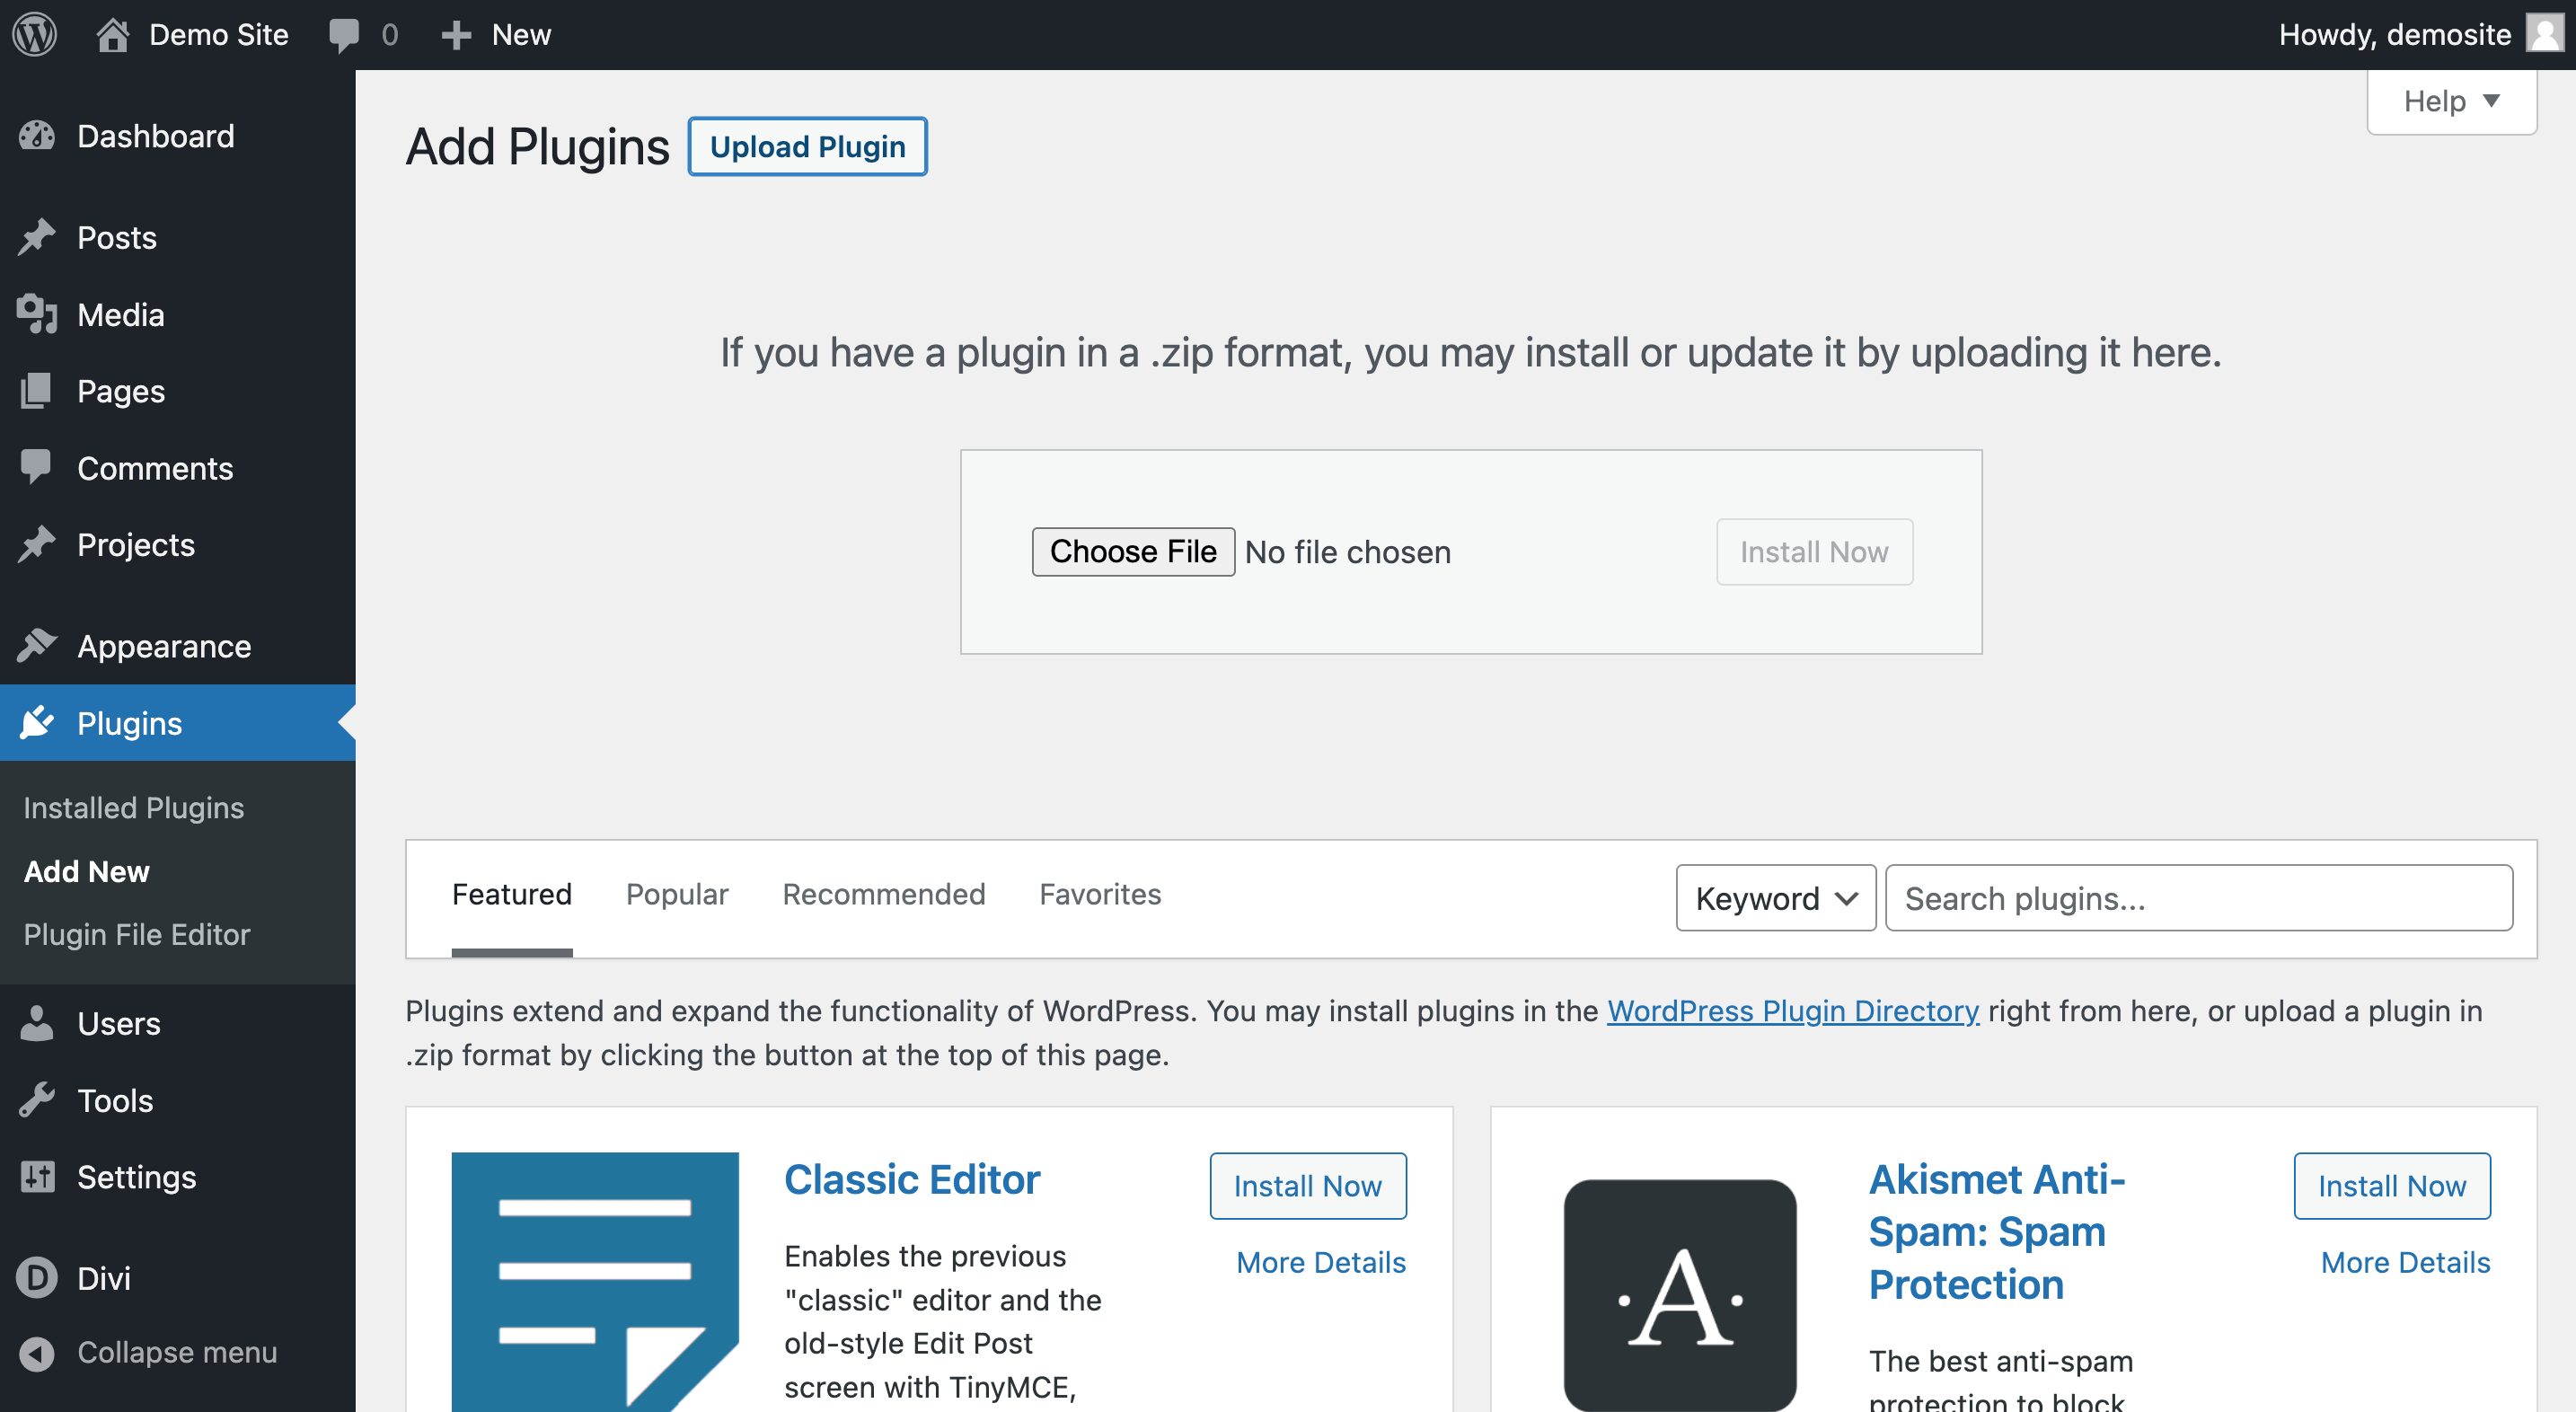
Hit Choose File. Then find and select your MemberMouse plugin file and install the tool. On the following page, click on Activate Plugin, and MemberMouse will be ready to go.
You can test this by looking to the MemberMouse tab in your left-hand menu. You'll also now have lots of useful pages for your Divi membership site:
Now, let's move on to the next step.
Step 4: Import the Divi Layout Pack for MemberMouse
So far, you've signed up for a web host, installed WordPress, and set up almost all the tools you'll need for your Divi membership site. But you're still missing the most important one!
As we mentioned, one of the best things about using the Divi Theme is that you'll get access to many website layouts. These can provide you with all the core elements of a website, so you're not starting from scratch.
And when you use the suite of tools we've discussed up until now, you'll also be able to use a free Divi Layout Pack for MemberMouse, which provides you with all the core pages you'll need for a membership site.
To start, download the Divi Layout Pack for MemberMouse. Then unzip the folder, and locate the Custom.css file:

Open it and copy all of its contents. Then return to your WordPress dashboard. Go to Divi > Theme Options, and scroll down to the bottom of the page to find the Custom CSS section:
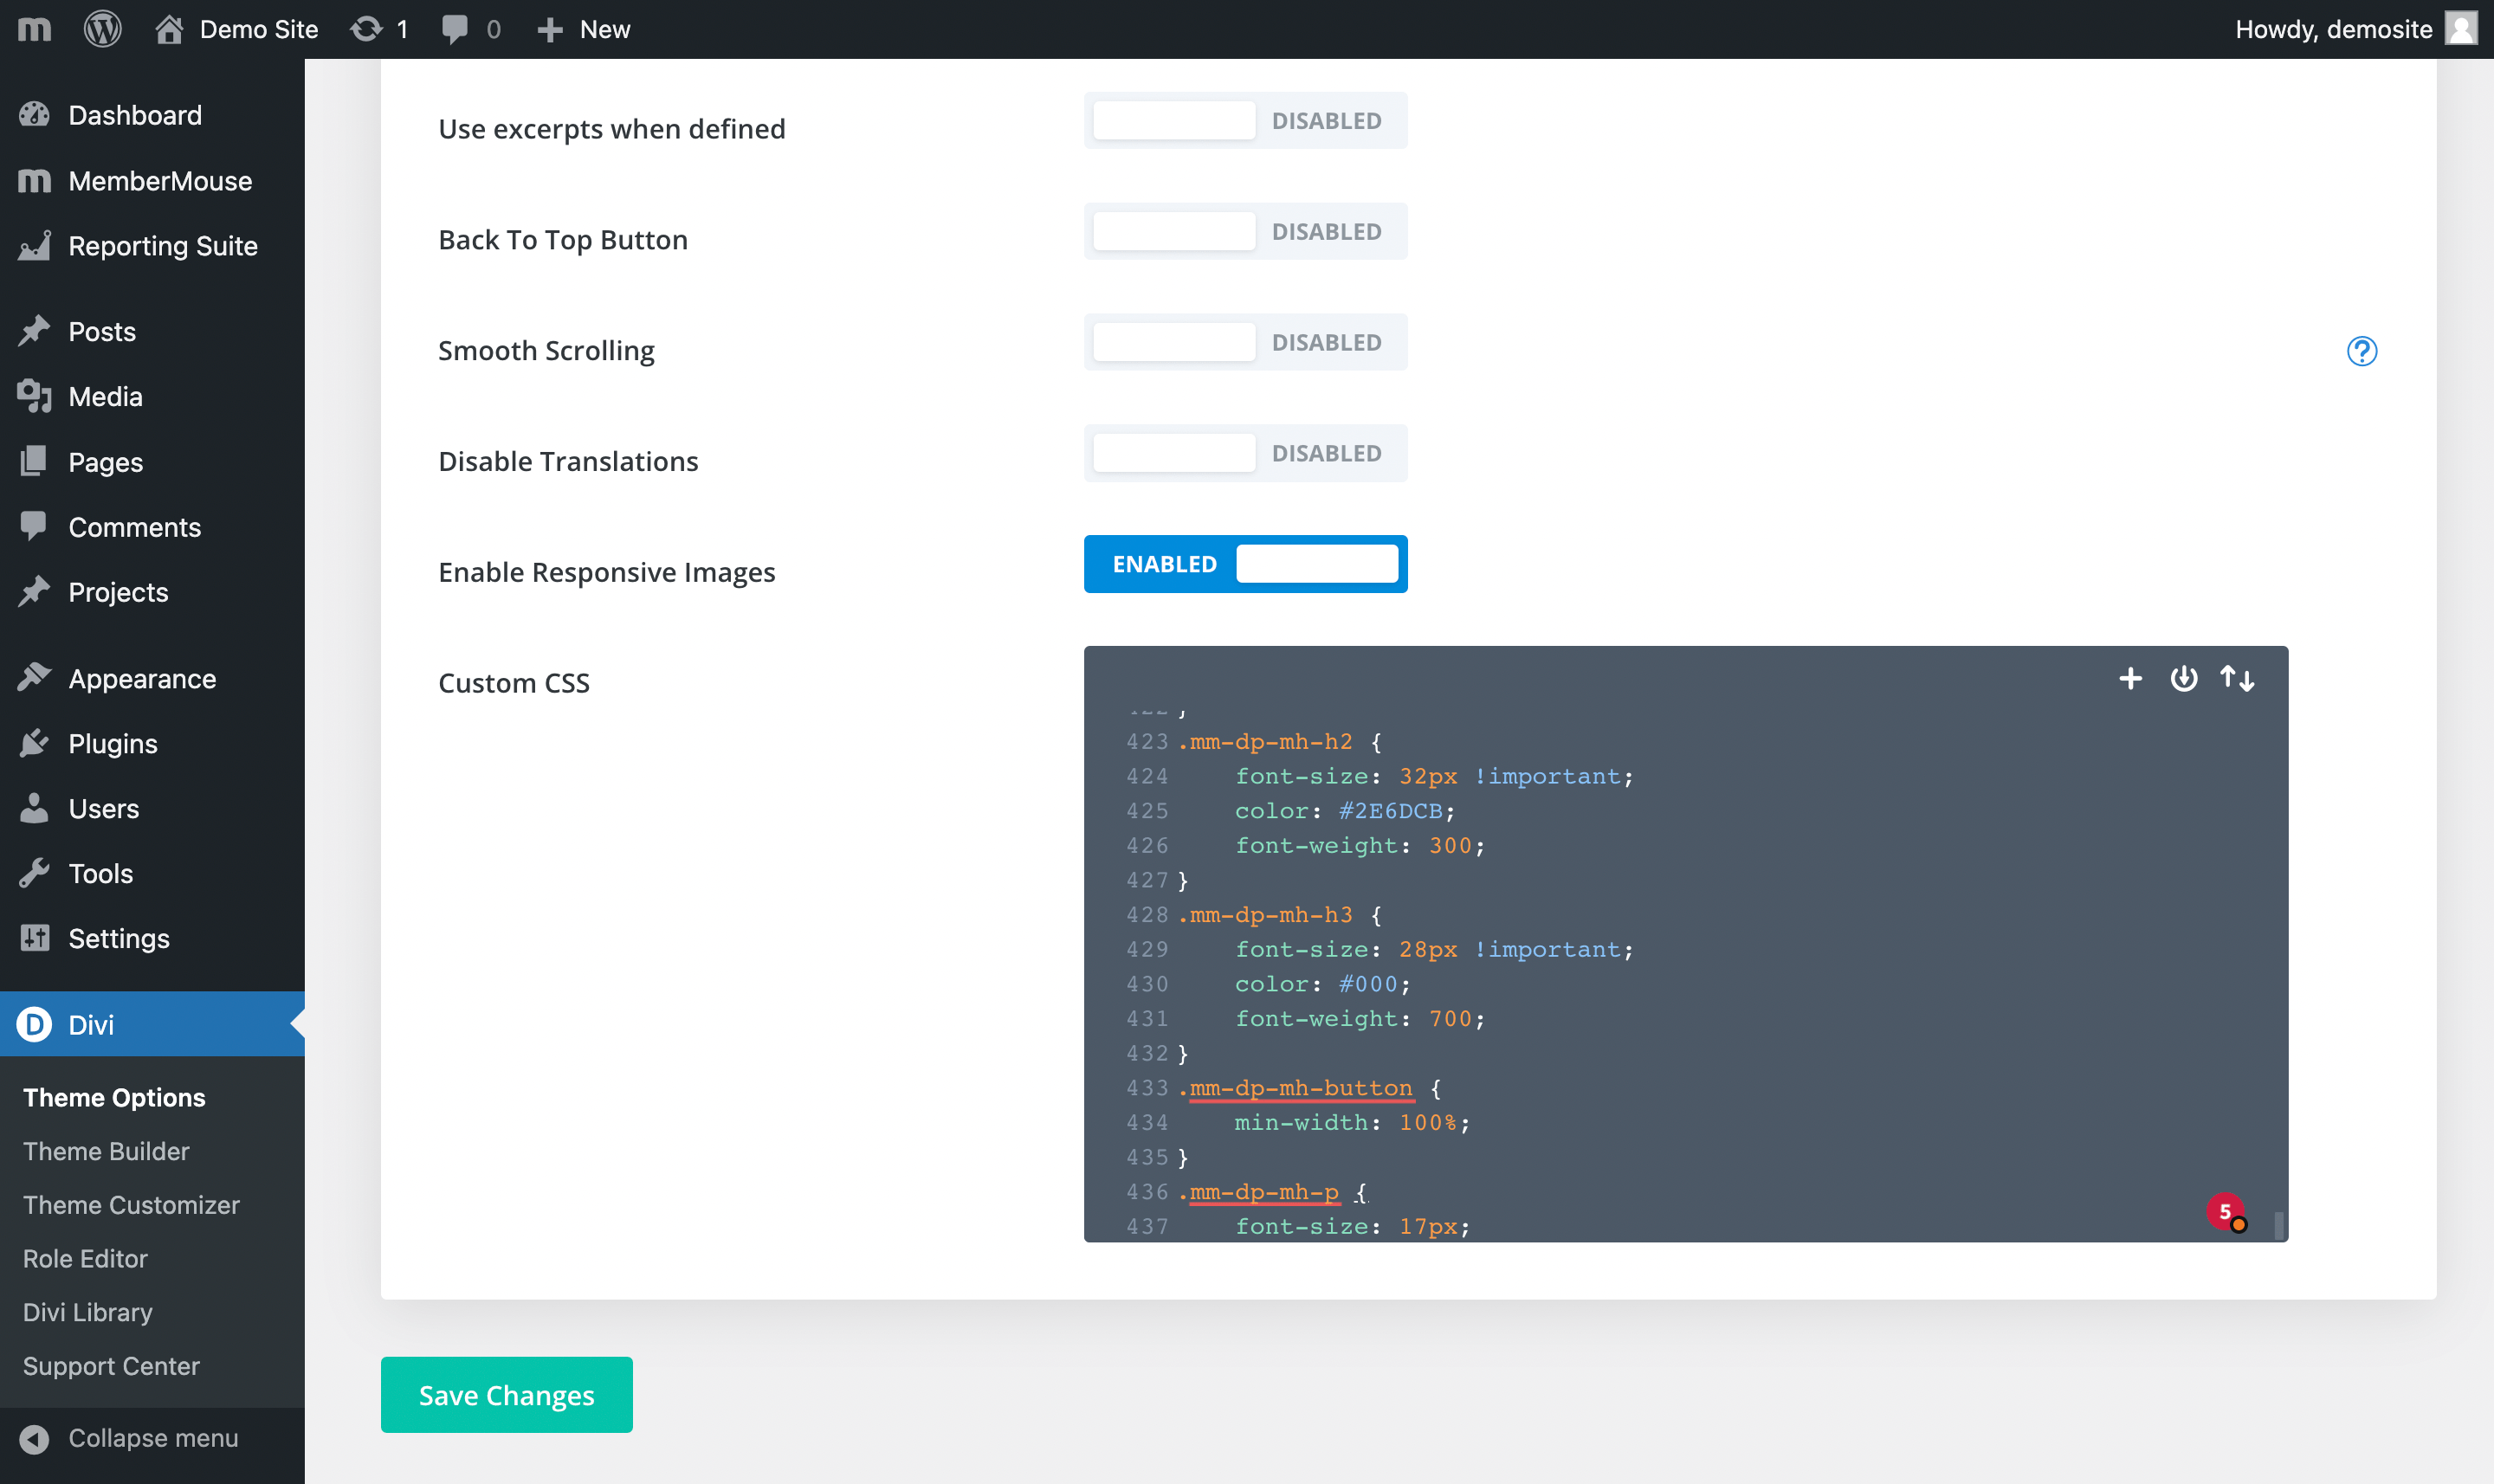
Paste all the custom CSS here. Then click on Save Changes.
Next, return to the Divi Layout Pack for MemberMouse files that you unzipped and downloaded. Open up the install-instructions.txt file:
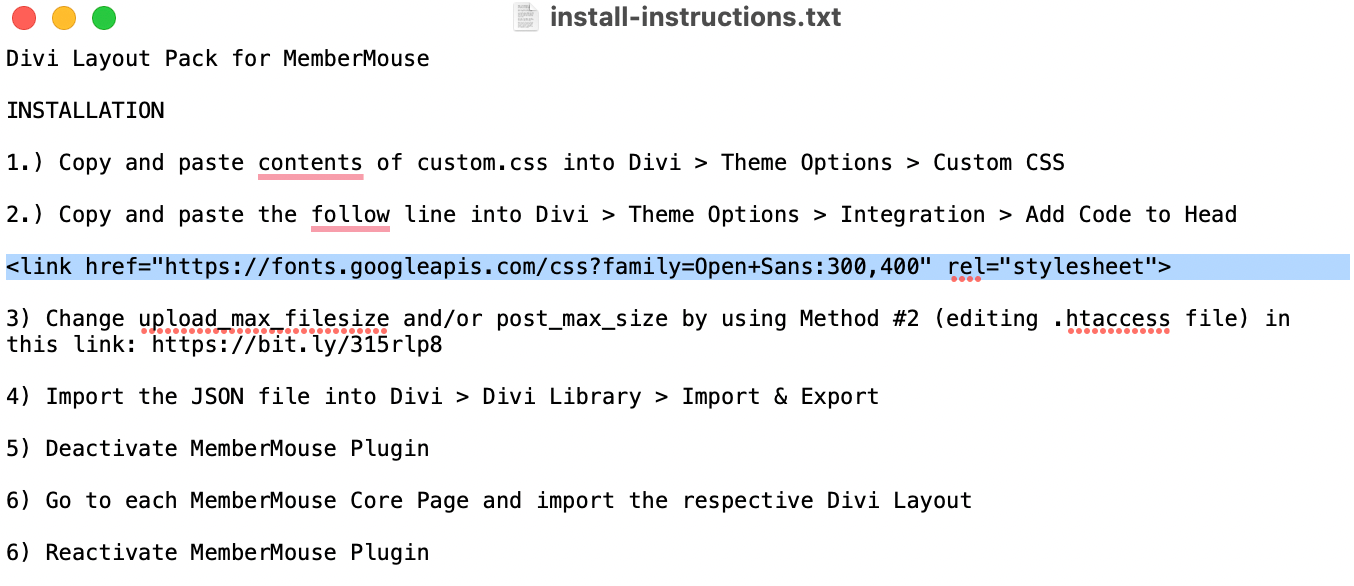
Copy the highlighted line of HTML code in step two.
After that, navigate to Theme Options > Integration > Add code to the < head > of your blog. Paste that line here:
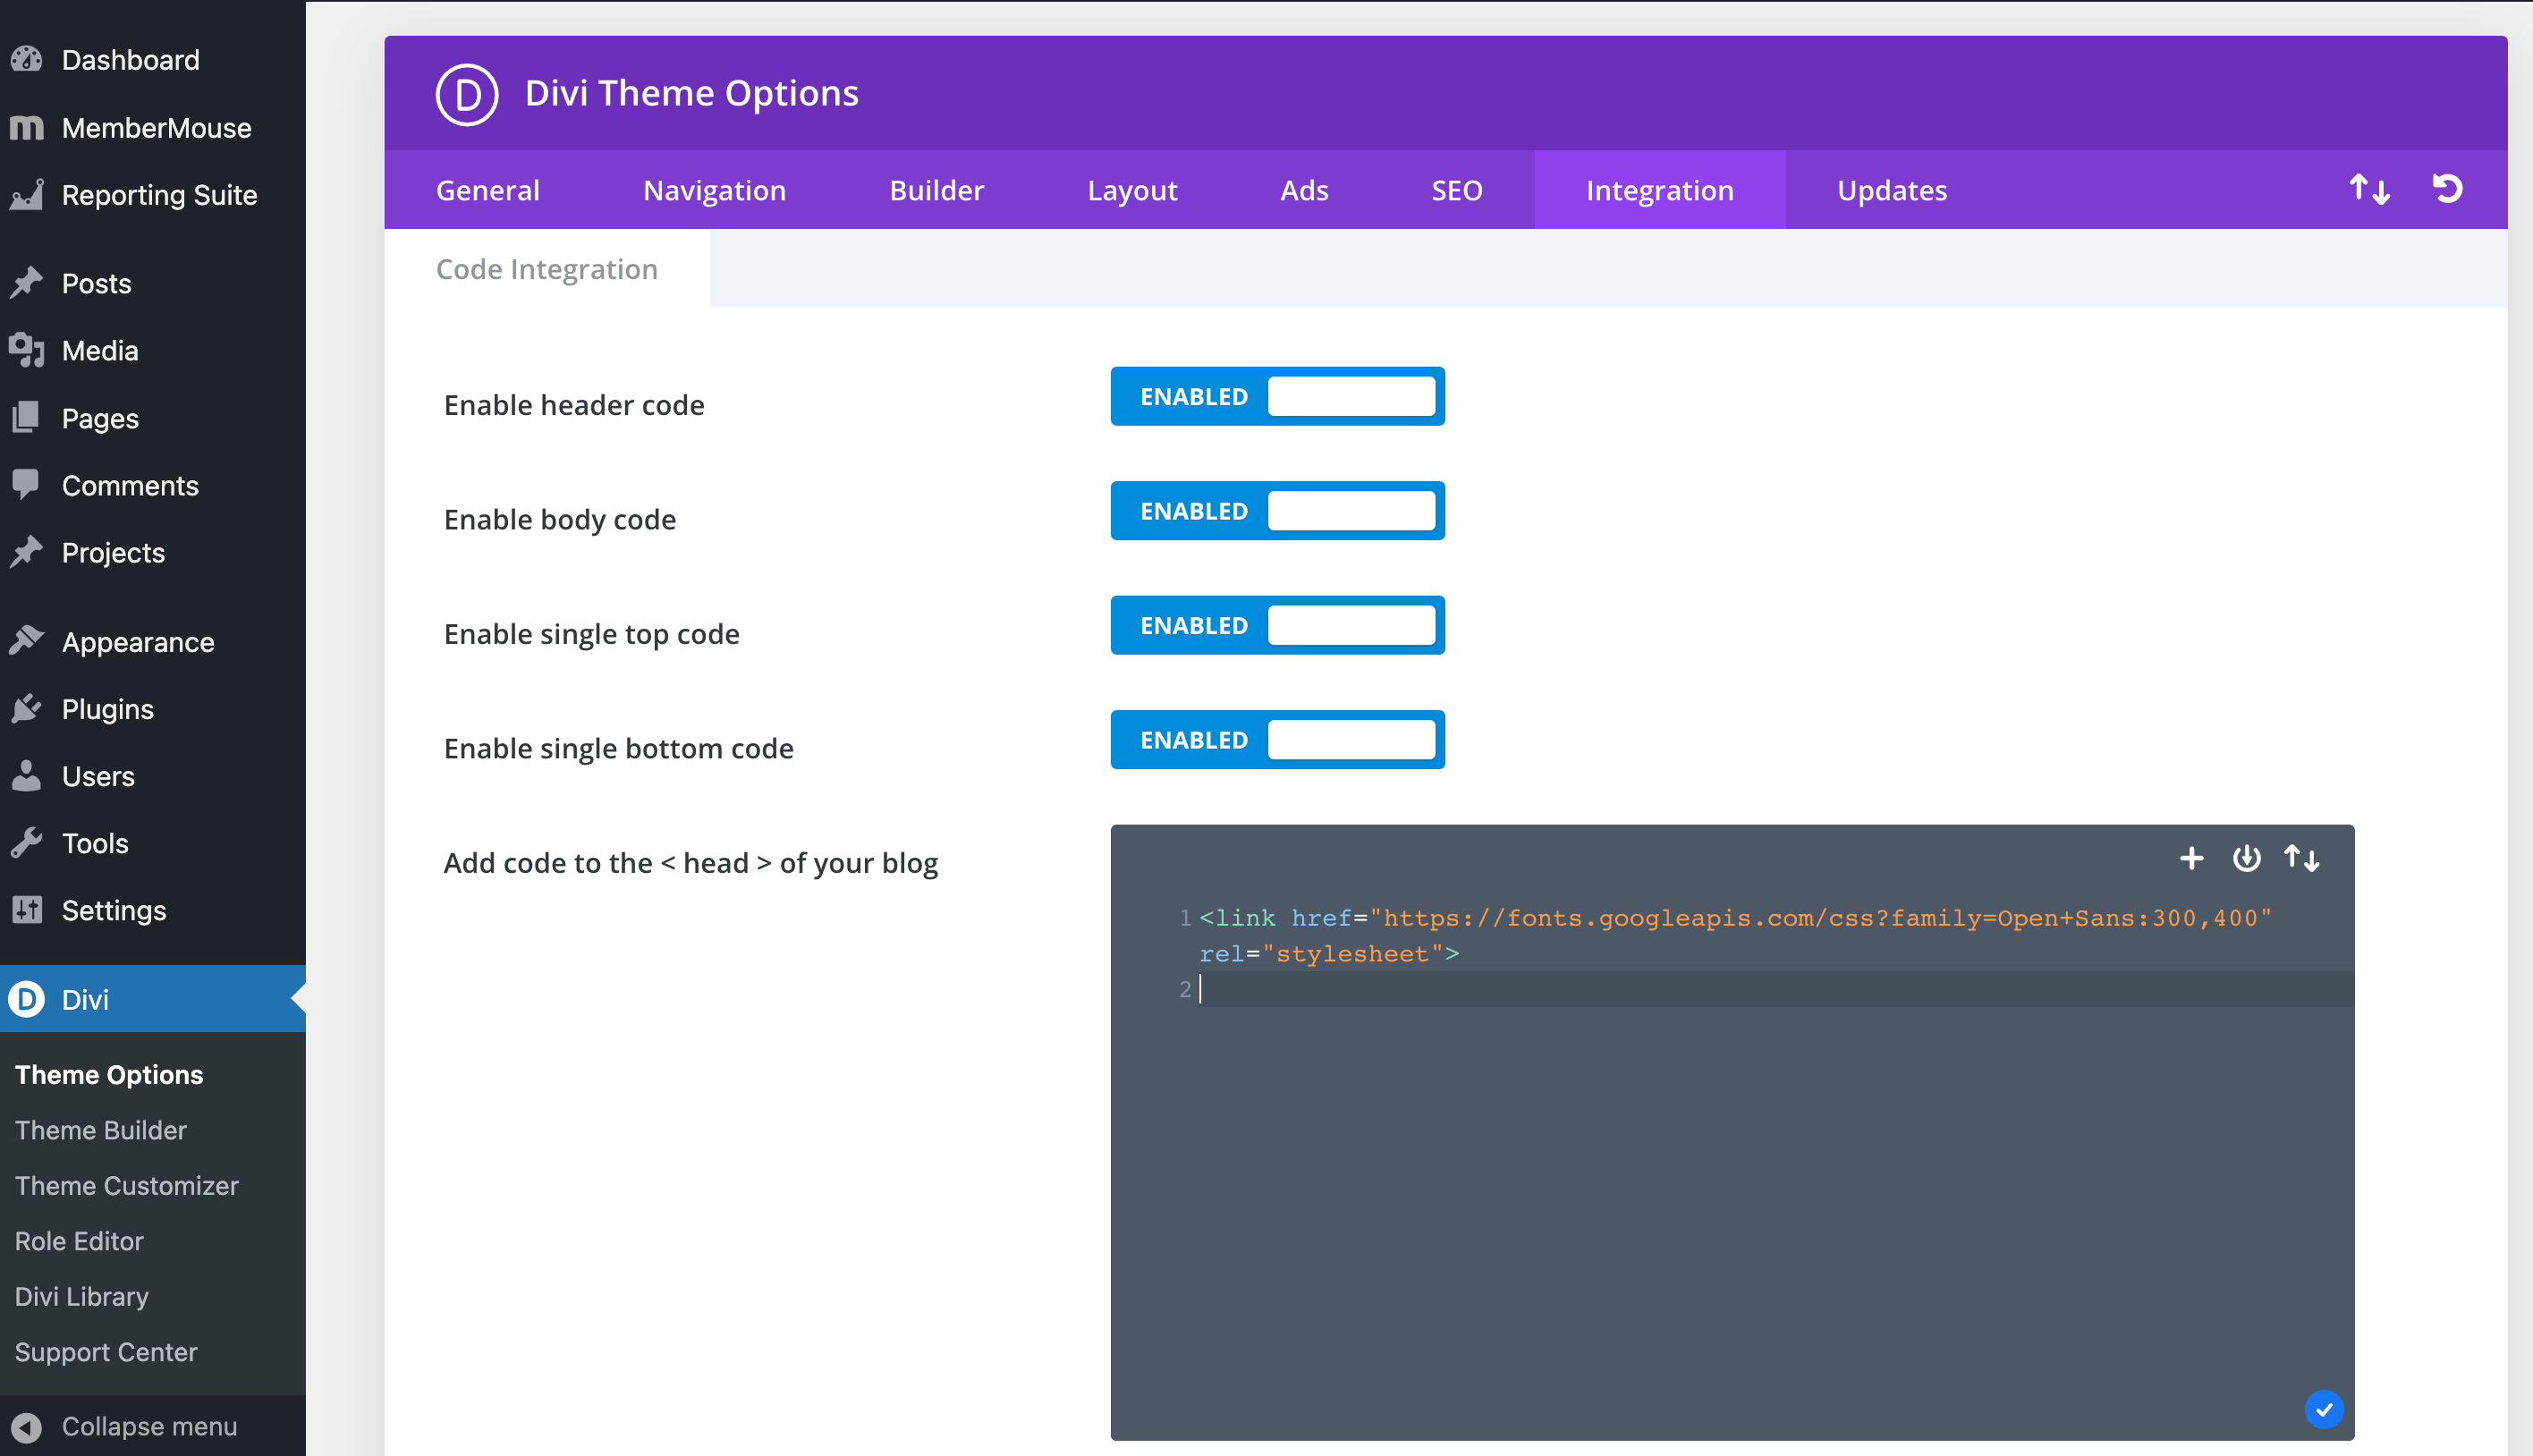
Then scroll down to the bottom of the page and click on Save Changes.
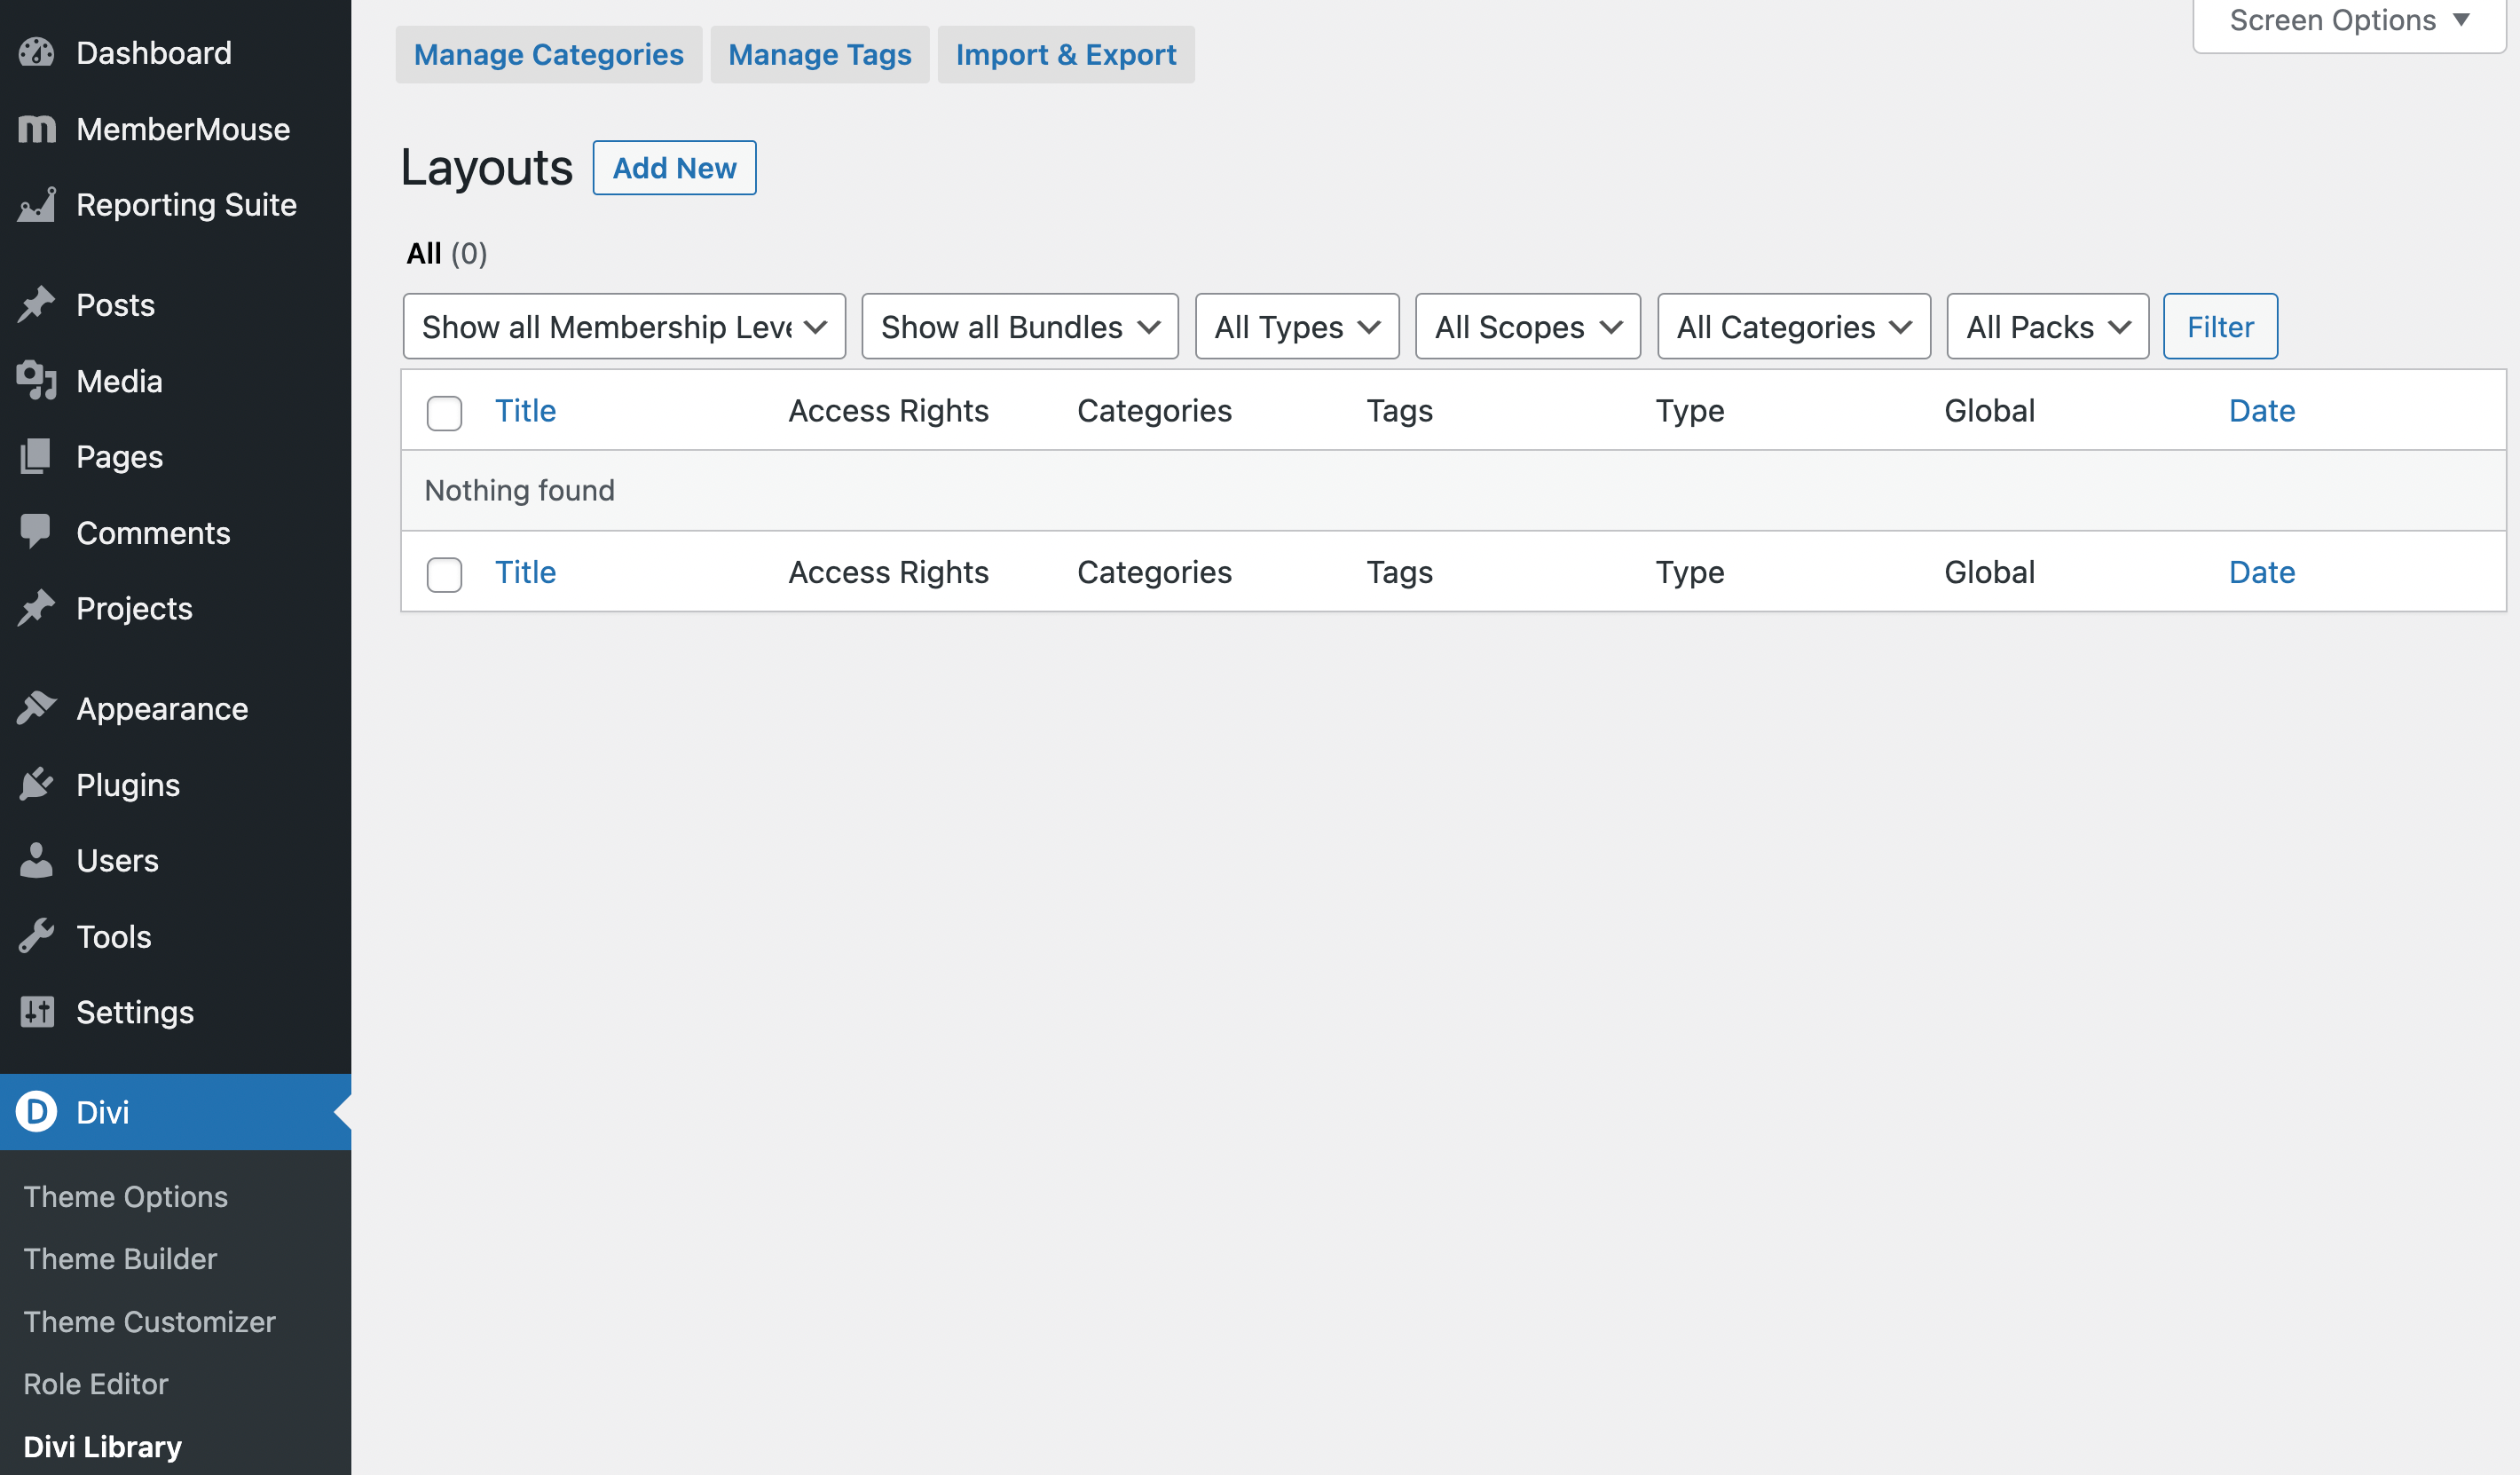
Next, go to Divi > Divi Library:
Select the Import & Export tab at the top of your screen. Then go to Import:
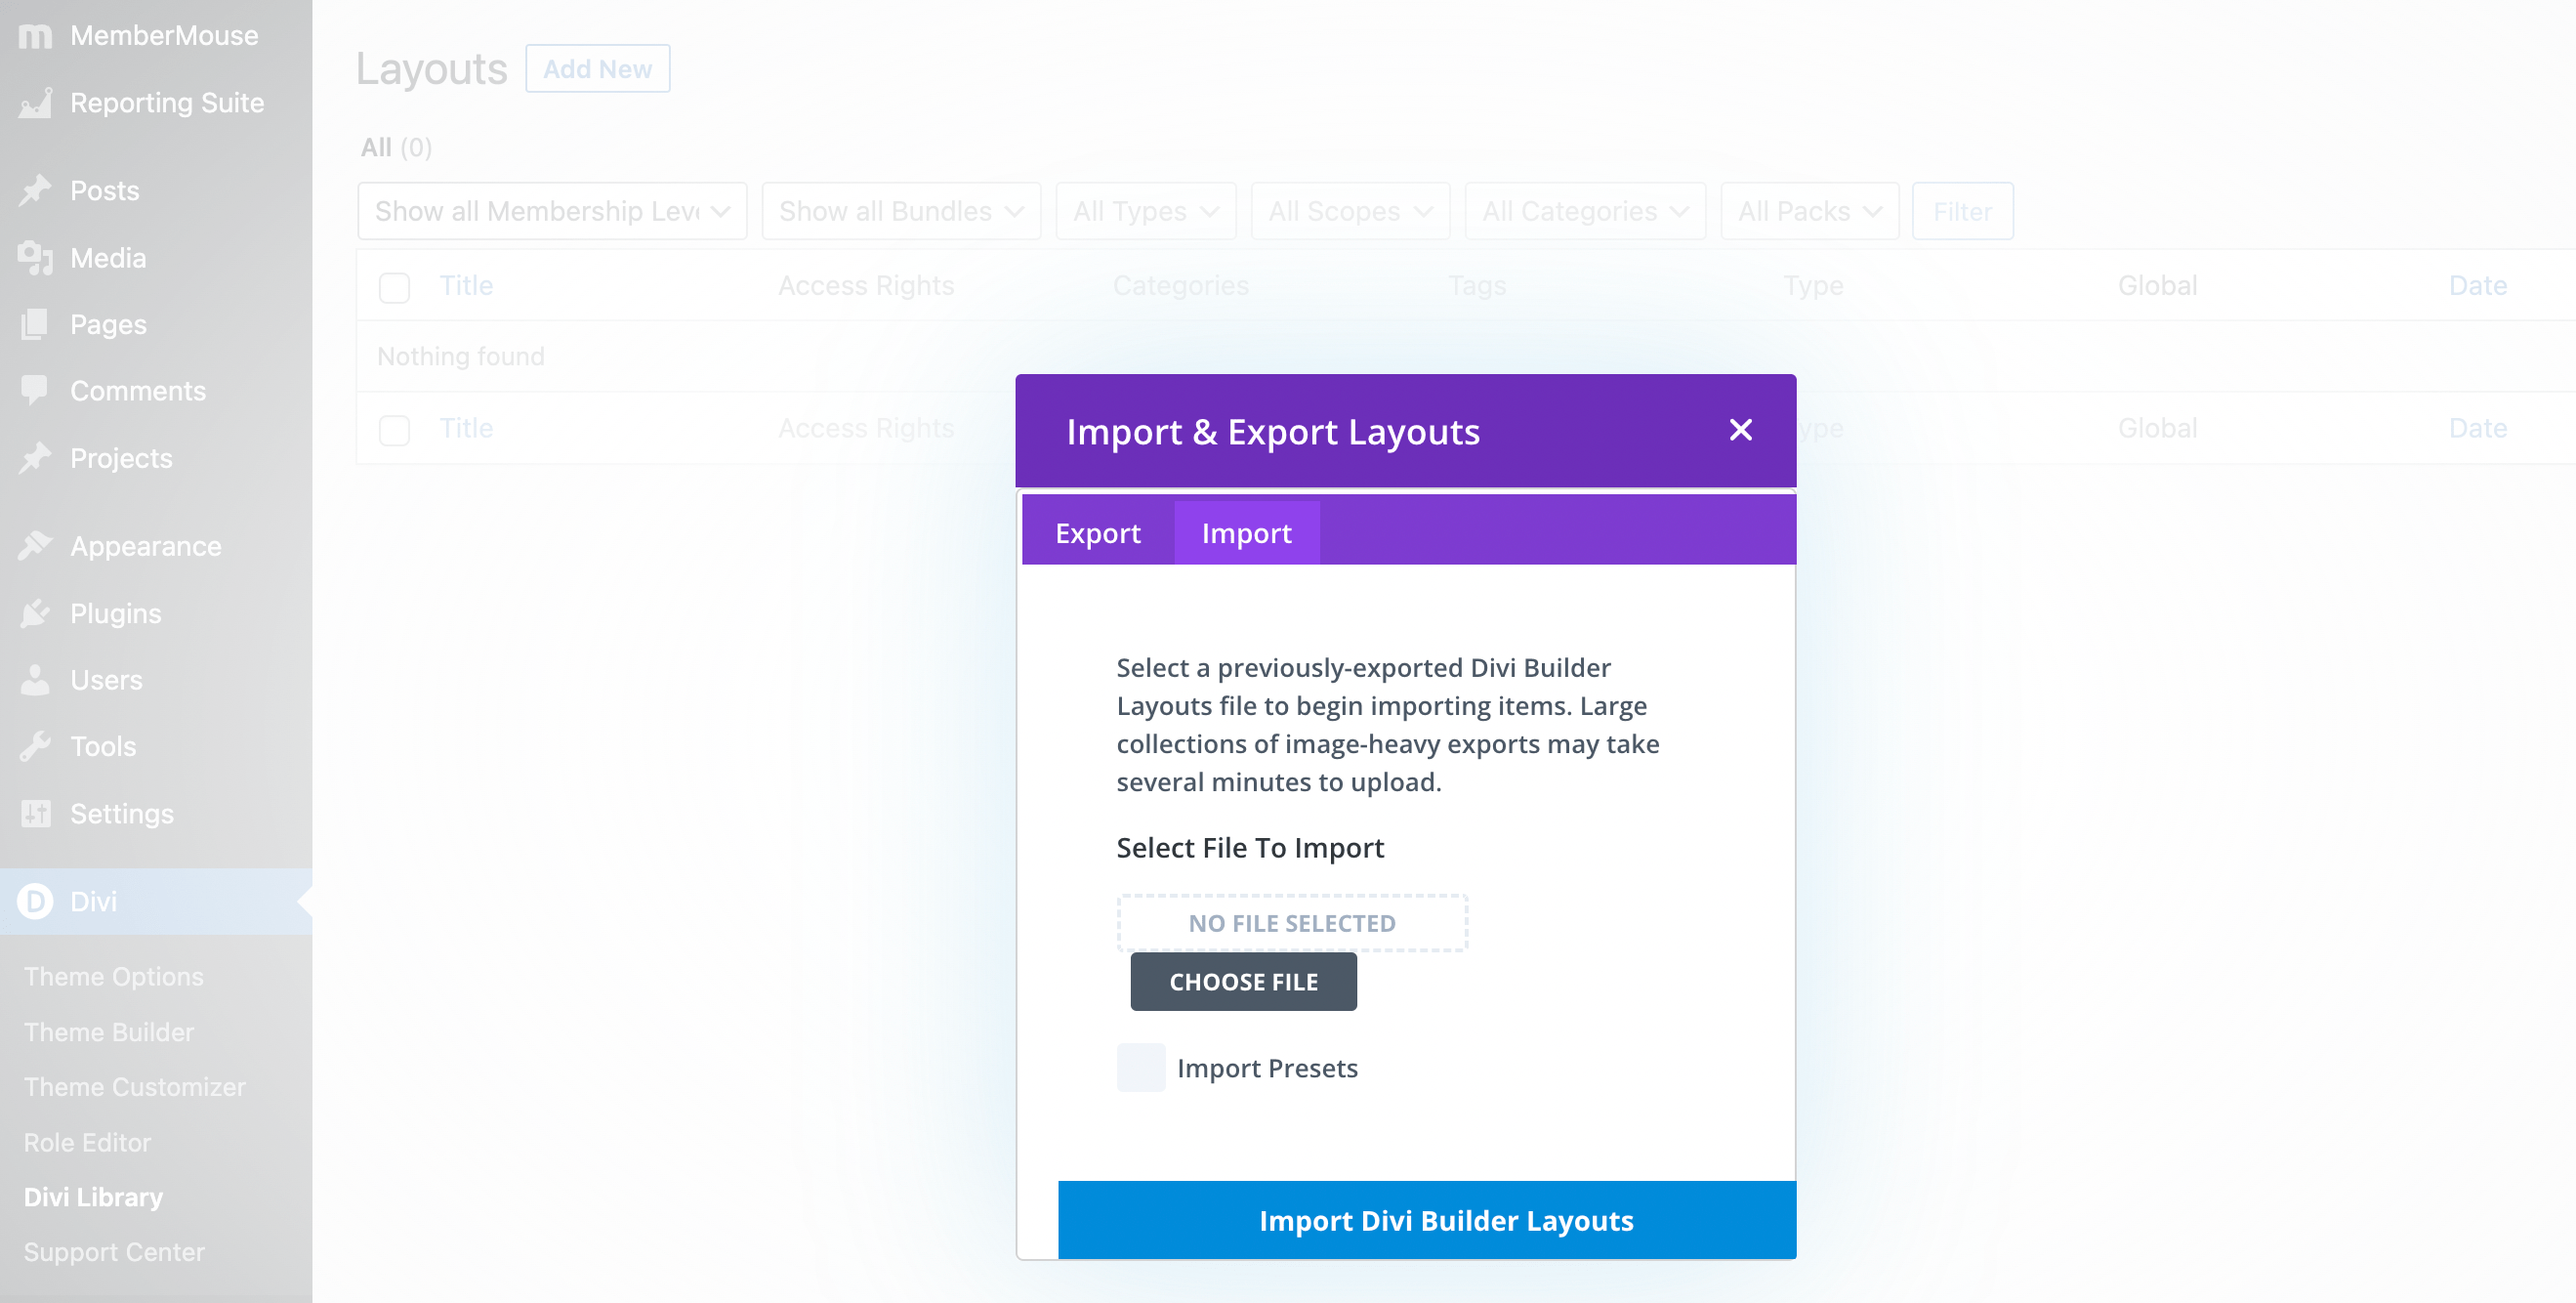
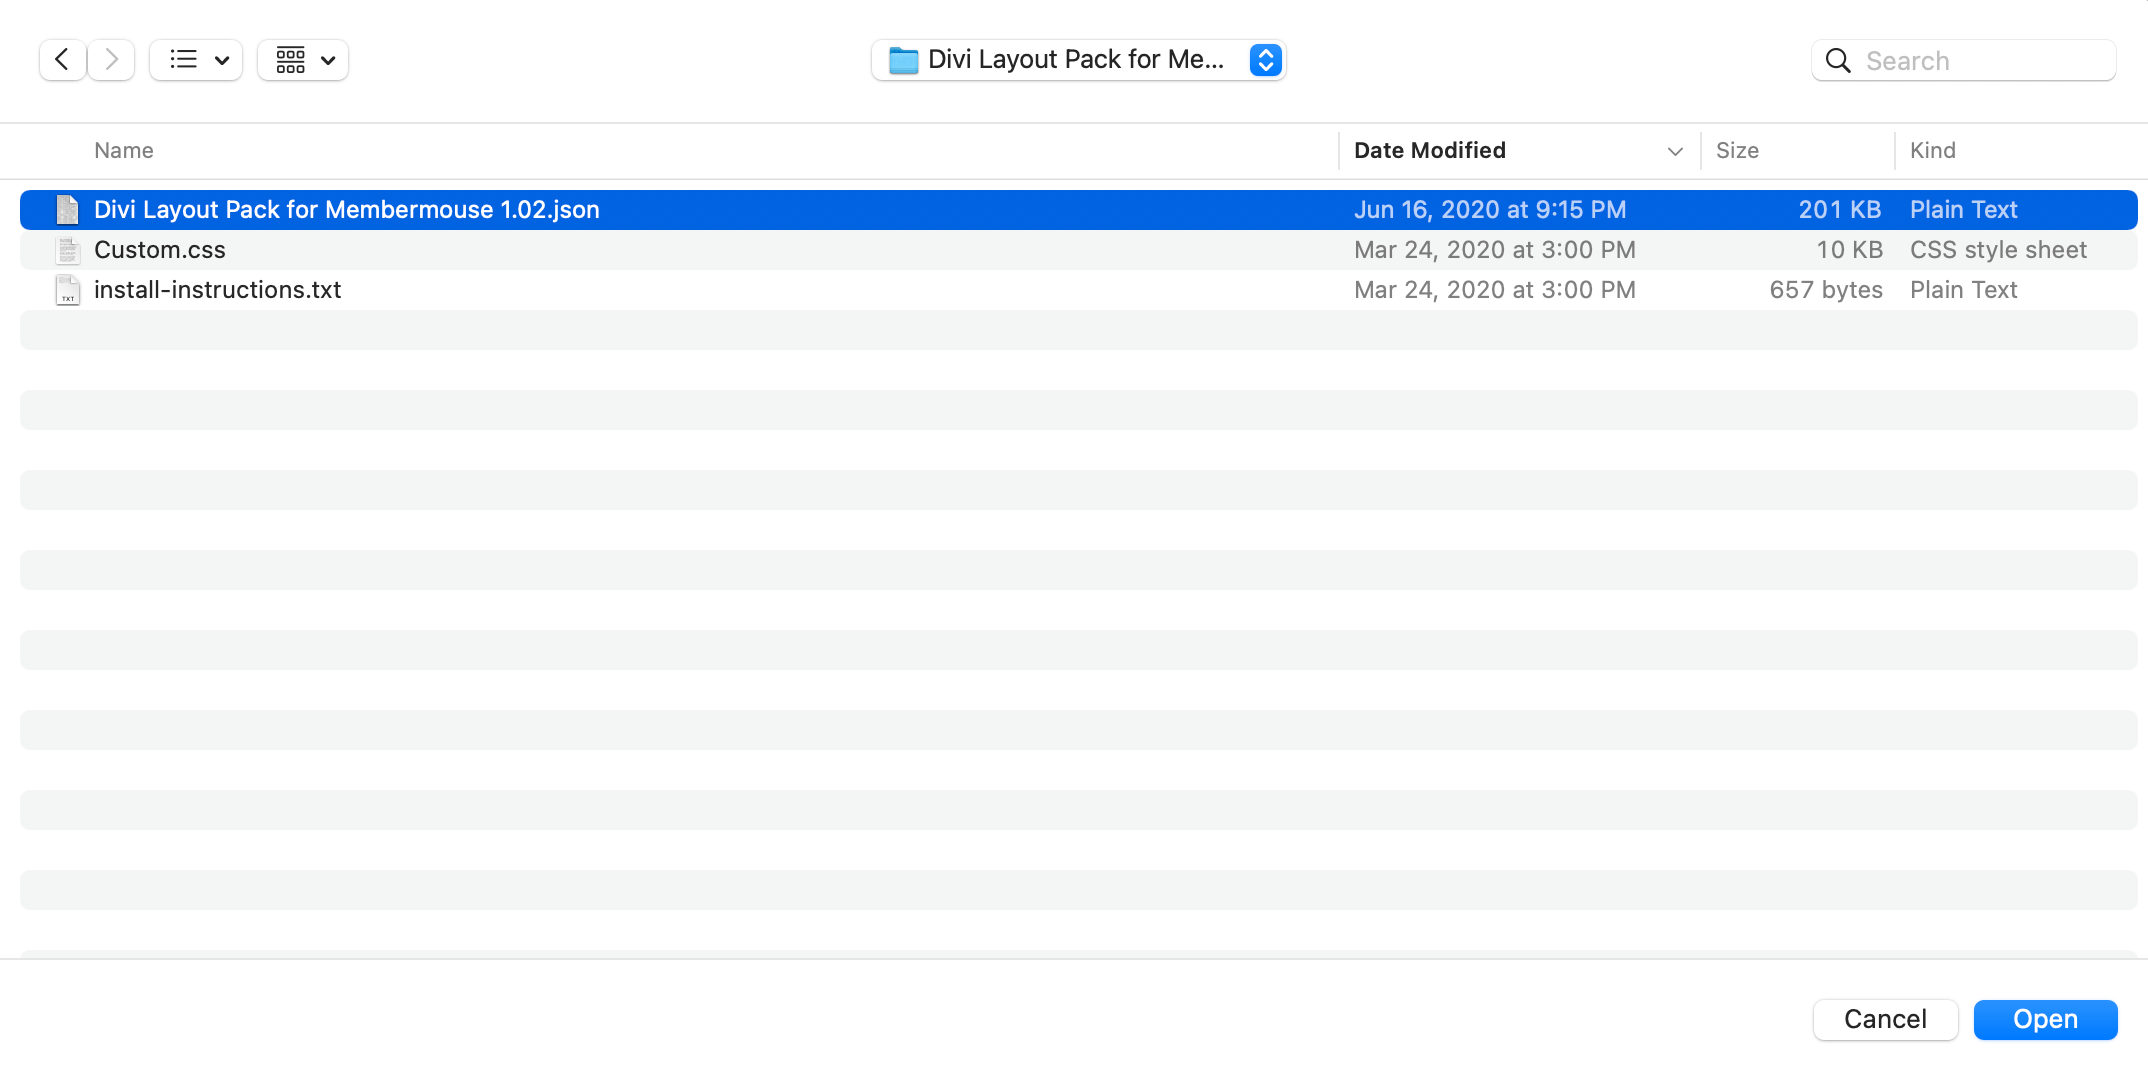
Hit Choose File, and select the Divi Layout Pack for MemberMouse .json file:
After that, click on Import Divi Builder Layouts. This may take a few moments. When the process is finished, you'll see all the imported layouts on the following screen:

These are all the core pages of your Divi membership site.
Step 5: Import Individual Page Layouts
After you've imported the entire Divi Layout pack, you'll also need to import individual layouts on specific pages.
However, before you can do that, you'll need to temporarily deactivate the MemberMouse plugin. Simply go to Plugins, locate MemberMouse Platform, and click on the Deactivate link below it:

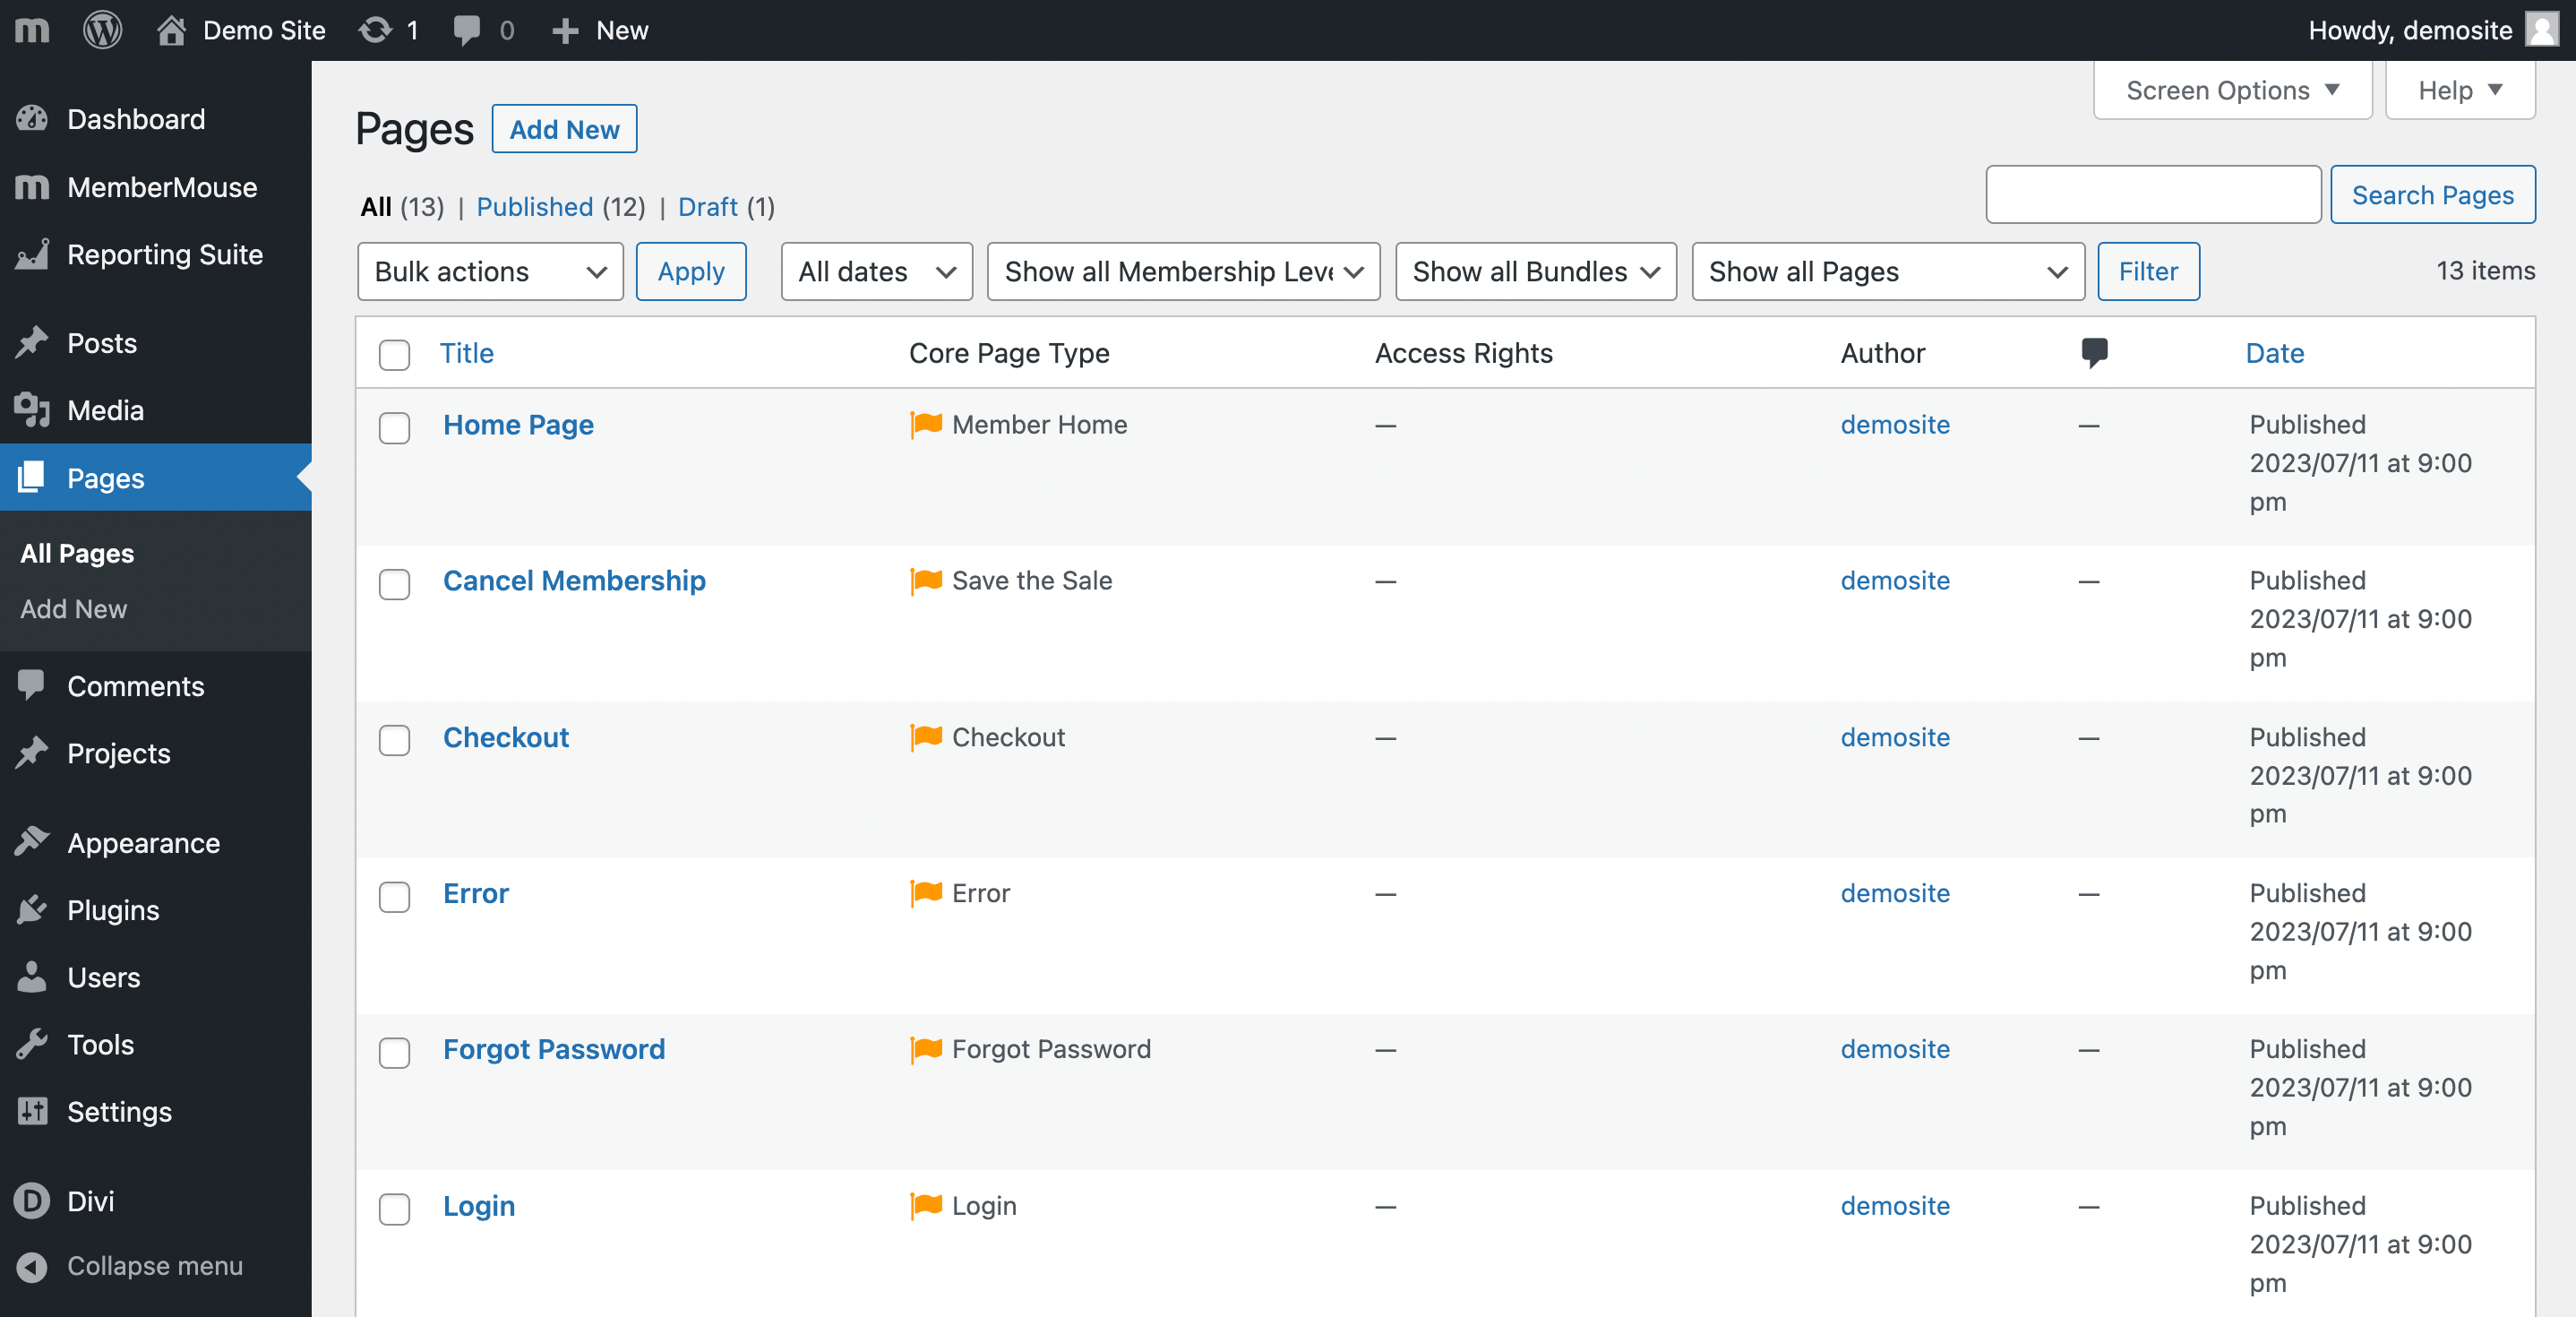
Then, return to your Pages tab in WordPress:

As you can see, you now have just about all the pages you'll need for a Divi membership site.
Let's start with the Checkout page. Hover over it and click on Edit with Divi. At this point, you'll be prompted to take a brief tour of Divi:
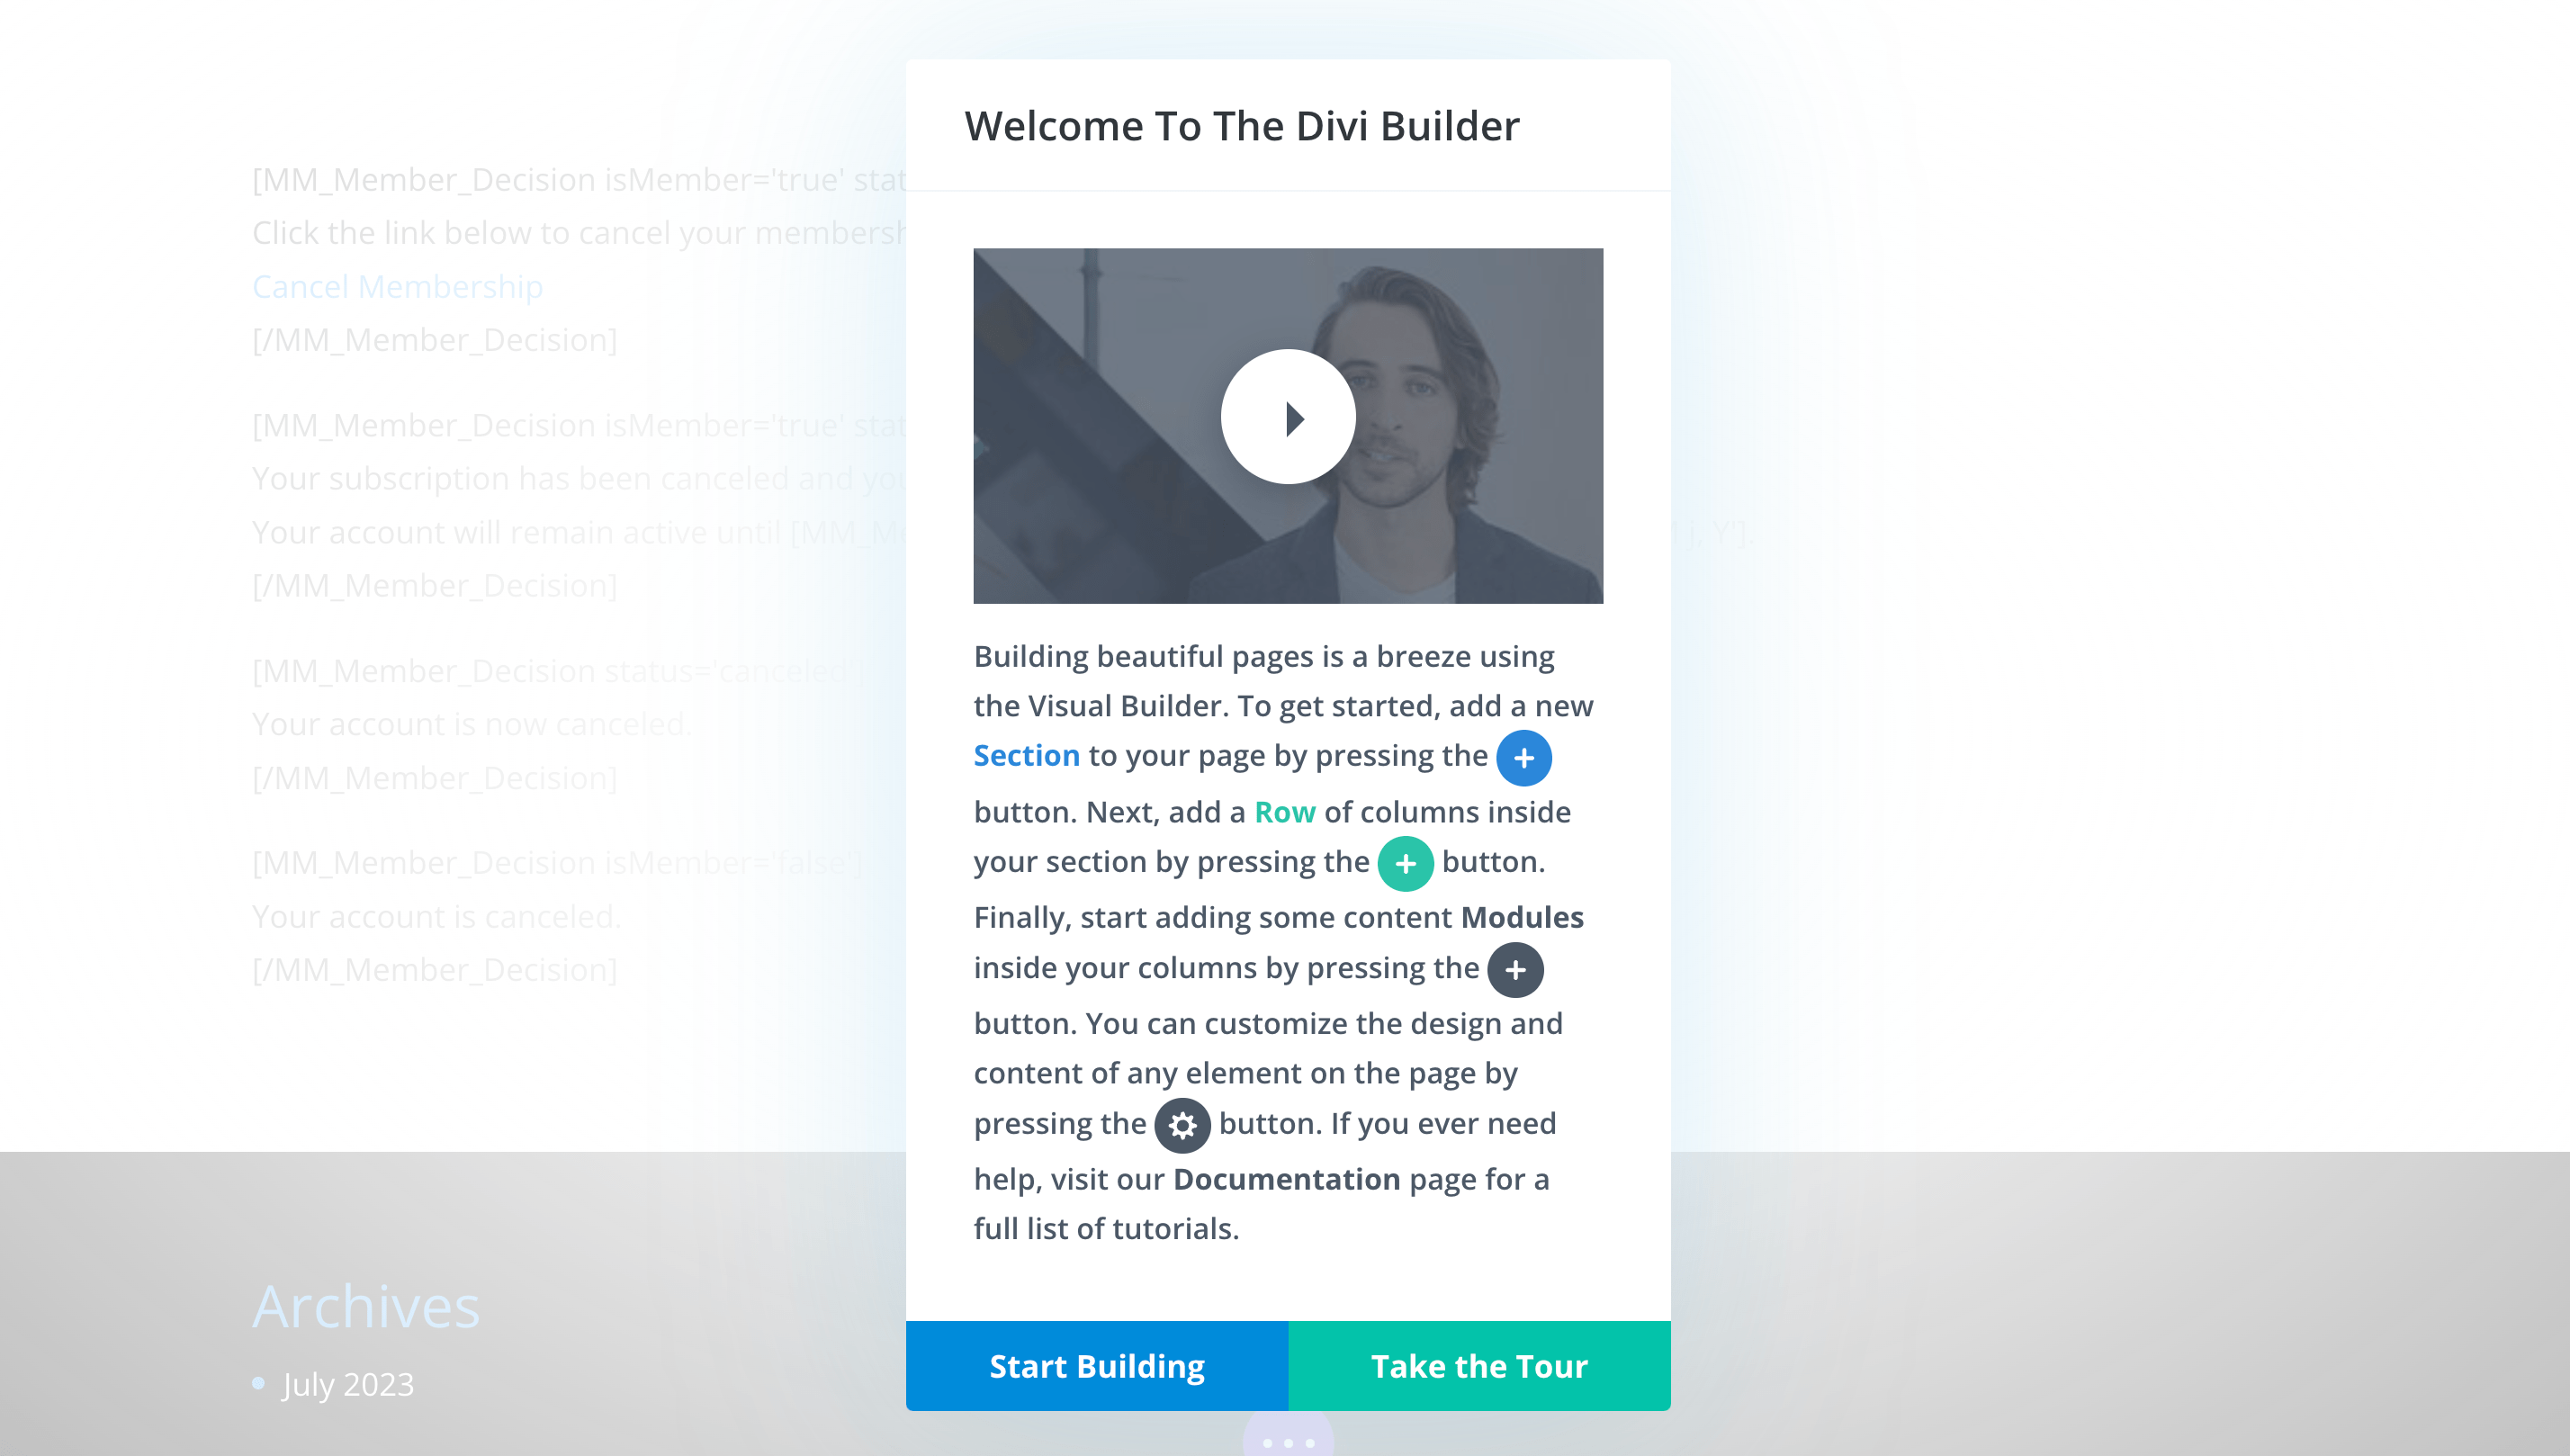
We're going to skip this, and hit Start Building, but you may want to take the time to watch it.
On the following page, we'll select Choose a Premade Layout:

Then we'll go to Your Saved Layouts, and check the box on the left for the MemberMouse category:
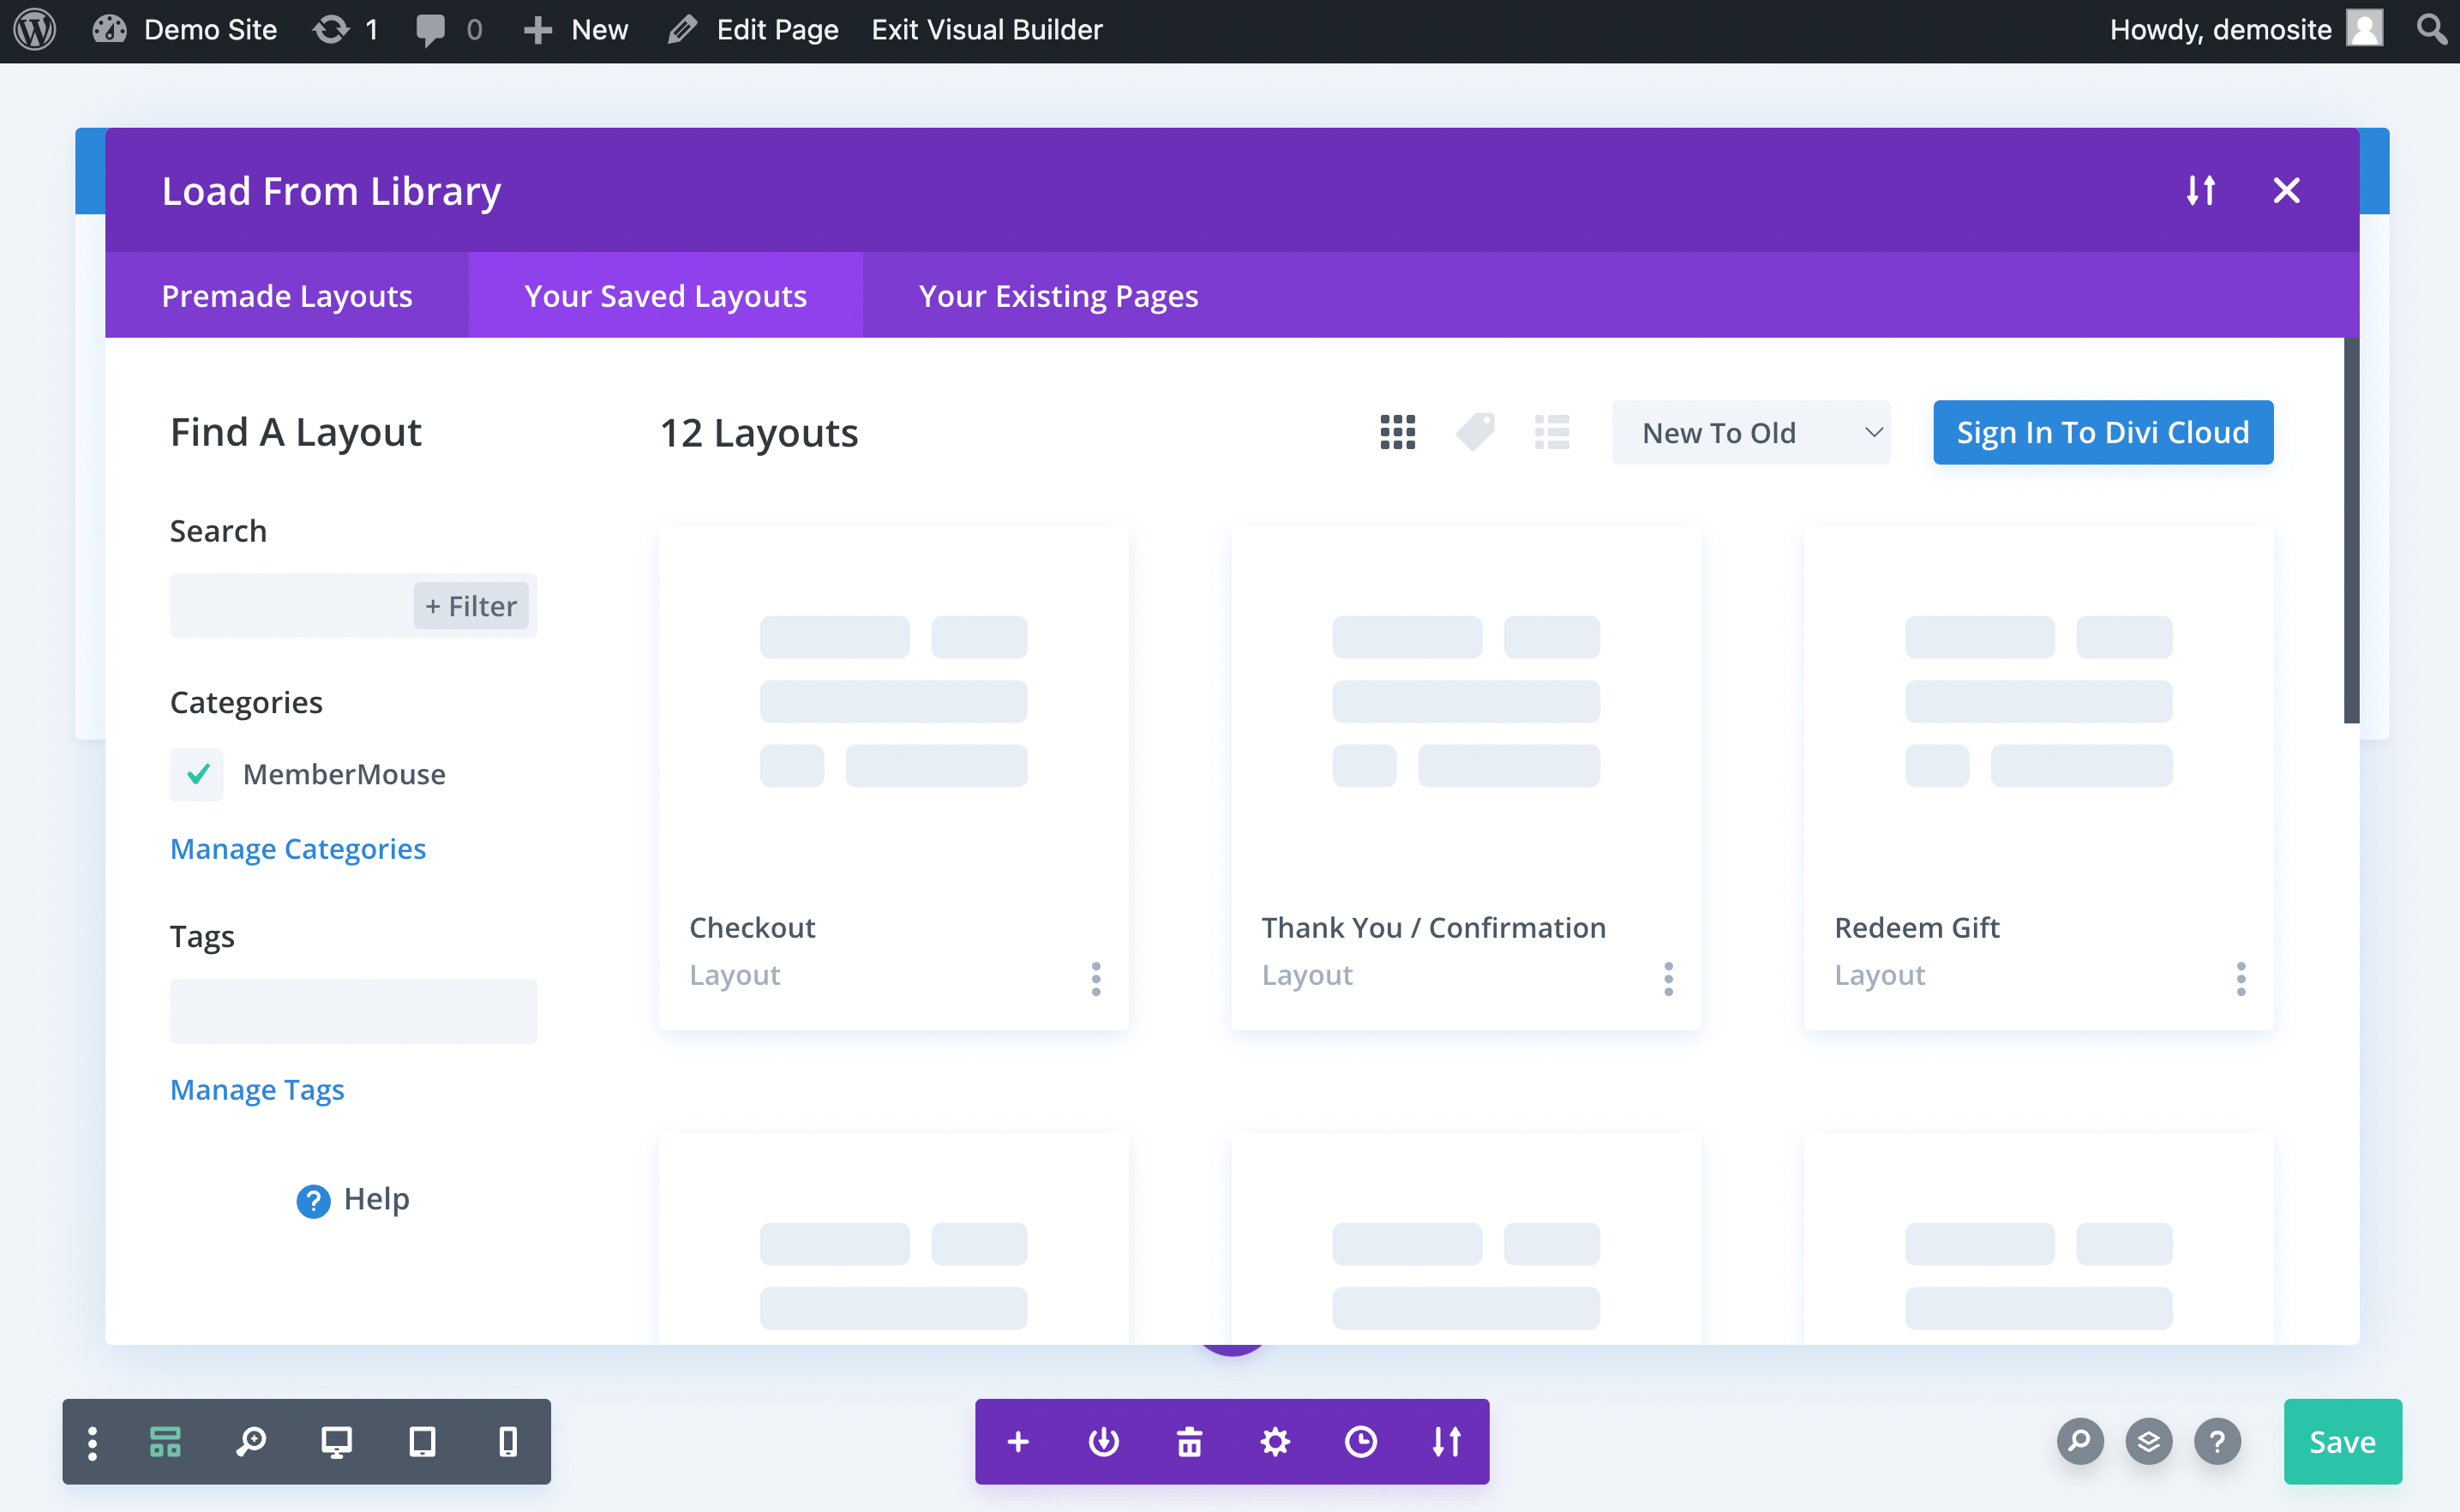
Here, we'll select the MemberMouse Checkout Layout. After that, we'll choose Use this Layout:
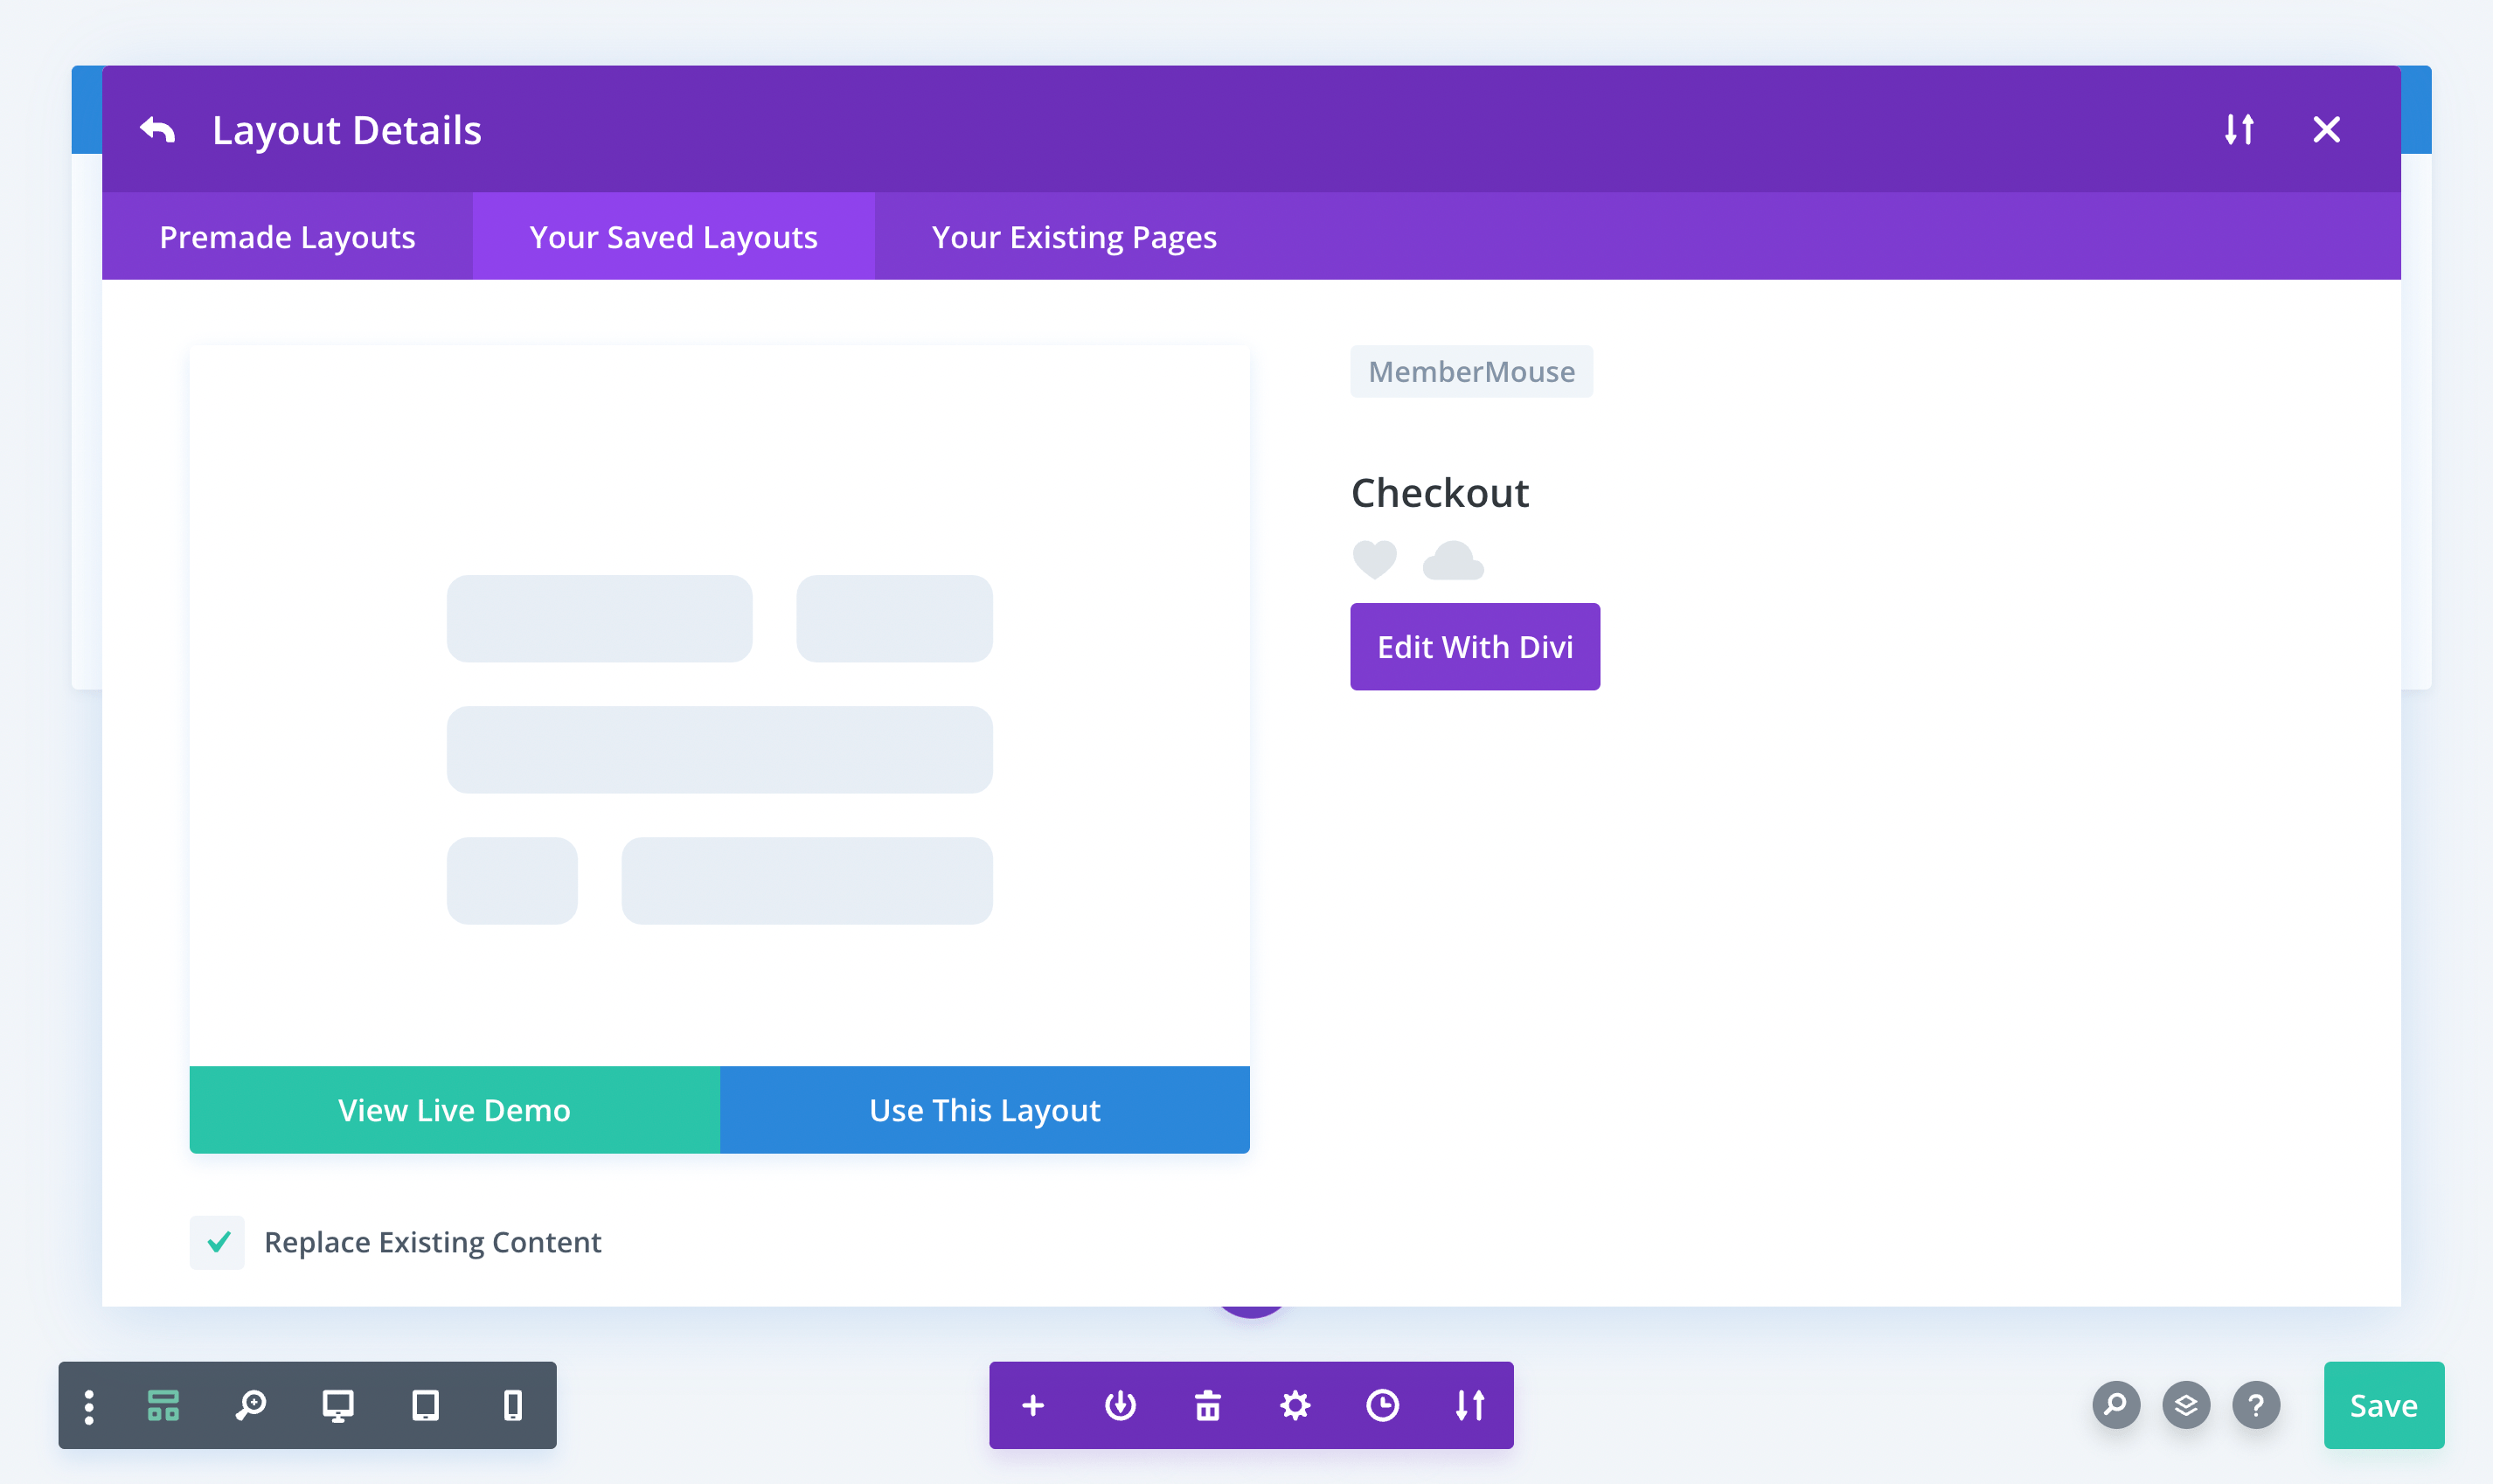
Once we do, we'll see the following page:

As you can see, this has everything we'll need for a working checkout page (don't worry about all the placeholders, we'll address that later). At this point, we can click on Save or customize the page using Divi.
After that, all you have to do is repeat this process for all of the MemberMouse core pages. Just match the layouts to the page that you've selected. When you're done, remember to activate the MemberMouse plugin again.
If you ran into any issues during these last two steps, check out our installation documentation on the Divi Layout Pack for MemberMouse. Alternately, you can watch our video tutorial on installing the Divi Layout Pack.
Step 6: Configure Your Memberships
When importing your page layouts, you might have noticed a lot of placeholder code. That's because you still need to configure some key information for your membership site.
Primarily, you need to add products and membership levels! You'll first need to create a product for each paid membership level you want to add.
To do that, go to MemberMouse > Product Settings:
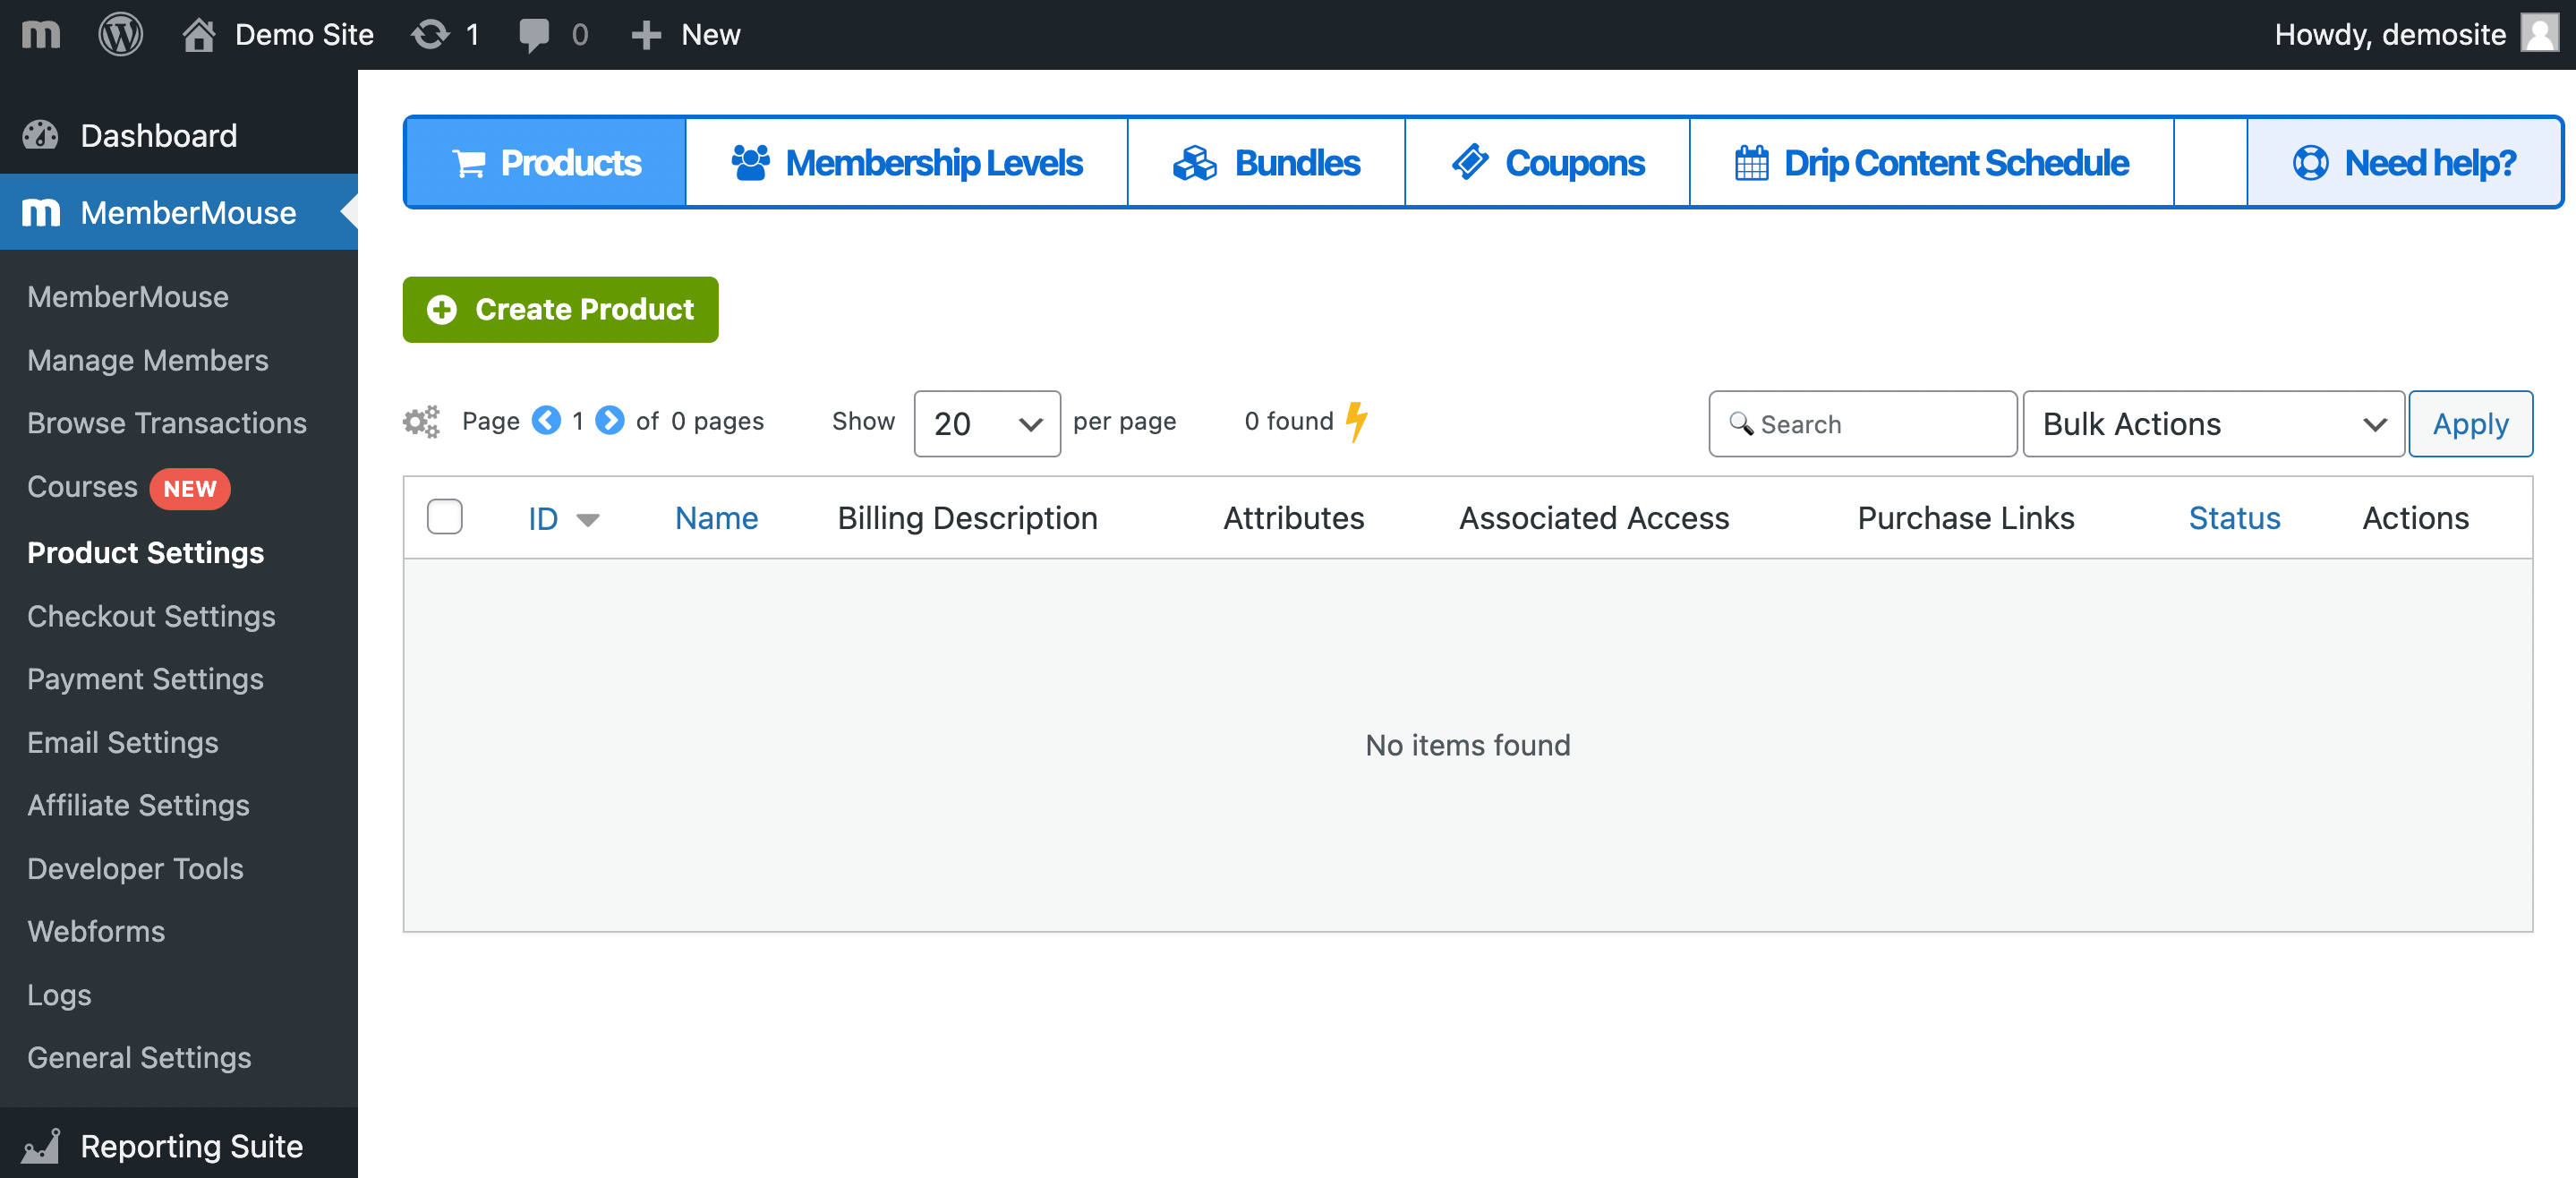
Then select Create Product:
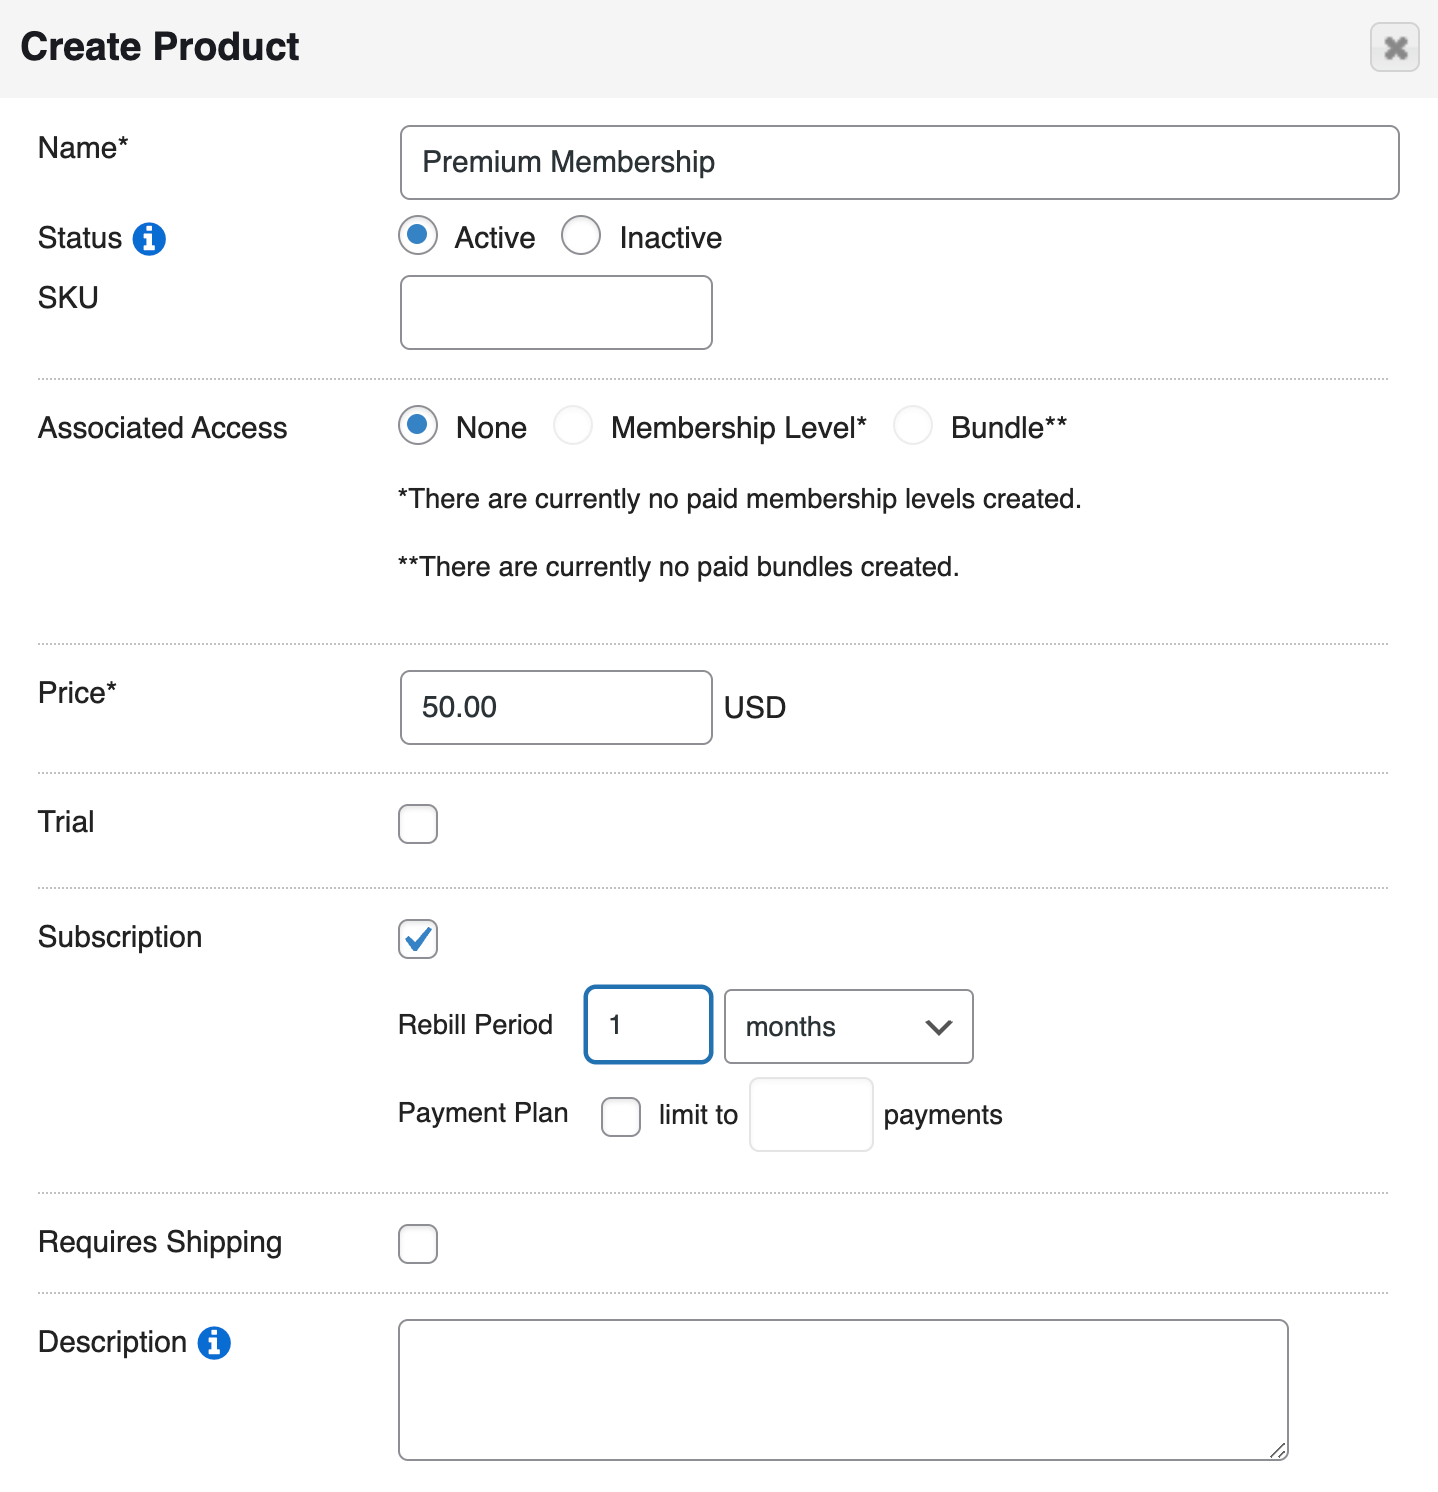
Give your product a name. Ours will be “Premium Membership”, a subscription that's billed monthly. Once you're happy with your own selections, click on Save Product.
Next, you'll need to create an accompanying membership. To do this, go to MemberMouse > Product Settings > Membership Levels:
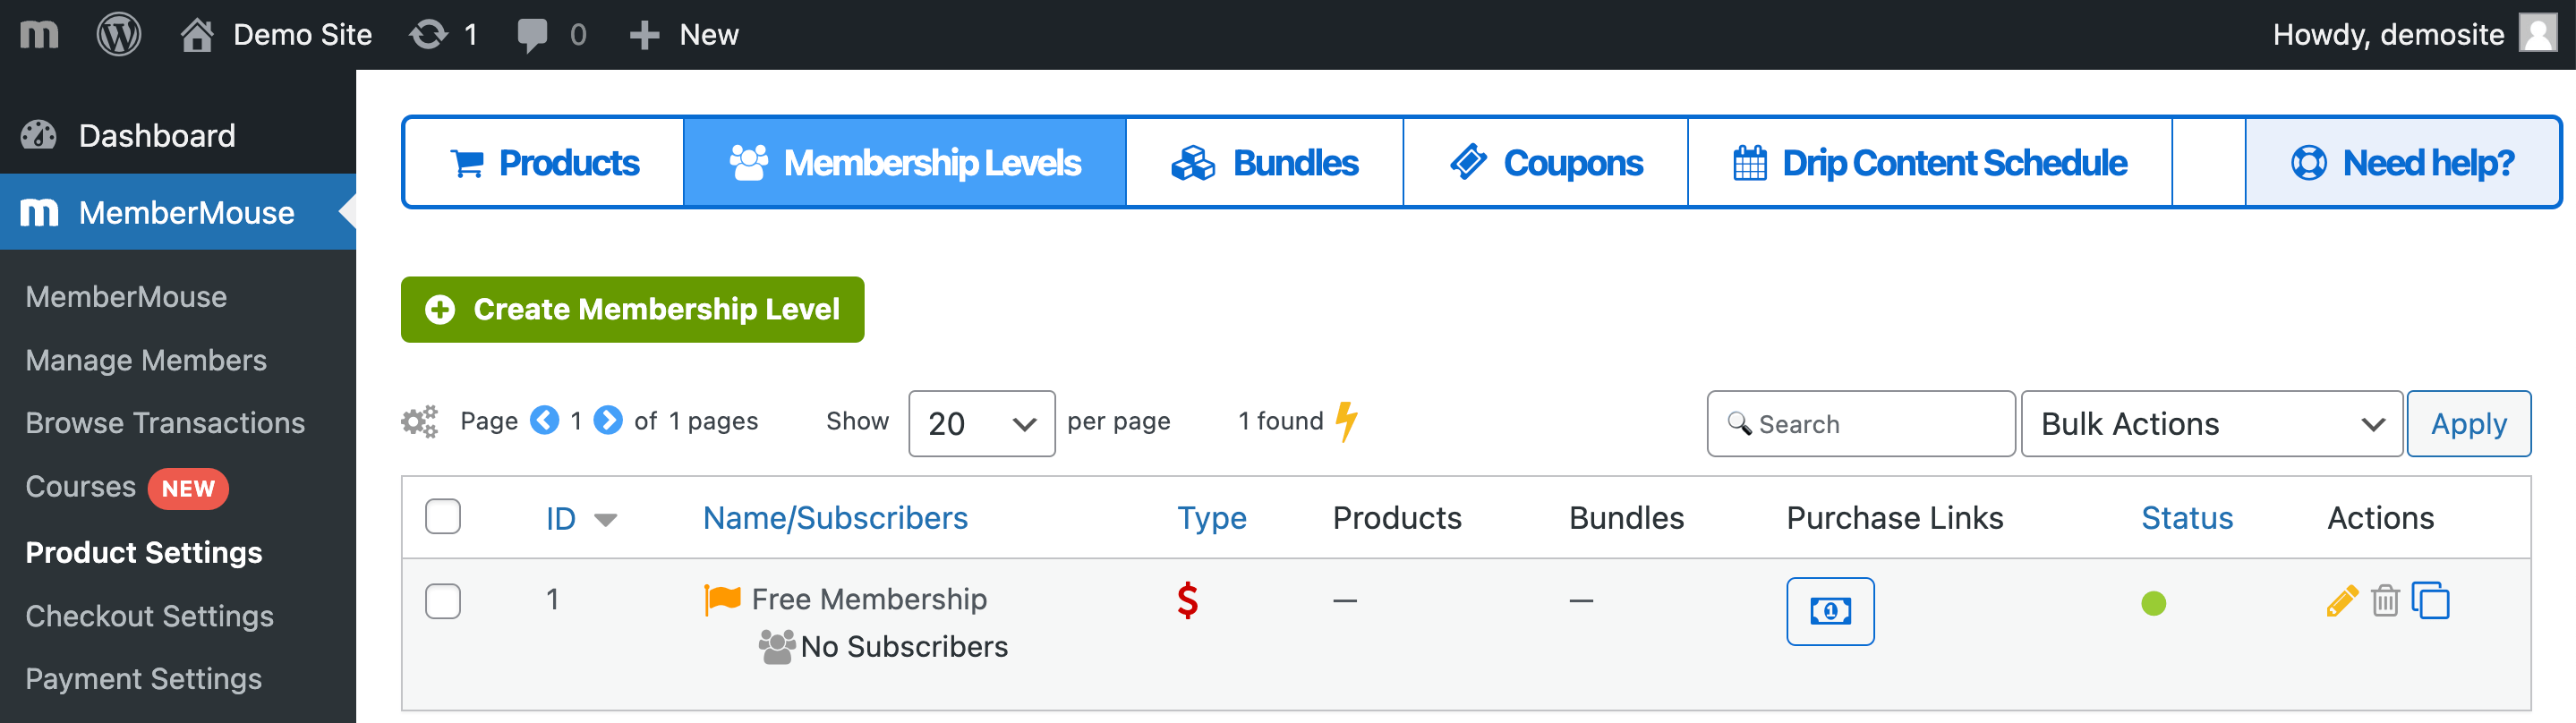
As you can see, by default you have a Free Membership. Let's click on Create Membership Level to make another one to go with our premium plan:
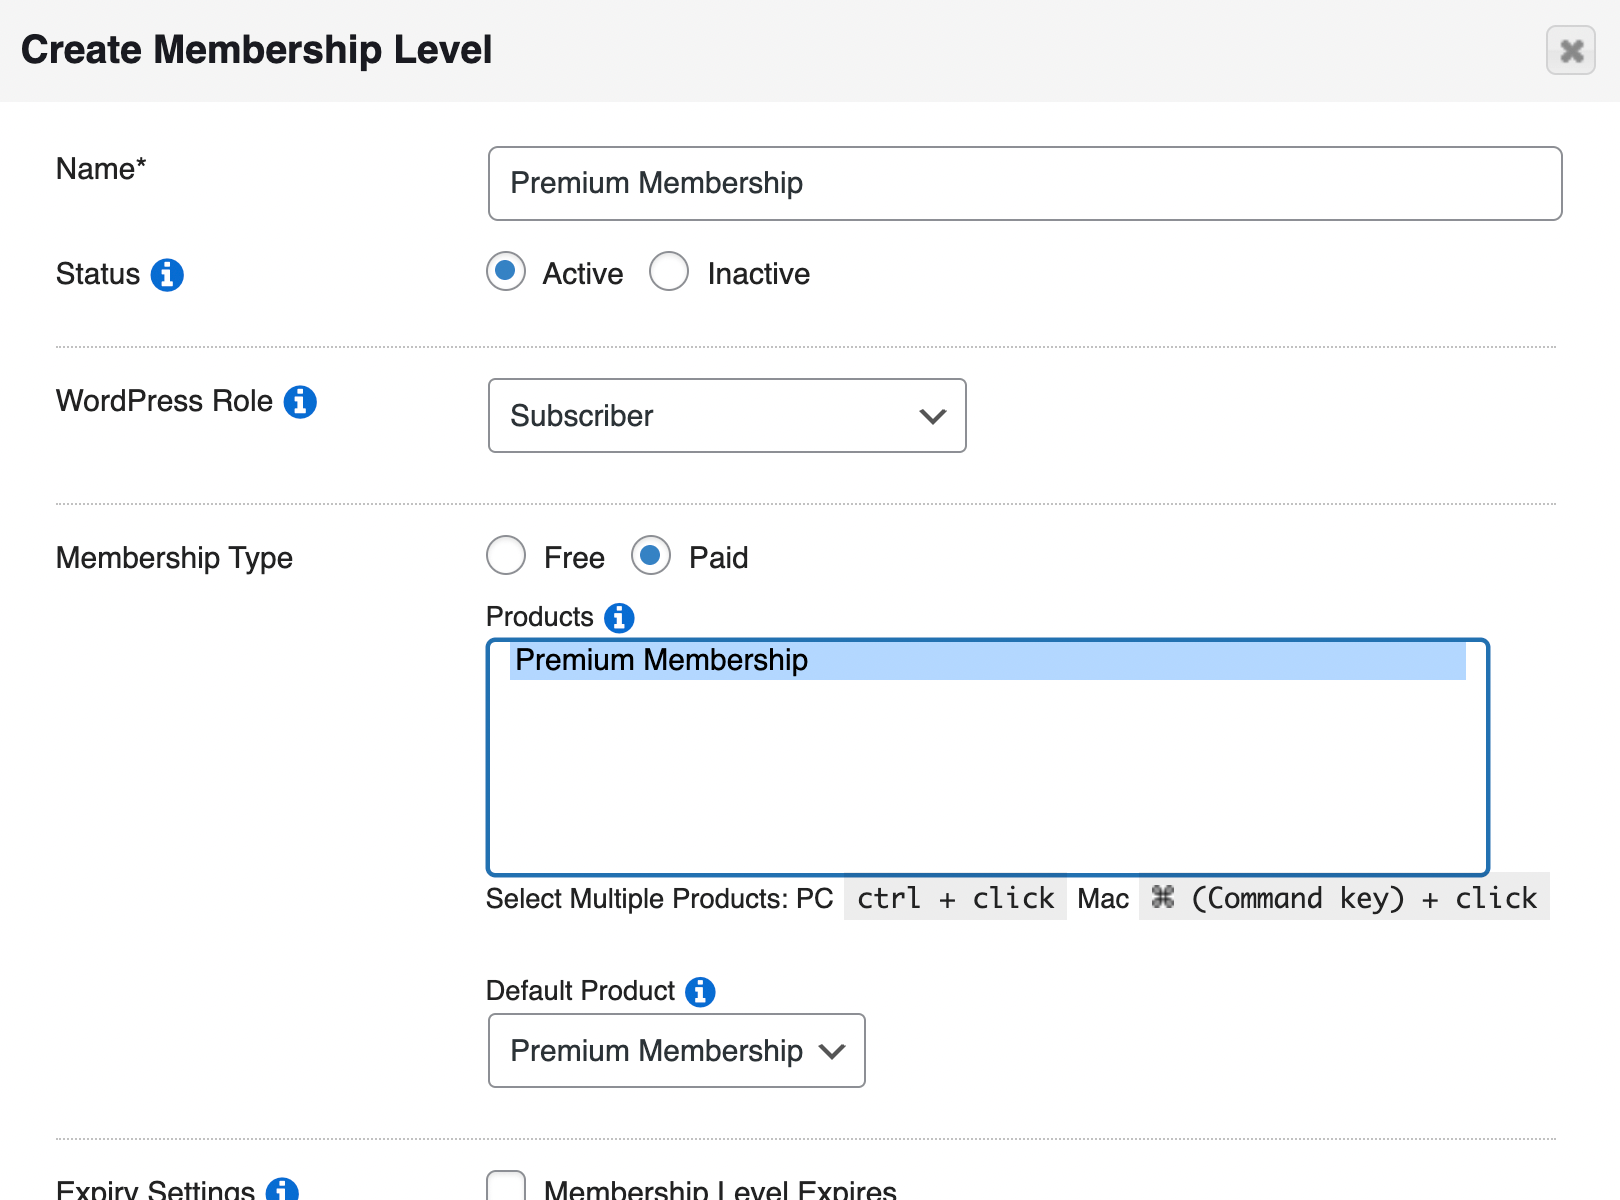
You'll probably want to give the membership the same name as the accompanying product. Under Membership Type we'll choose Paid, and the we can add the product we just made.
At this point, you'll want to configure the rest of your membership level's settings. Then, click on Save Membership Level. Now, you should have a functioning premium membership in addition to the default free one.
Bonus! – Step 7: Design Your LMS & Course Pages with Divi
As we discussed earlier in this article, creating a membership site is an excellent way to monetize your content and expertise. However, there are many types of membership sites.
For example, a classic subscription membership site may offer users access to paywalled content, or to an intimate community of individuals with a similar lifestyle or interests.
However, if you want something a little more formal, you might be interested in transforming your site into an educational platform using a Learning Management System (LMS).
The good news is that MemberMouse and Divi make a great combination if you want to do this. You can use Courses by MemberMouse to transform your membership site into a Divi LMS:
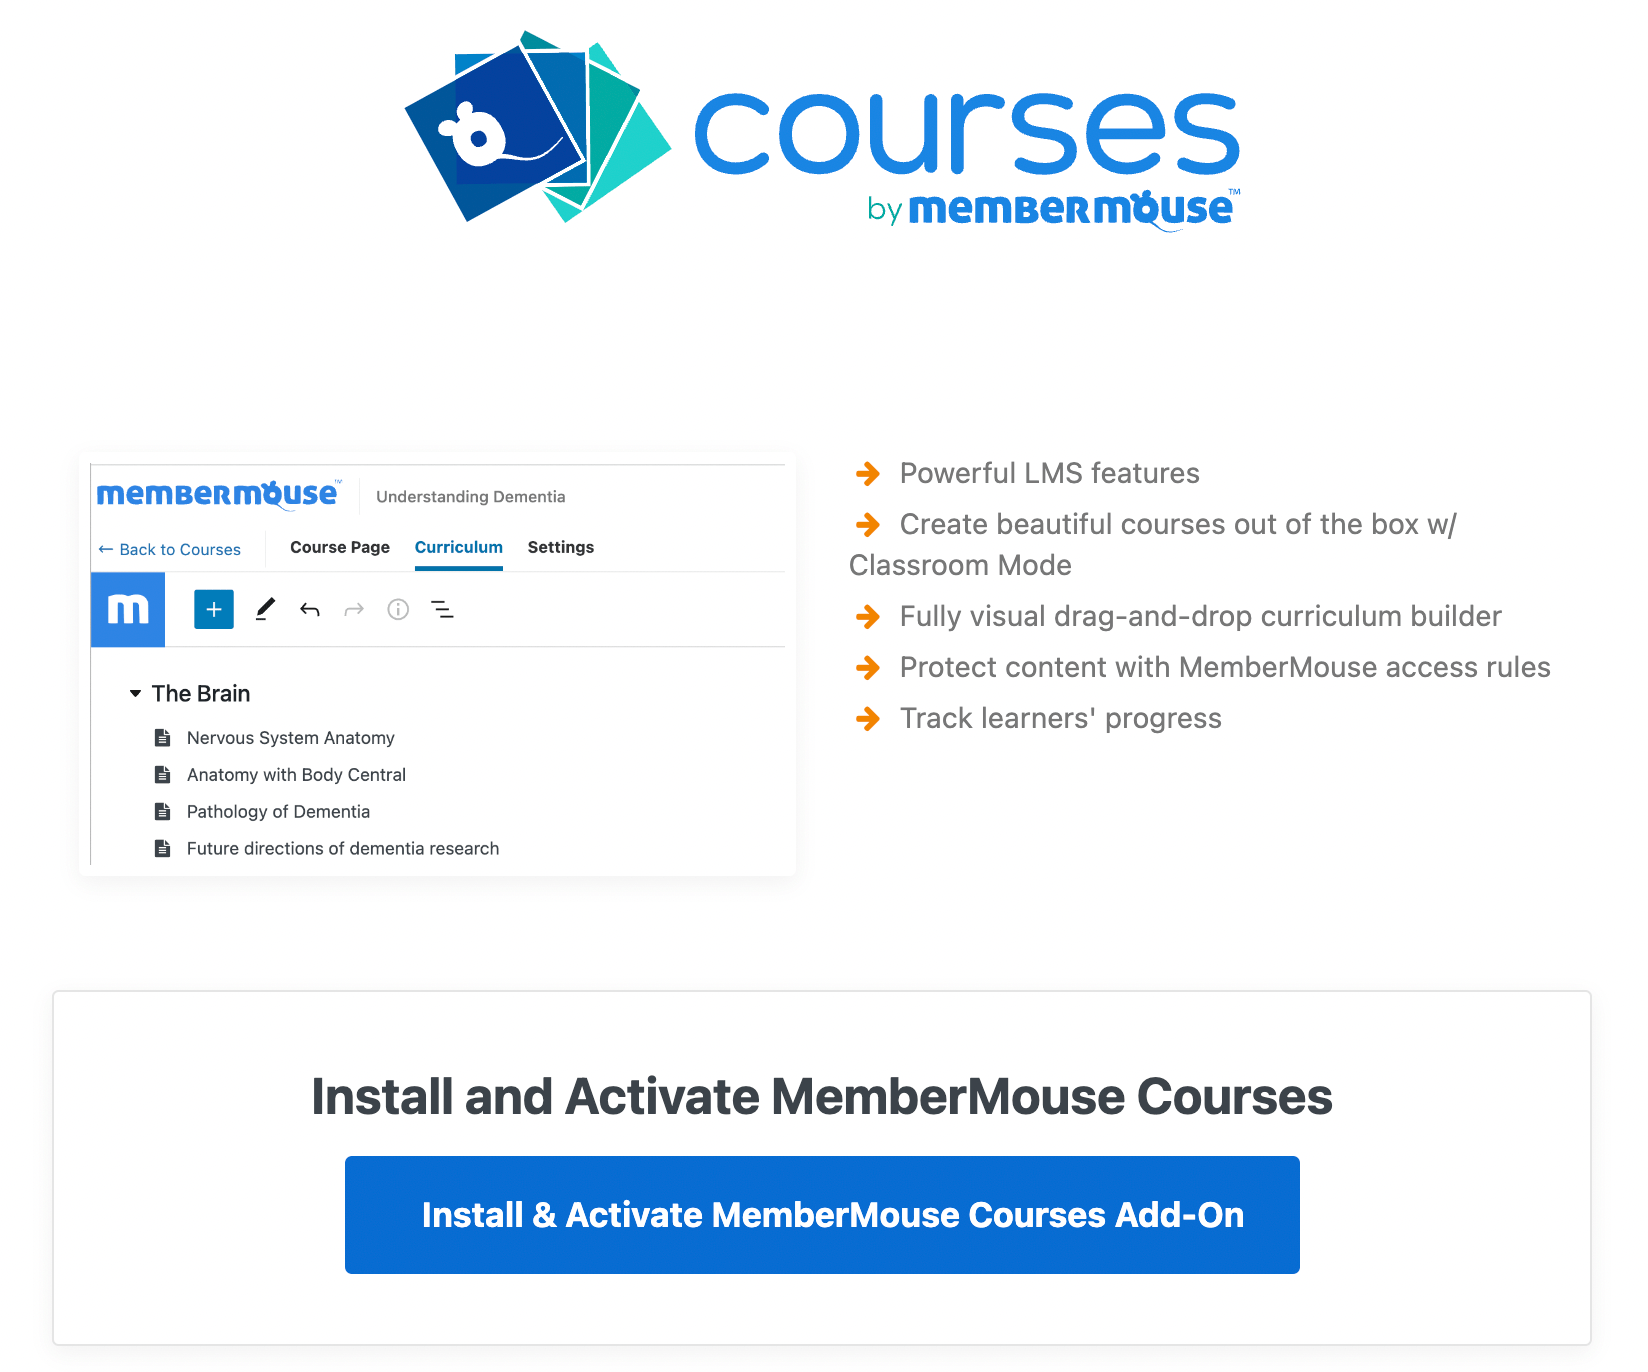
This extension is included in all MemberMouse plans. For more details, check out our official instructions on how to get started with Courses for MemberMouse.
Conclusion
If you want to create a community or offer online courses using a membership site, WordPress is an excellent platform for the job. However, if you’re not familiar with the CMS and you don’t have the right tools, this process could end up requiring a lot of your time.
Fortunately, if you follow these steps, you can easily create a Divi membership site in record time:
- Choose a web host and install WordPress.
- Download the Divi Builder and Theme
- Install the MemberMouse plugin.
- Set up the Divi Layout Pack for MemberMouse.
- Import individual page layouts.
- Configure your memberships.
- (Optional) Design your online course & LMS pages with Divi.
Do you have any other questions about how to create a Divi membership site? Let us know in the comments section below!
If you liked this article, be sure to follow us on Facebook, Twitter, Pinterest, and LinkedIn! And don't forget to subscribe in the box below.
Amy Harper
Hi! I'm Amy. I'm obsessed with the three W's: Writing, WordPress, and Walking! When I'm not blogging about the WordPress ecosystem, you can find me hitting the trails of the Pacific Northwest with a cup of coffee and my camera.


