 Blog
Blog Podcast
 Support
 Customer Login

How To Launch A Dog Walking Business Using WordPress and MemberMouse
Looking to transform your love for dogs into a thriving business that gets tails wagging?
If the thought of starting your own dog walking enterprise makes your heart leap, like a bounding spaniel, then keep reading!
Building your business website may not sound as exciting as trotting around parks with your furry friends, but it's an essential part of the process.
Don't fret if you're not tech-savvy. WordPress, with its user-friendly platform, coupled with MemberMouse, makes creating a professional website simpler than ever.
If you think a “plugin” is some kind of dog odor neutralizer, and you’ve never heard of a content management system (CMS), then stick around.
This guide will help you get started on your entrepreneurial journey, and set you up with a pro dog walking website, even if you have no WordPress experience.
Let's dig in!

Tools for the Task
To kickstart your online dog walking business, you'll need these digital tools:
- WordPress
- MemberMouse
- WPForms
- Zapier
If you're new to these tools, we've got you covered. In this guide, we'll explain how to set up and use each of them.
Building Your Dog Walking Business Using WordPress
Follow these steps to create your dog walking business online using WordPress and MemberMouse.
Step 1: Setting Up WordPress
WordPress is a content management system (CMS) used by more than 40% of all websites worldwide.
A CMS is software that allows users to create, manage, and modify content on a website without needing any specialized technical skills or coding knowledge.
WordPress, being user-friendly and highly customizable, makes it an ideal CMS for budding entrepreneurs like you.
Why WordPress?
Here are some of the reasons why we recommend opting for WordPress:
1. You only pay for what you need
WordPress is free to download, install, and use. This makes it an affordable choice, especially for small businesses on a tight budget.
There are some costs involved, such as buying a domain name, web hosting, themes, and plugins (that give your website extra functionality) the core software itself won't cost you a dime.
You only pay for designs and features you can really benefit from.
2. It offers professional themes
Themes serve as the foundation of your website's design and layout, and WordPress offers thousands of them, many completely free!
That means that you can use a ready-made theme, personalize it with your logo, images, and written content, and have a professional-looking site in minutes.
Plus, most themes are customizable, allowing you to alter colors, layouts, fonts, and more to fit your branding.

3. It has SEO advantages
SEO stands for search engine optimization. SEO is important if you want clients to discover you on Google and Bing.
WordPress is well-known for its SEO-friendly nature. It comes with a variety of tools and plugins that can help optimize your website to rank higher in search engine results.
Plugins like SEOPress and All in One SEO make it easy for you to manage your SEO settings.
There are other things you can do with WordPress to optimize for search. For example, you can optimize your site for fast loading speeds, and use themes with responsive designs (that change to fit the size of different screens).
Both of these are factors that search engines like Google favor, helping your site rank even better!
Buy a Domain Name and Web Hosting Service
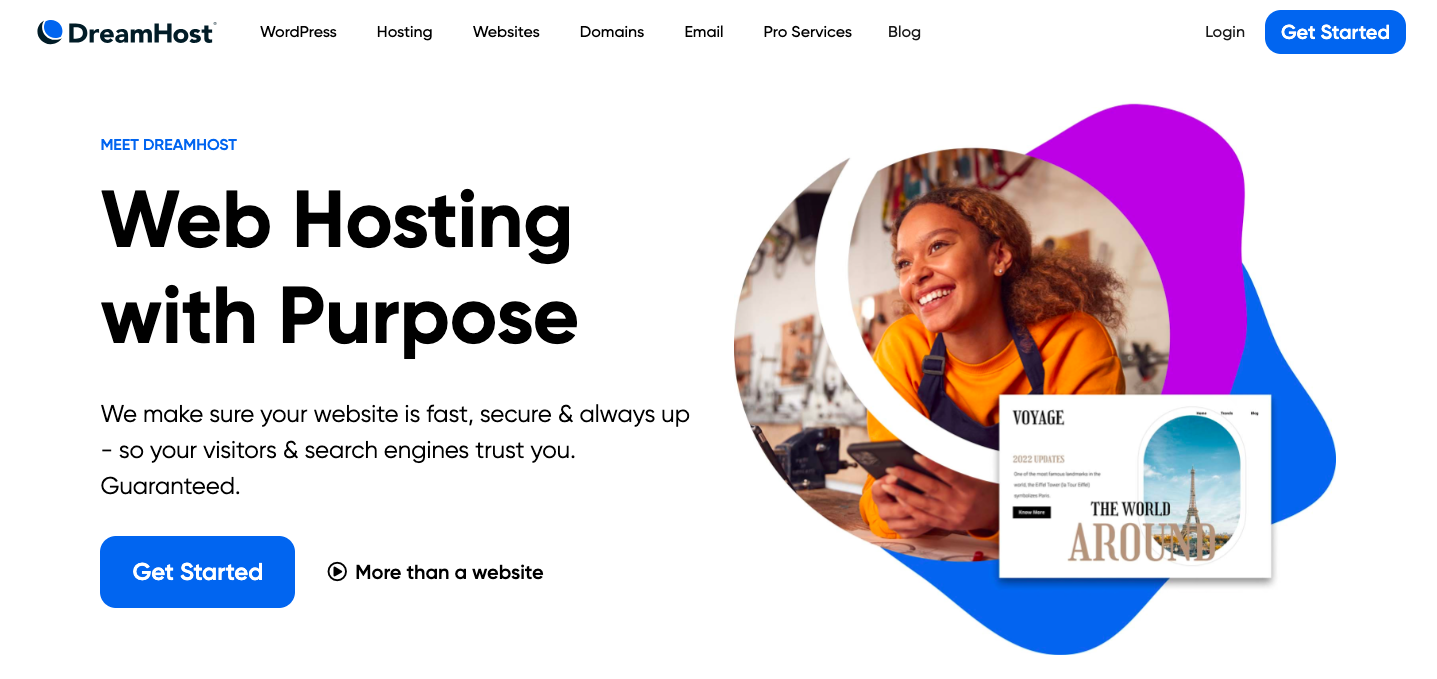
Before you begin, you'll need to secure a domain name and a web host, both of which are usually offered as a package deal by hosting providers.
We recommend using DreamHost (as recommended by WordPress) for its affordability and reliable service.
Choose a WordPress Theme That Fits Your Business
There are countless themes available, many of which are even free.
You can search WordPress.org’s library of themes for any industry. For example, searching “pet” themes returns these results.

The great thing about choosing an existing theme that fits your industry is you already have most of the features you need out of the box. You also don’t have to spend time and money sourcing stock images for your business.
Step 2: Building Your Site with MemberMouse
With your WordPress site set up, it's time to install MemberMouse, a WordPress plugin that provides a robust platform for managing your online business.
MemberMouse allows you to:
- Create a password protected client area on your site
- Develop membership levels with recurring billing options
- Sell online courses and consultations
- Create VIP communities
- Paywall premium content
Through your MemberMouse-powered website, your clients can set up one-time or recurring dog walking services.
You can also easily offer a variety of services related to dog walking to diversify your income.
For example, you can sell a video course on pet care, pet training, and share the dog walking best practices you use while walking your clients’ dogs. Or maybe you can offer a dog-sitting service for VIP members.
Ultimately, you decide how to structure and monetize your business.
Install MemberMouse
The first thing you need to do is install and activate MemberMouse. Follow this video to get started:
Create Products
Once you’re set up, it’s time to add some products to your site. These can be one-off products or services, payment plans, subscription products and more.
1. From your WordPress dashboard, go to MemberMouse > Product Settings, and select the Products tab.
2. Click the green + Create Product button which will open up a dialogue box.
3. Name the product. For example “Up to 3 walks a week”
4. Seeing as dog walking is a service and not a physical product, you can leave the SKU blank.
5. Leave associated access as None for now. We’ll get back to that later.
6. Set the Price for your service.
7. Under Trial you can offer a discounted or free trial for a limited period.
8. If you’re creating a service that requires recurring billing, check the Subscription box. Then enter the Rebill Period with how frequently you want your subscribers to pay. You can choose weekly, monthly, or annually.
Create Membership Levels
Now it’s time to set up membership levels. These are what allow your customers to set up a password protected account on your website.
You can have just one membership level, or set up multiple membership levels with different “products”.
For example, you might want to set up:
- A basic tier that entitles members to up to 3 walks a week
- A middle tier that offers up to 5 walks a week and limited access to training tips.
- A premium tier for up to 5 walks a week, full access to online training courses and tips, and entitlement to up to 7 days’ dog-sitting per year.
Here are the steps for setting up your membership levels:
1. From your WordPress dashboard, go to MemberMouse > Product Settings, and select the Membership Levels tab.
NOTE: By default, MemberMouse sets up a default membership level. You can identify the free account by the orange flag icon. This default membership level is assigned to any member who makes a one-off purchase on your site.
For example, if they book a one-off dog walking session, but don’t sign up as a regular client, they still need to be assigned a membership level.
2. To create a paid membership level, start by click the green + Create Membership Level button at the top of the page. A dialogue box will load with the settings for your new membership level.
3. Keep the Status as Active
4. Set Membership Type as Paid and select the Product(s) you’d like to associate with the membership level. You can select multiple products by holding the ctrl key on your PC or the cmd key on your Mac as you click.
5. You can also change the default Welcome Email message and even include SmartTags to personalize the email with the user’s name.
Step 3: Set up Appointment Scheduling with WPForms
Now you’ve created a membership site for your clients to make one-off and recurring payments! There’s one more cherry on top to streamline your clients’ experience of your service and reduce your admin time: online booking.
With appointment scheduling, your clients can book their dog walking slots on your website. And there’s even a way to link online bookings to your Google calendar so that you’re always up to date, and avoid clashing schedules.
To handle this, we'll use WPForms and Zapier to create an appointment booking system that integrates with Google Calendar. Let’s meet these tools.
WPForms
WPForms allows you to create forms for your WordPress website without needing to write any code.
It provides a simple drag-and-drop interface, so building a form is as easy as selecting the fields you want and placing them where you'd like them to appear.
Zapier
Zapier is an online automation tool that connects your favorite apps, such as Gmail, Slack, Mailchimp, and over 2000 more.
You can connect two or more apps to automate repetitive tasks without coding or relying on developers to build the integration.
Google Calendar
Google Calendar, as you probably already know, is a time-management and scheduling calendar service developed by Google.
Now, let's get into how to use these three together:
1. Create a New Form in WPForms
- After installing the WPForms plugin, navigate to your WordPress dashboard. Click on WPForms > Add New.
- Name your form, select the Appointment Form template, and customize it with the necessary fields (like date, time, client name, and contact information).
- Save your form when you're done.
2. Insert the Form on Your Website
- Go to the page where you want to add the form, click the + Add Block button, and select WPForms.
- Choose the form you just created, and then update or publish your page.
3. Create a New Zap in Zapier
- Log in to your Zapier account, and click on the Make a Zap button.
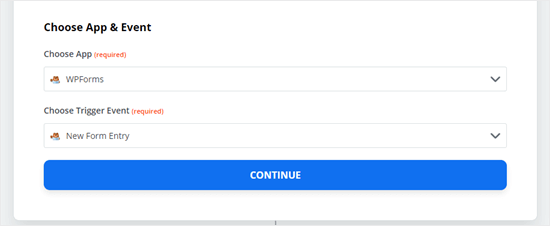
4. Set the Trigger
- Search for WPForms in the search bar. Select it, then choose the New Form Entry trigger event. Click Continue.
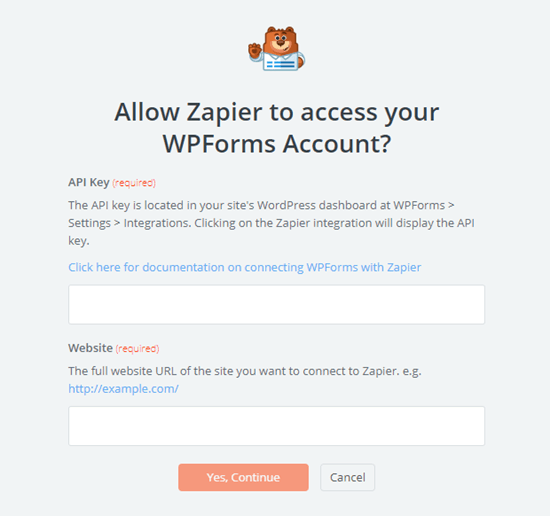
5. Connect your WPForms Account
- You'll need your website's URL and the WPForms API key, which you can find under WPForms > Settings > Integrations in your WordPress dashboard.
- Paste your API key and website URL into the corresponding fields in Zapier, then click Yes, Continue.
6. Set Up the Trigger
- Choose the form you created from the dropdown menu, then click Continue.
- Test the trigger to make sure it's working
- Click Continue again.
7. Set the Action
- Search for Google Calendar in the search bar and select it.
- Then choose the Create Detailed Event action event.
- Click Continue.
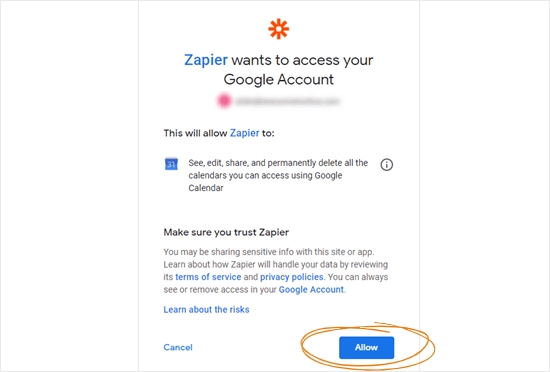
8. Connect Your Google Calendar Account
- Follow the prompts to allow Zapier access to your Google account, and select the calendar where you want to schedule your appointments.
9. Set up the action:
- You'll see a form where you can detail the event. Fill in the Summary, Description, Location, Start Date & Time, and End Date & Time fields using the corresponding fields from your WPForms form.
- Fill out any other fields as needed.
- Click Continue.
10. Test your Zap
- Click on Test & Continue.
- If the test was successful, you should see a new event in your Google Calendar with the details from the form entry.
11. Activate your Zap
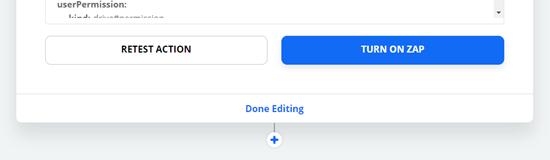
- Click on Turn on Zap.
Now, whenever someone fills out the form on your website, an event will automatically be created in your Google Calendar with all the appointment details!
Remember, this is a basic guide. You can further customize your form and your Zap as needed to suit the needs of your dog walking business.

4. Marketing Your Dog Walking Business
With your website ready, it's time to spread the word about your new dog walking business.
Social media platforms like Facebook and Instagram can serve as effective channels for promoting your services and engaging with potential clients. You can use hashtags and location tags to build a local following.
Registering your business on Google My Business will make it easier for people to find your services in local searches and Google Maps.
Remember, word-of-mouth marketing can be an invaluable asset for your business. Encourage your clients to share their positive experiences with their network.
Collaborating with other local businesses, such as vet clinics or pet supply stores, can also be a fruitful approach to broaden your customer base.
Consider offering a referral bonus or a first-time customer discount to attract new clients. With MemberMouse's coupon feature, you can easily set up and distribute these discounts.
Summing Up
Starting your own dog walking business allows you to blend your love for animals with an exciting career or side hustle. With WordPress and MemberMouse, setting up an efficient, user-friendly, and professional-looking website is a breeze.
To summarize, here are the steps for launching a dog walking business using WordPress and MemberMouse:
- Set up your WordPress website
- Build your membership site with MemberMouse
- Connect WPForms to Google Calendar via Zapier for easy scheduling
- Market your new dog walking business
It's time to take your passion for dogs and your entrepreneurial spirit and create a business that brings joy to both you and your four-legged clients.
So what are you waiting for? Grab a leash, and let your dog walking journey begin!
Got any questions or comments for us? Feel free to share them with us in the comments below.
If you liked this article, be sure to follow us on Facebook, Twitter, YouTube, and LinkedIn!


