Note: Courses for MemberMouse is available for all current MemberMouse plans: Basic, Plus, Pro and Elite. Quizzes and Certificates are available for Plus, Pro and Elite plans. Legacy Premium and Professional MemberMouse plan customers will also have access to Courses, Quizzes and Certificates.
Those on other legacy MemberMouse plans will need to switch to a currently offered plan for access to the courses extension.
Install the Courses for MemberMouse Extension
Installing the Courses for MemberMouse extension is easy. Begin by visiting MemberMouse > Courses. There, you can click the blue button labeled Install & Activate MemberMouse Courses. After installing the extension, it will automatically activate and you will be redirected to the Courses page, where you can create your first Course.
If you don't see the MemberMouse > Courses menu item, update the MemberMouse plugin to the latest version to gain access to it.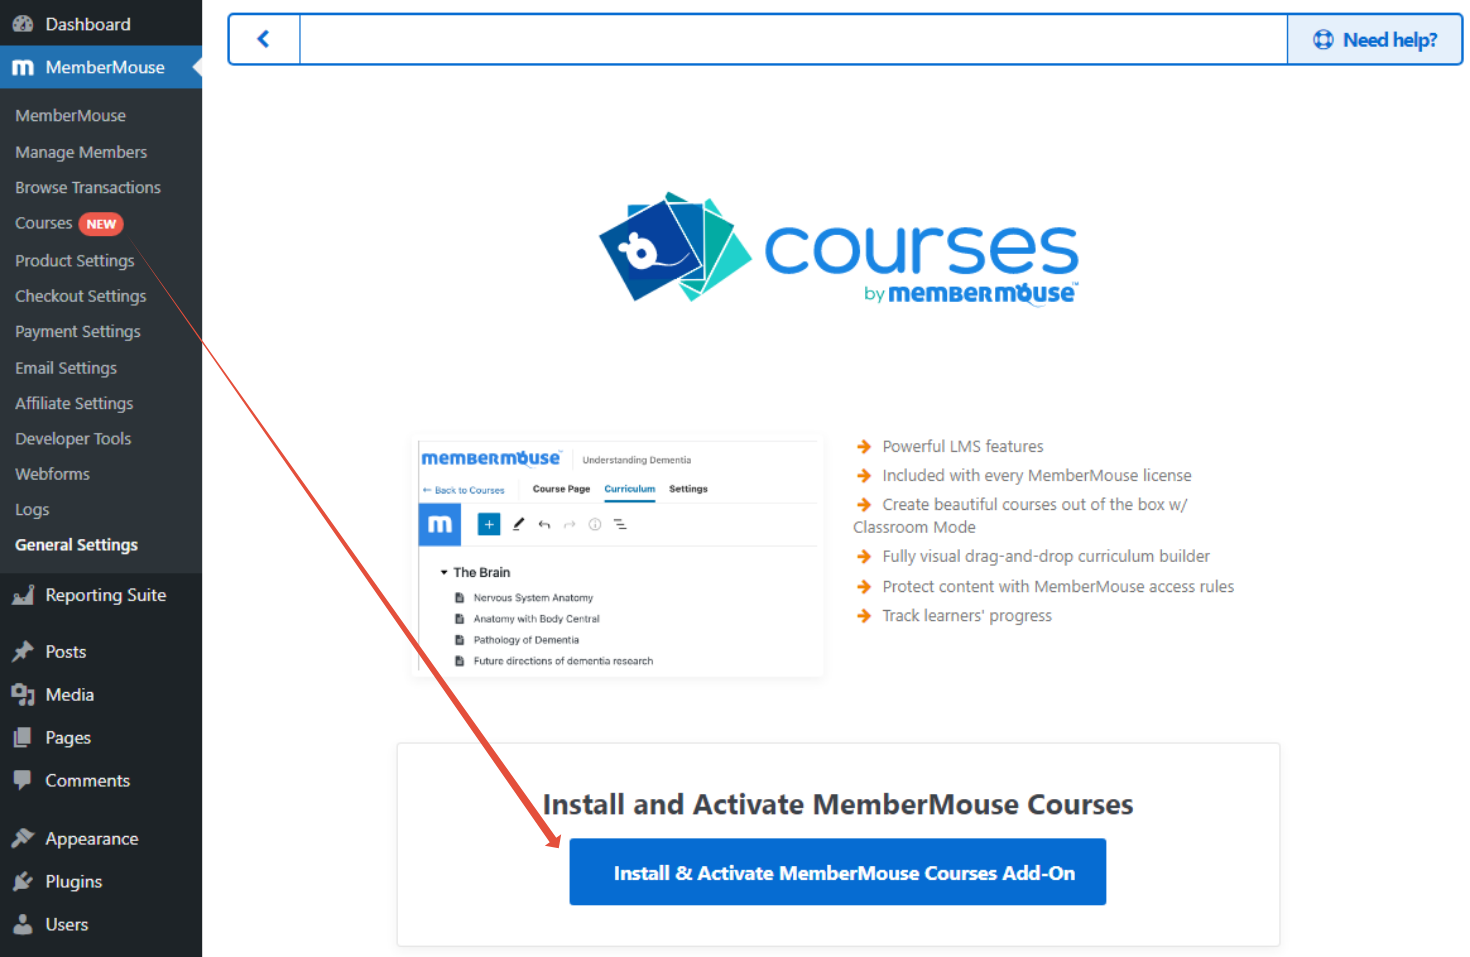
Create Your First Course
Note: Please be sure you use the standard WordPress Gutenberg editor while working with Courses. Other editors can be used in other parts of the site, but not while working on Courses specifically.
After installing the Courses extension from the steps above, you are now ready to create your very first course. If you don't have your content/layout fully put together on paper, pause and take a few minutes to write down your course title, section headings, and the name of each lesson. This will help you assemble the basic frame of your course quickly, and you can build on it and fill in the small details later.
To begin, visit your new MemberMouse > Courses page, and you'll see the following buttons at the top:
Click the Add New button to add a new Course.
Course Page
Give your Course a catchy title and some content below the title. This content will show up as the course overview/description on the front end. Please do not add your curriculum or course layout here; we'll do that in the next step below.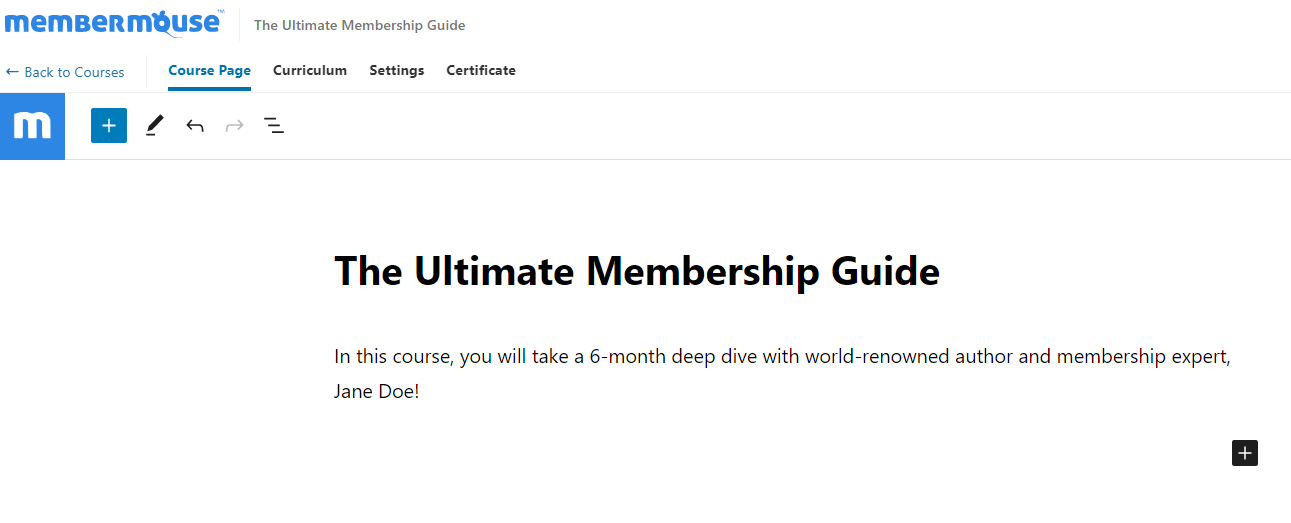
Curriculum
Once you've created your course title and description, click on the Curriculum tab at the top to add your Sections and Lessons.
Add as many Sections as your course may require. In the next steps, you will add your Lessons within those Sections. Think of Sections as containers or modules that help you organize your Lessons into groups.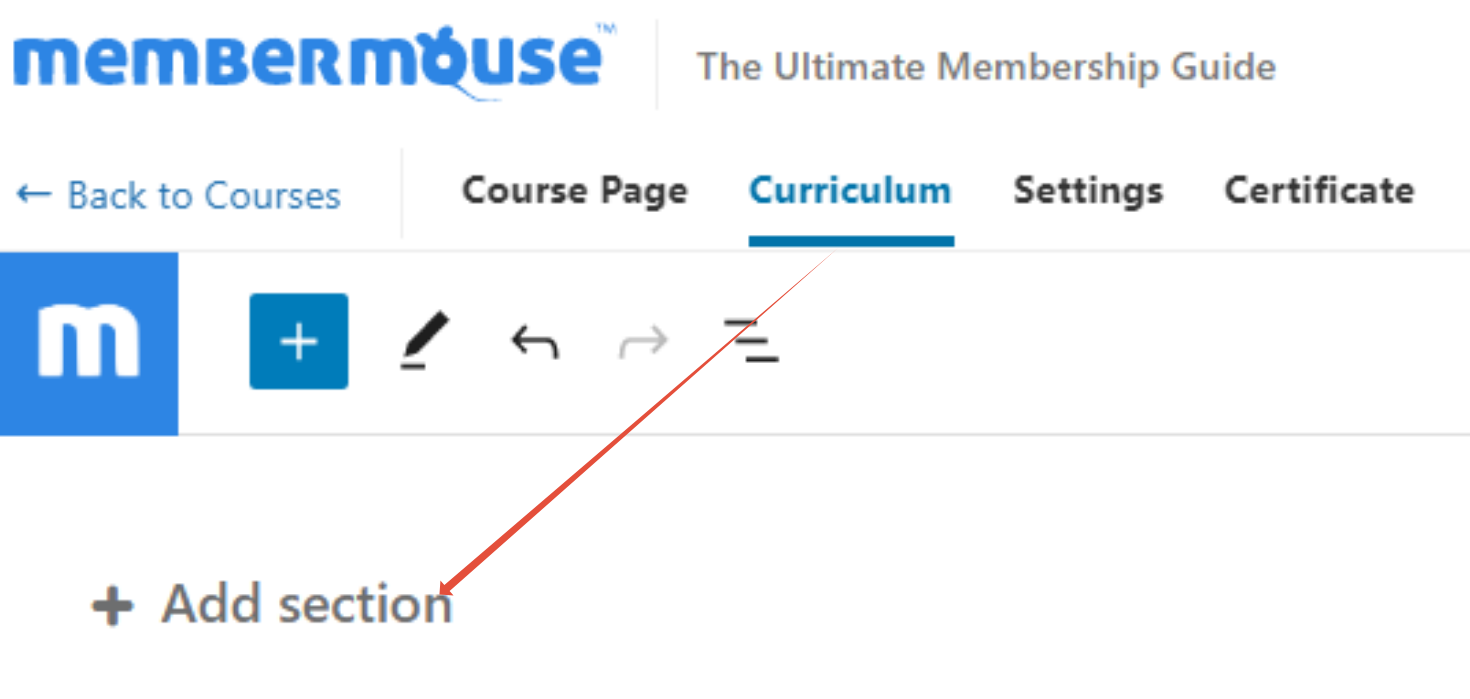
Below is an example of how you might layout your Sections: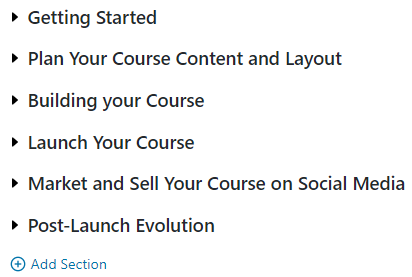
Expand each Section to add Lessons or a Quiz. The below screenshot provides greater clarity on where to add the Lessons and Quizzes: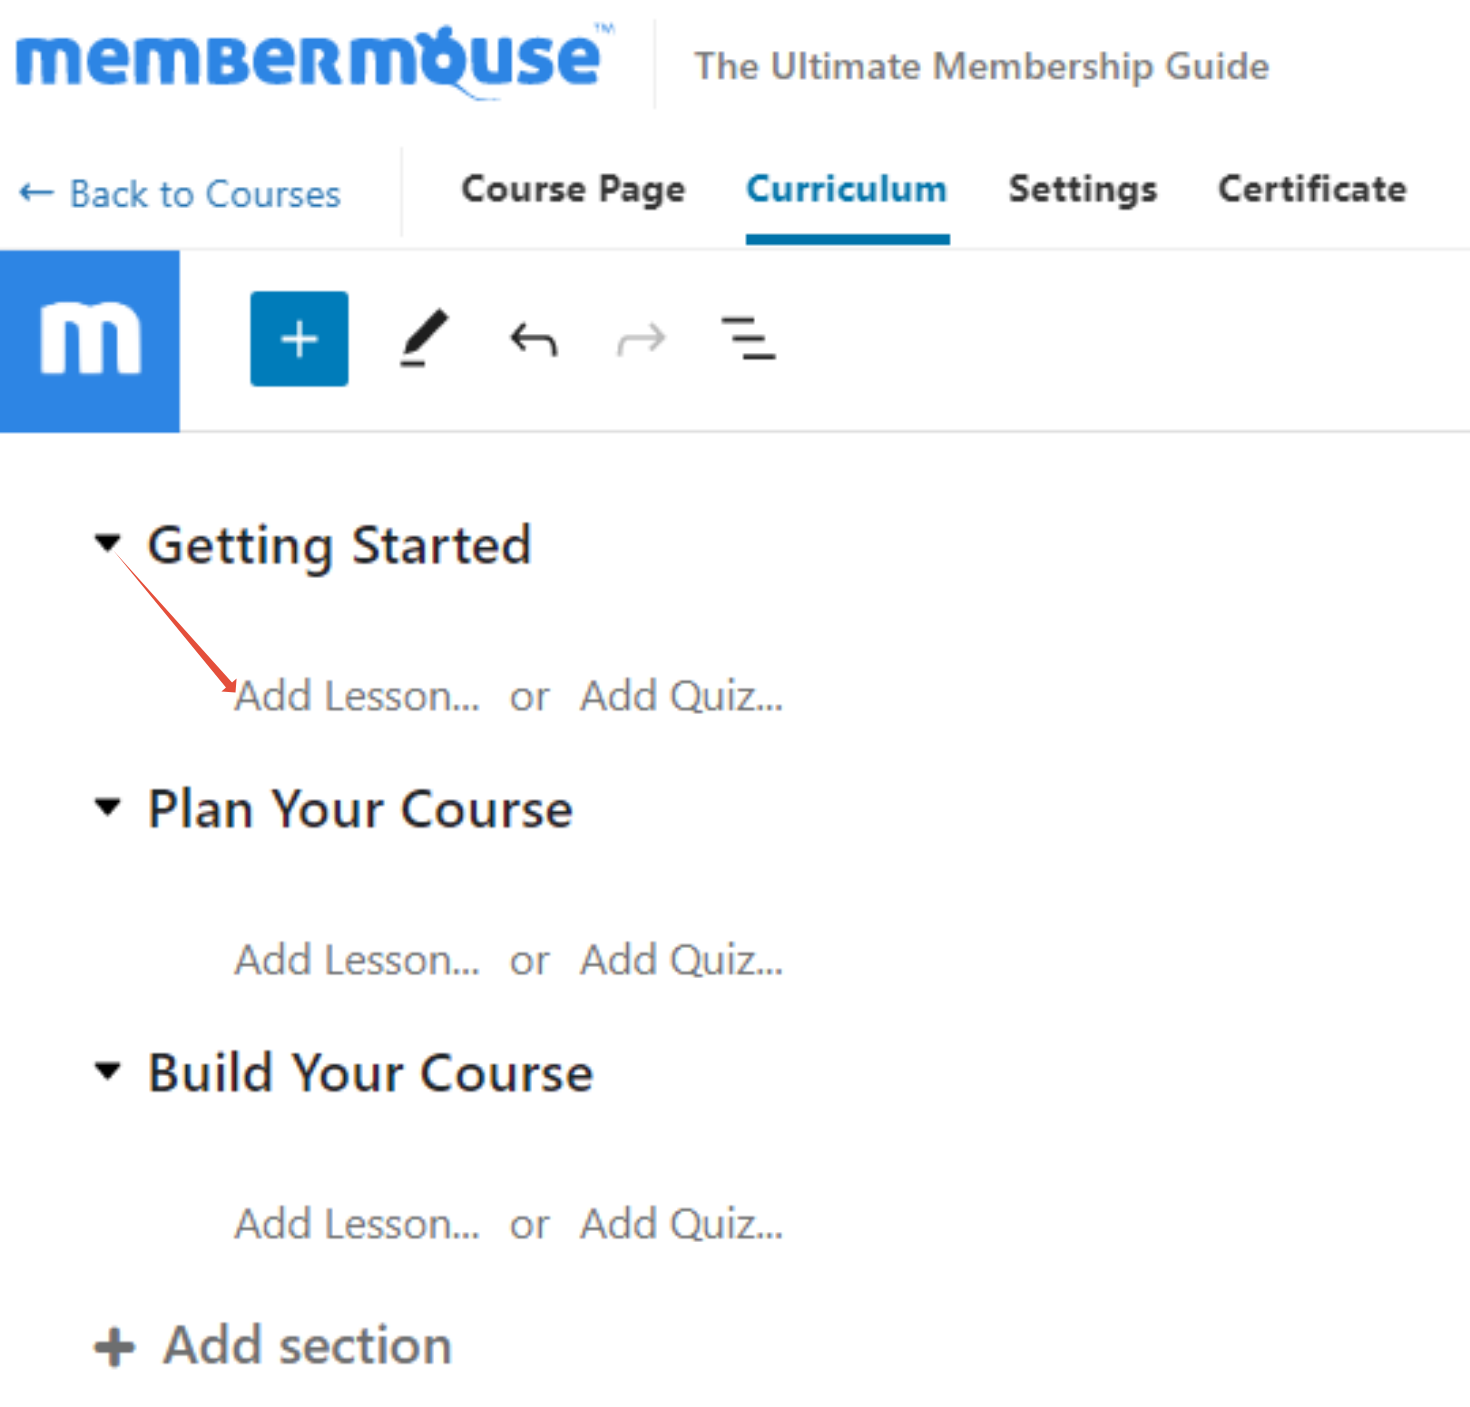
Note: For more info on how to use MemberMouse Quizzes, learn more here.
As you add Sections, Lessons, or Quizzes, they will be displayed on the front end as an accordion in the sidebar of your lessons: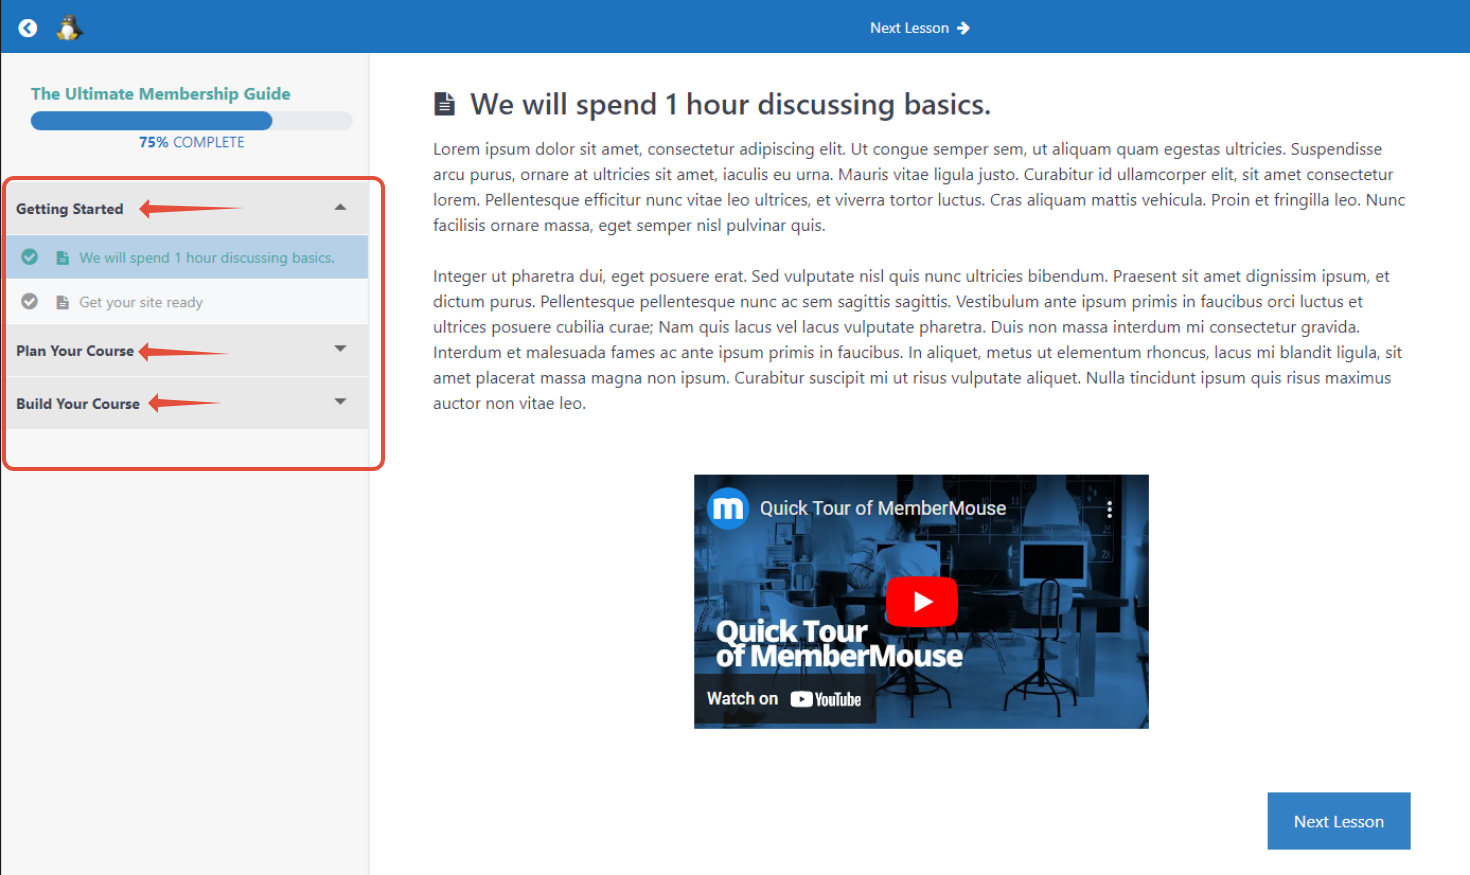
Once a Lesson or Quiz is created, it will show up in a Panel Area on the right side of the admin page.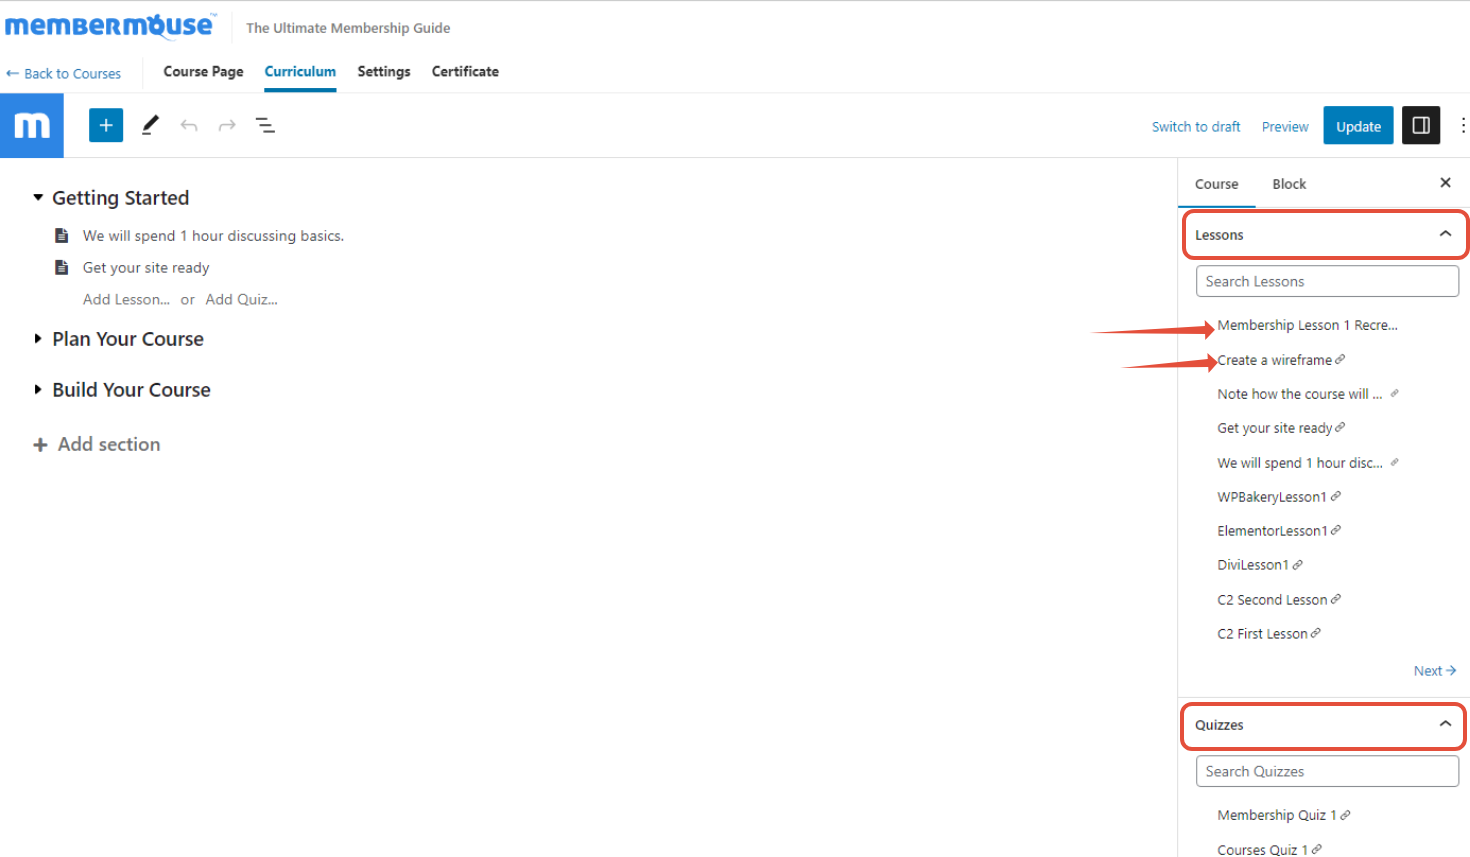
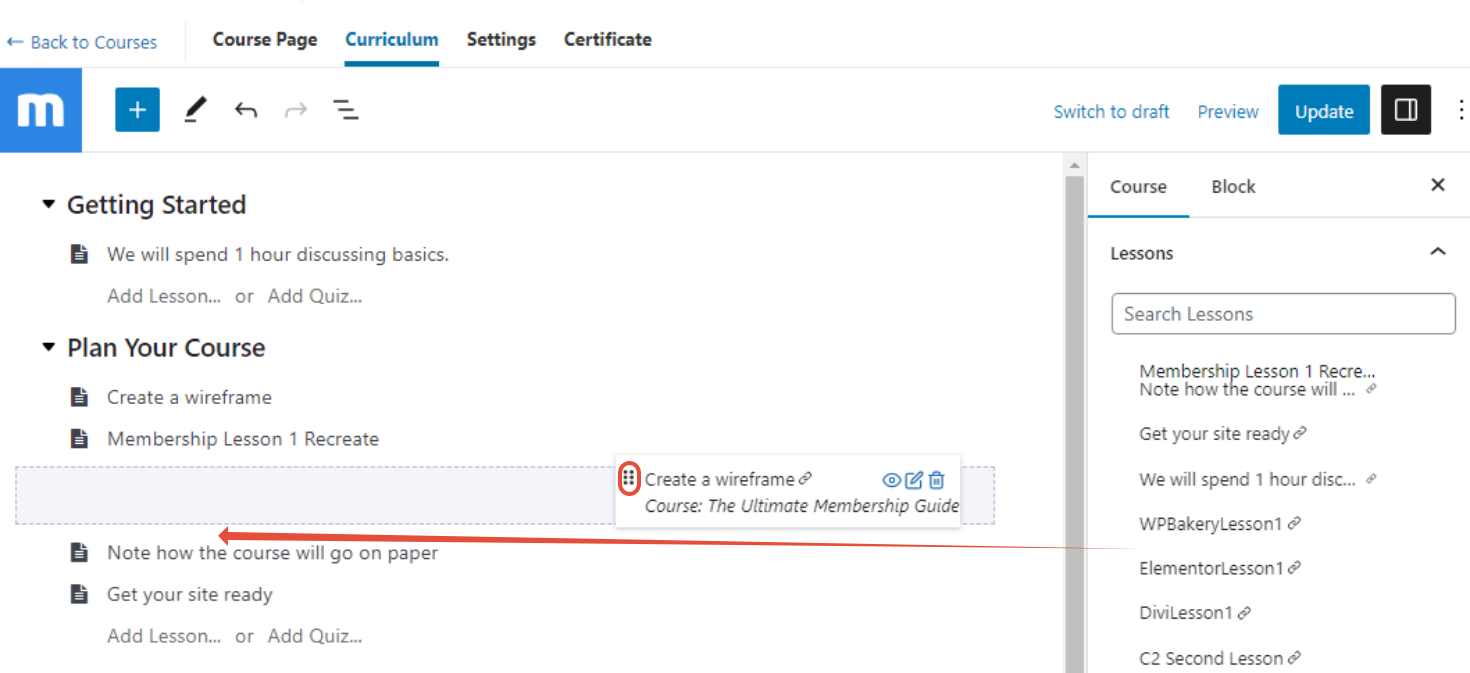
You can search for existing Lessons and use the grid icon on the left to drag Lessons into the appropriate Section, of your Course. If the Lesson already exists in another Course or Section, it will be moved to a new location.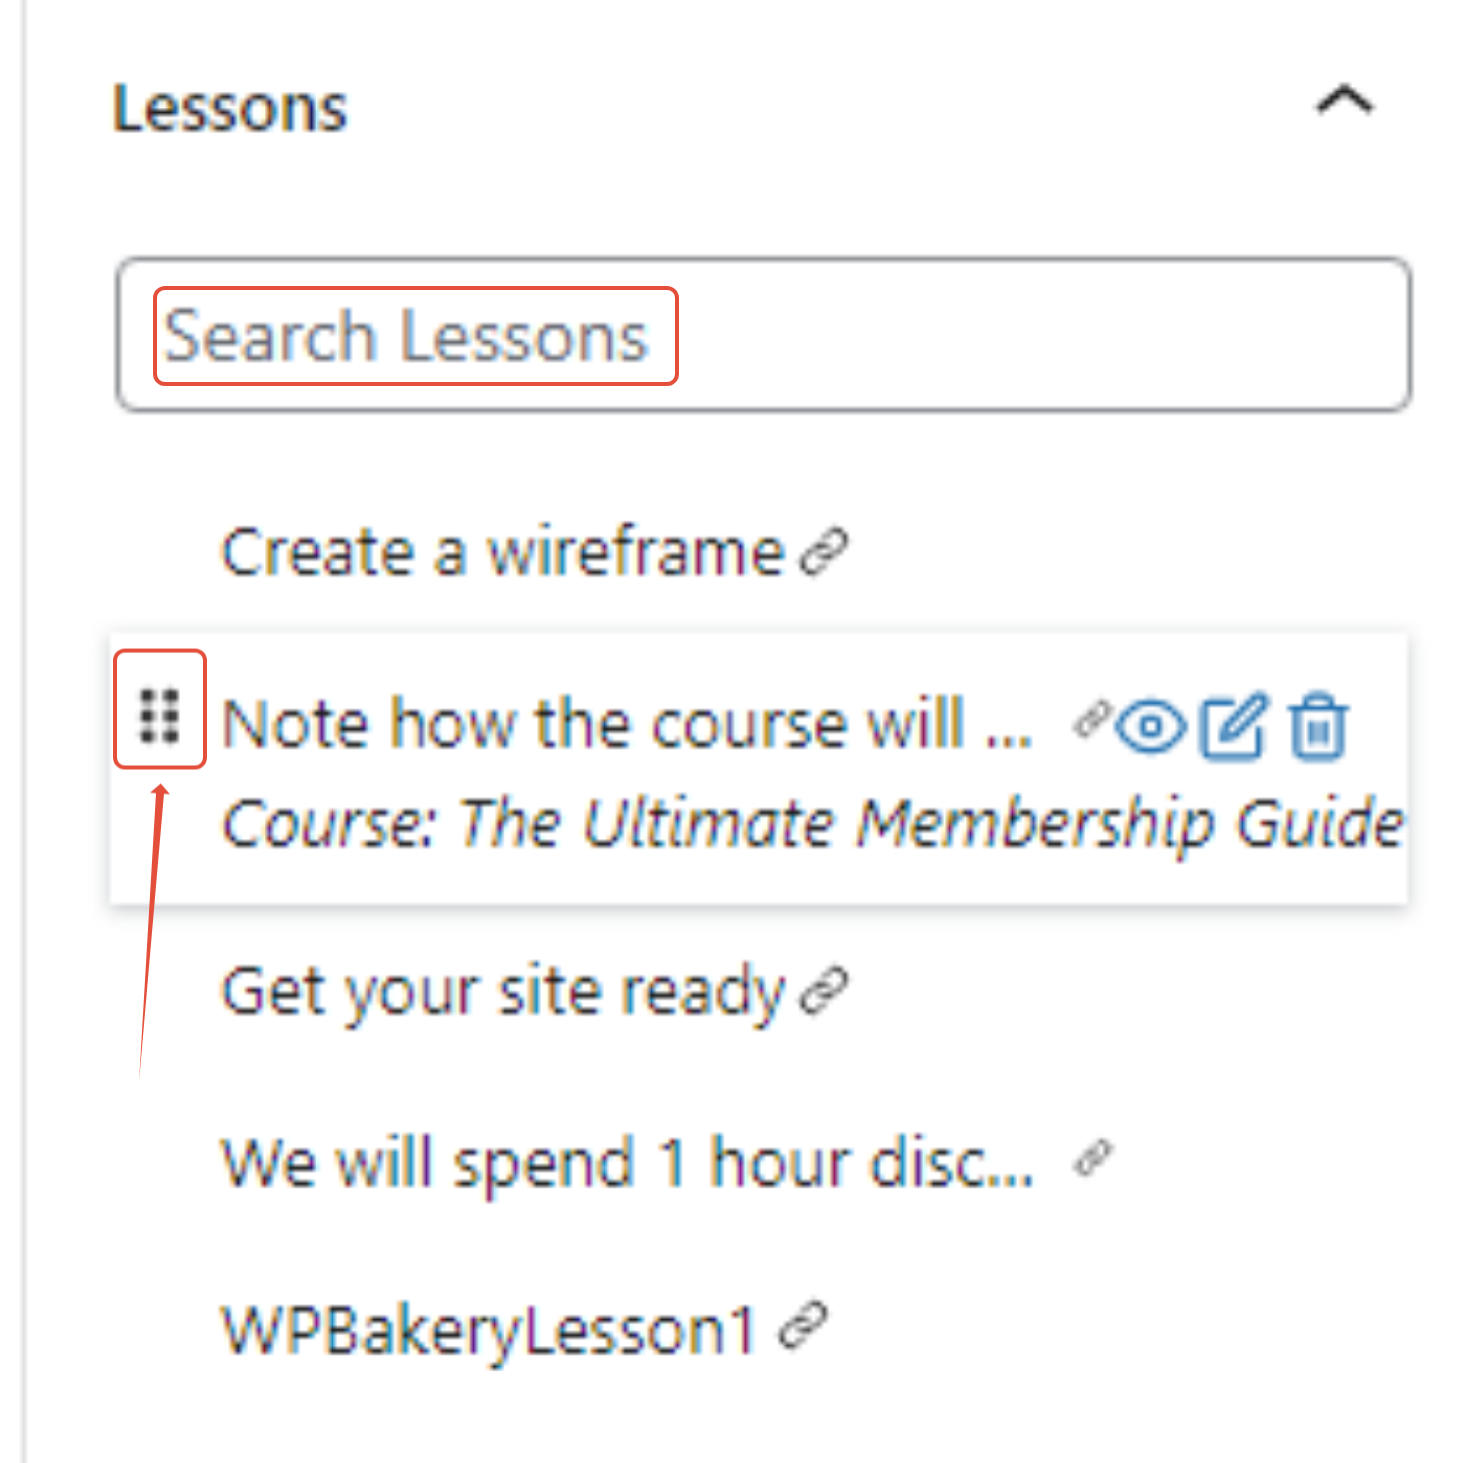
To Edit a Lesson or Quiz, click the edit icon next to it. You will be redirected to the editor for that Lesson and you can return once complete: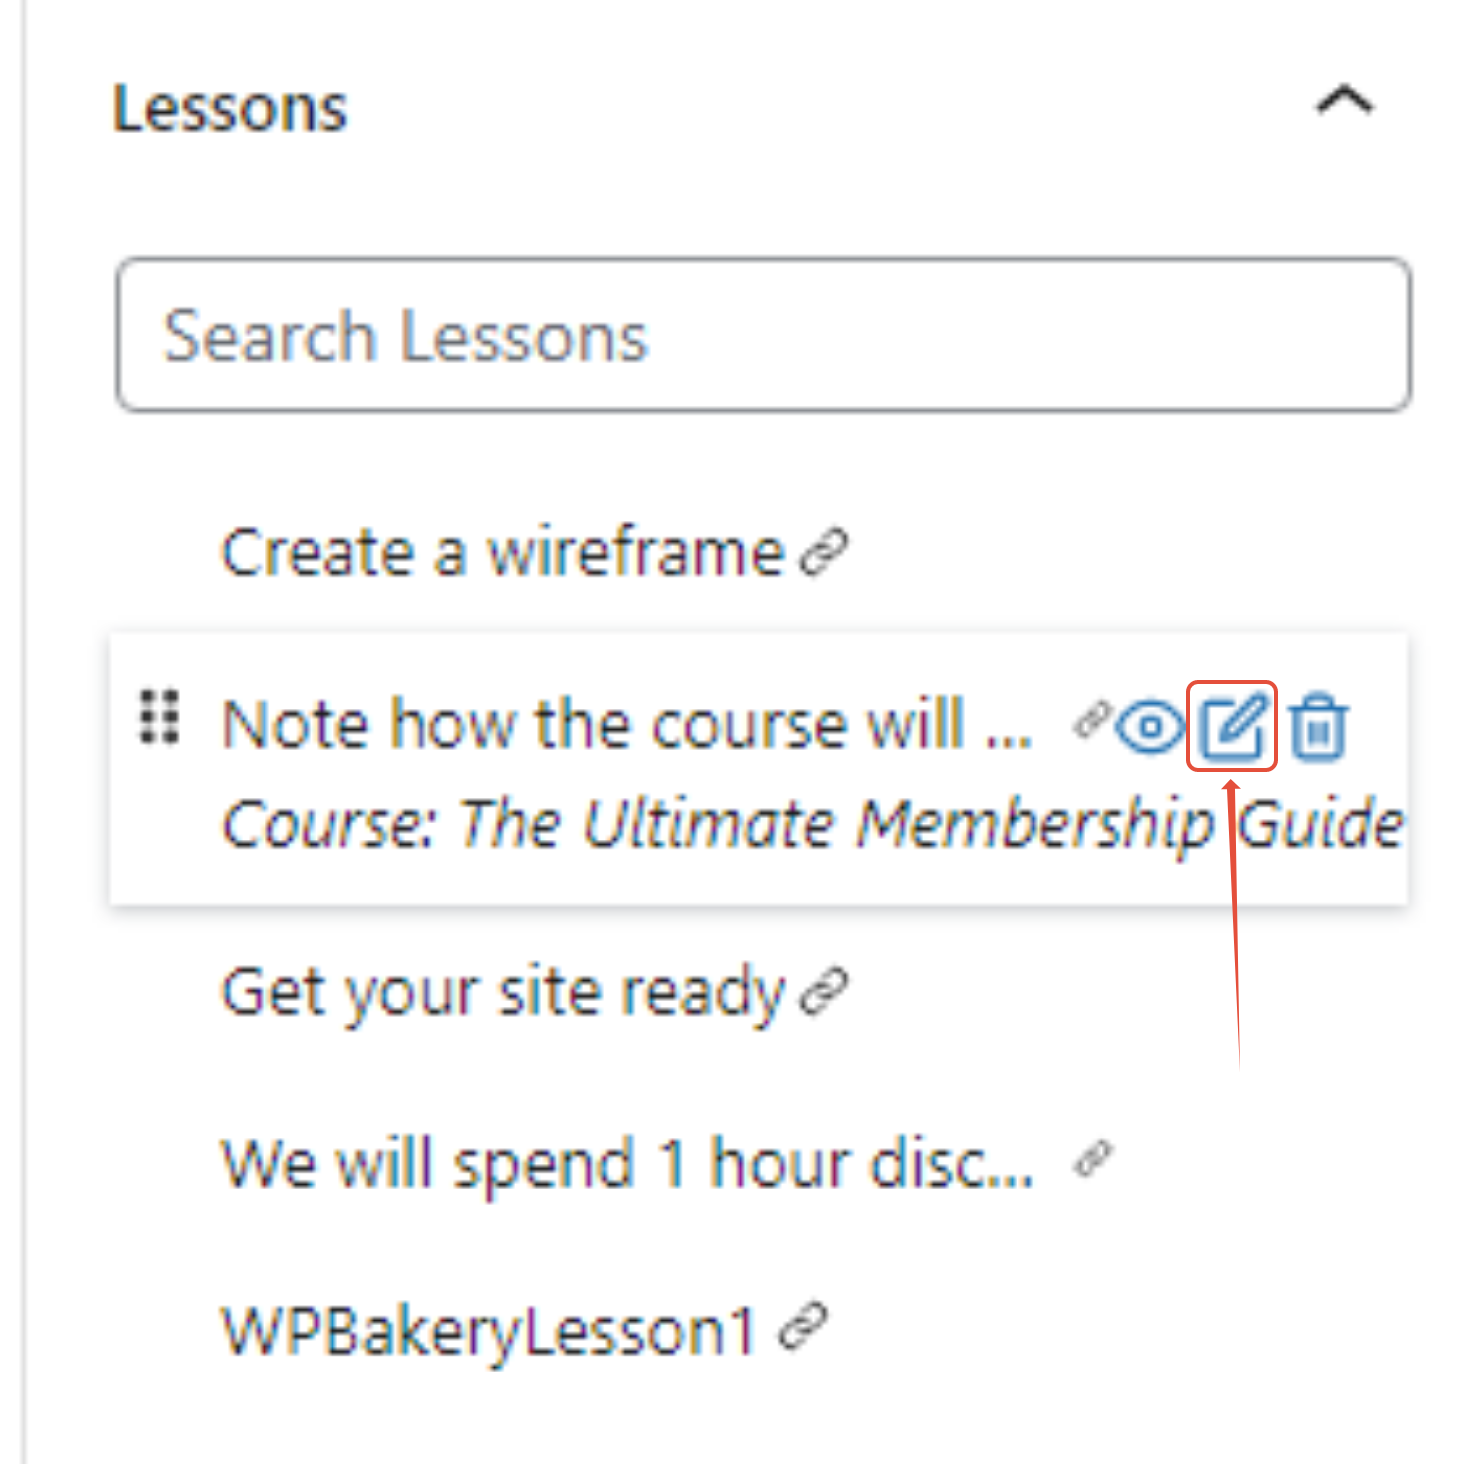
To View a Lesson or Quiz, click the view icon next to it. This will open the lesson for viewing on the front end in a new window or tab in your browser: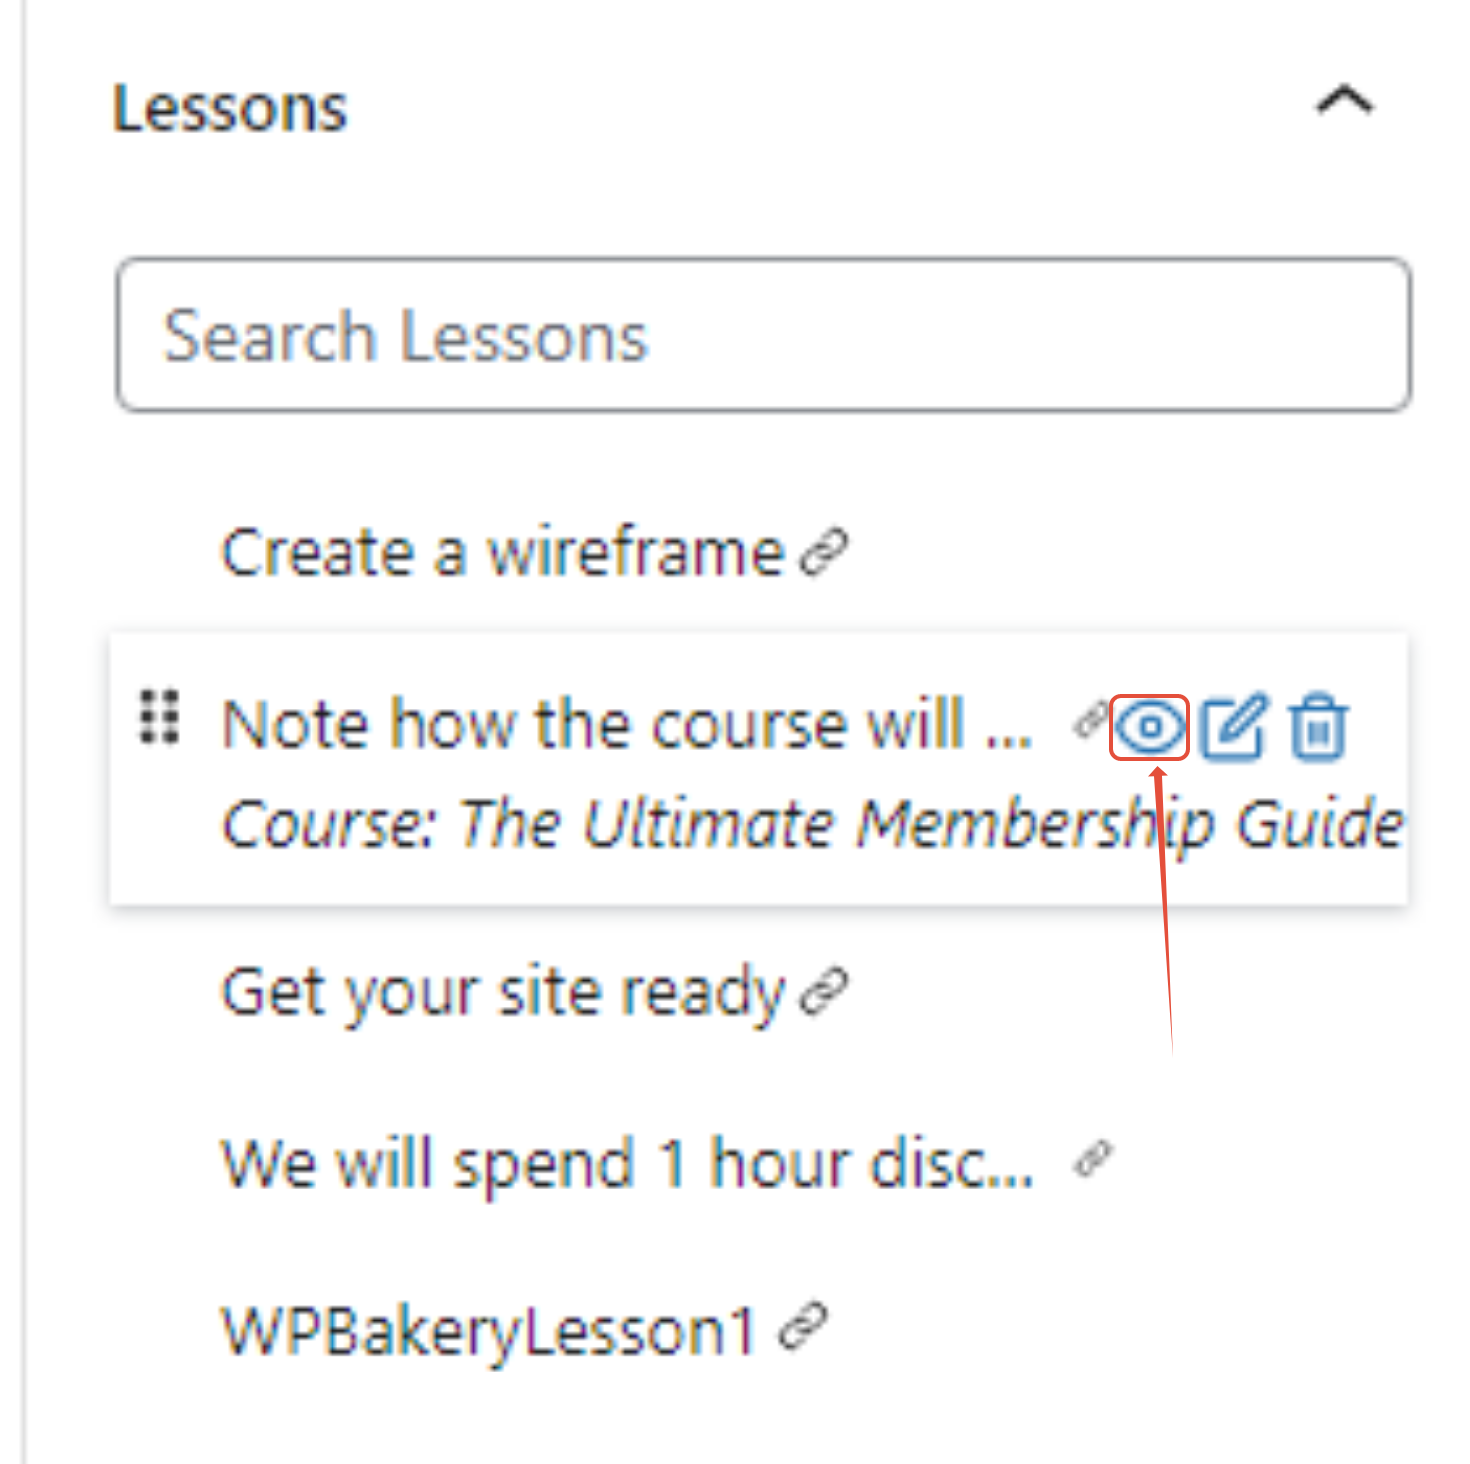
To fully delete a Lesson or Quiz, click the trash icon next to it.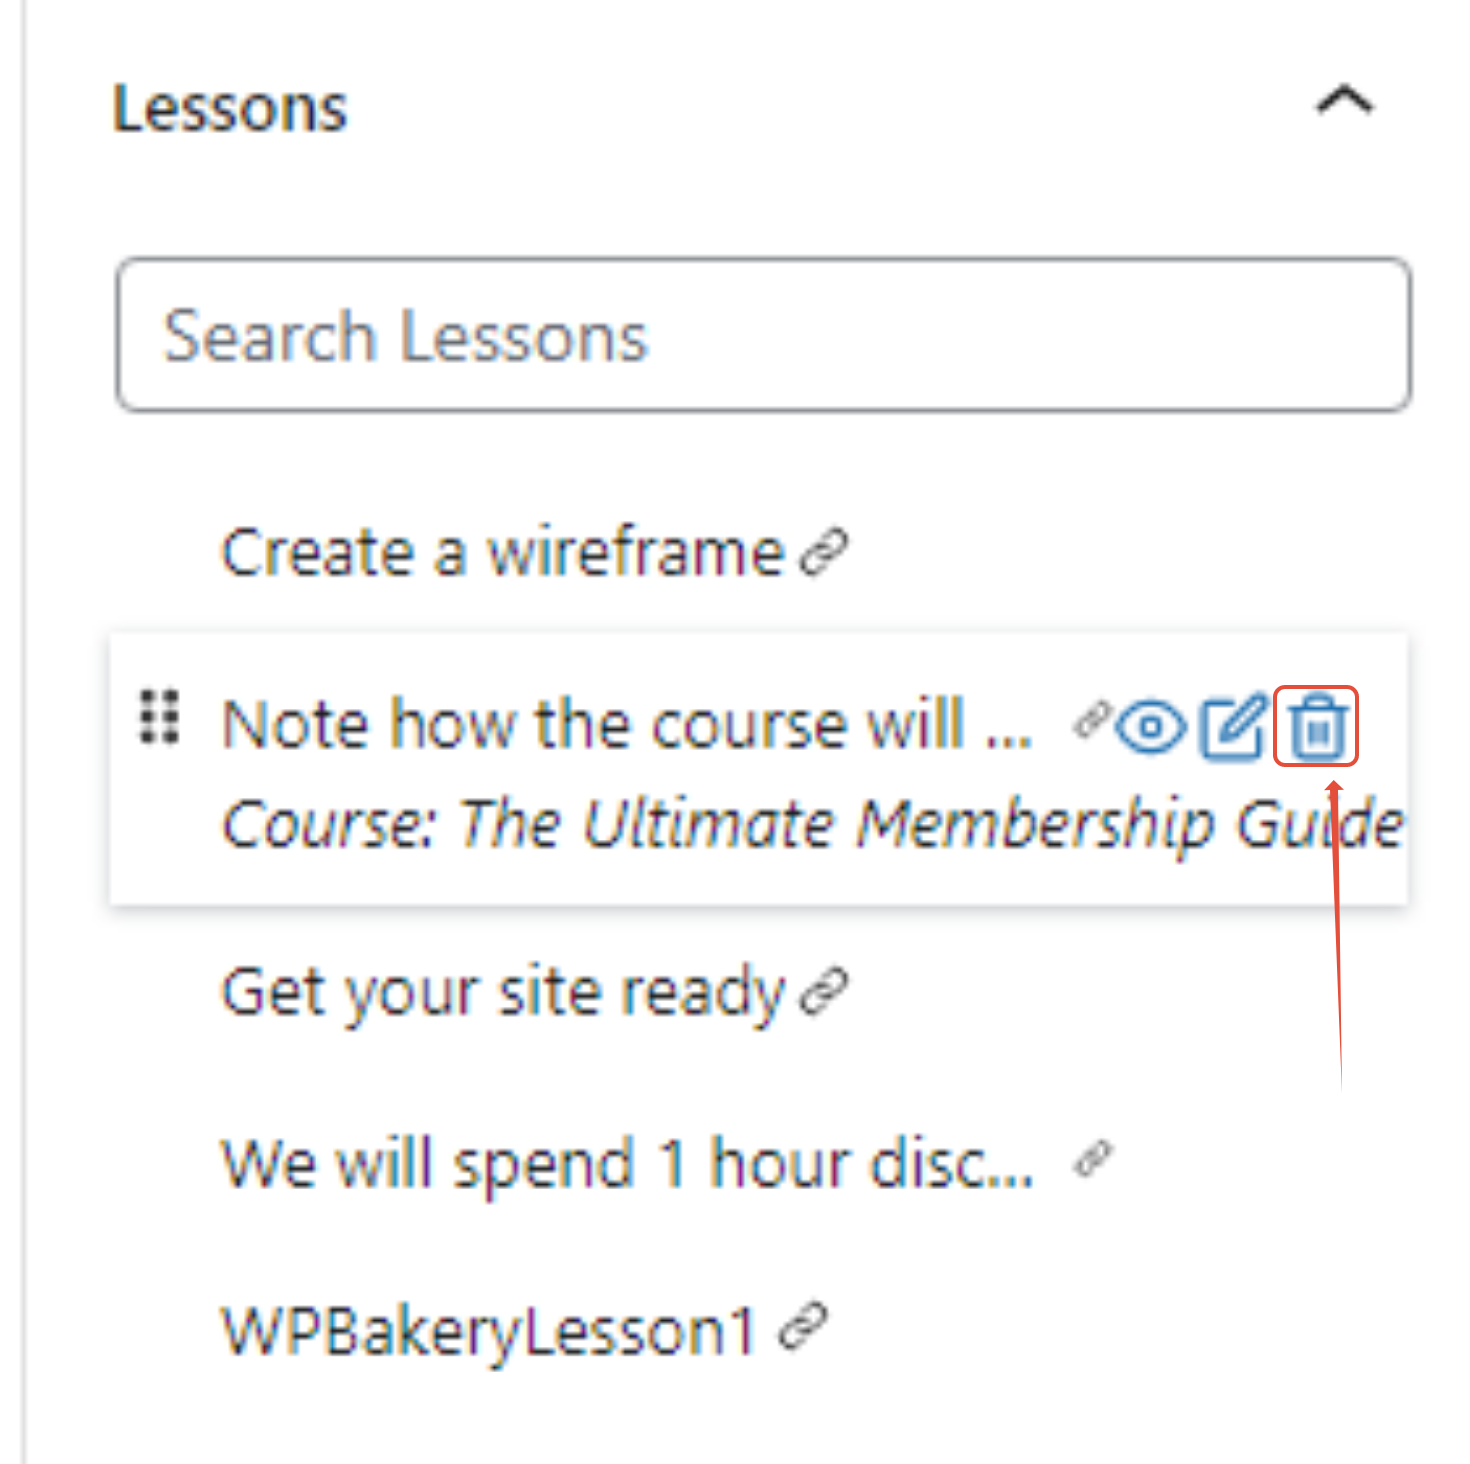
Once you've finished filling out your Curriculum, head to the Settings page to configure your Course Settings.
If you happen to be editing a Lesson or Quiz, you can return to your Course by clicking the Back to link at the top of the editor. Once you are back in the Course, you will see the Settings tab at the top of the screen: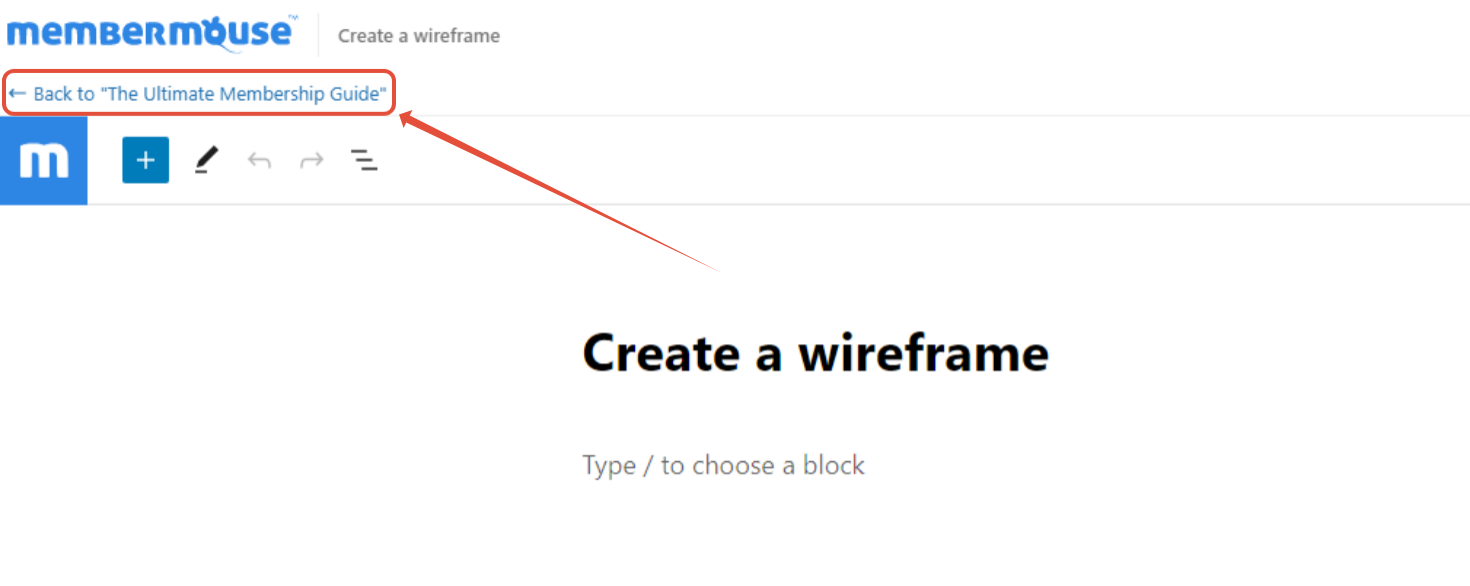
Settings
Course-Specific Settings
Course-specific settings can be found when editing a course and clicking the “Settings” tab.
The first setting you'll see is the option to Include in Course Listing. The Course Listing page is a page on the front end of your website where all of your Courses are displayed in a nice, searchable grid. Typically found at https://yoursite.com/courses/
If the option is disabled, the course will not display in the normal grid, and only users who you have provided a link to, will be able to locate it. A private course would be a good example of disabling this option.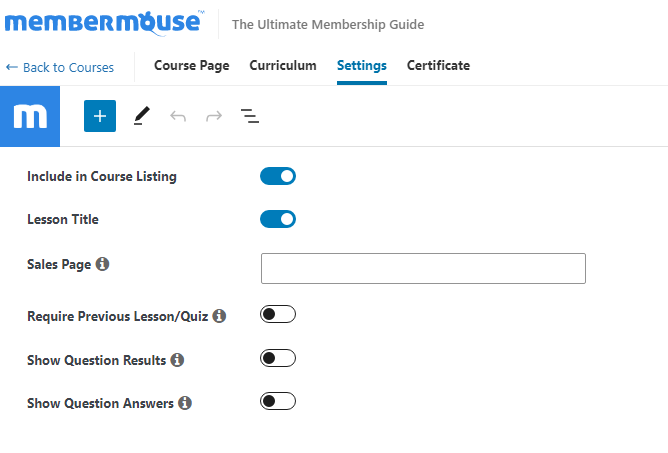
The second setting you'll see is the Lesson Title. This option controls whether the Lesson and Quiz titles are to be displayed on the front end. Titles will be enabled by default. On the other hand, you can hide these titles on all your Lessons and Quizzes by disabling this option.
The third setting you'll see is the Sales Page URL setting. Here is where you will add the full URL to your sales page, or the Purchase Link that provides access to your Course. This link is where a user will be directed if they try to access a course that they do not have Access Rights to, pushing for them to first purchase so they can gain access.
If you're unsure where your Purchase Link is, you can find them in the Purchase Link column in Product Settings. Learn more about Purchase Links here.
Once you have gathered the correct Purchase Link to sell access to that course, paste the Static Link URL into the Sales Page field as shown in the screenshot below: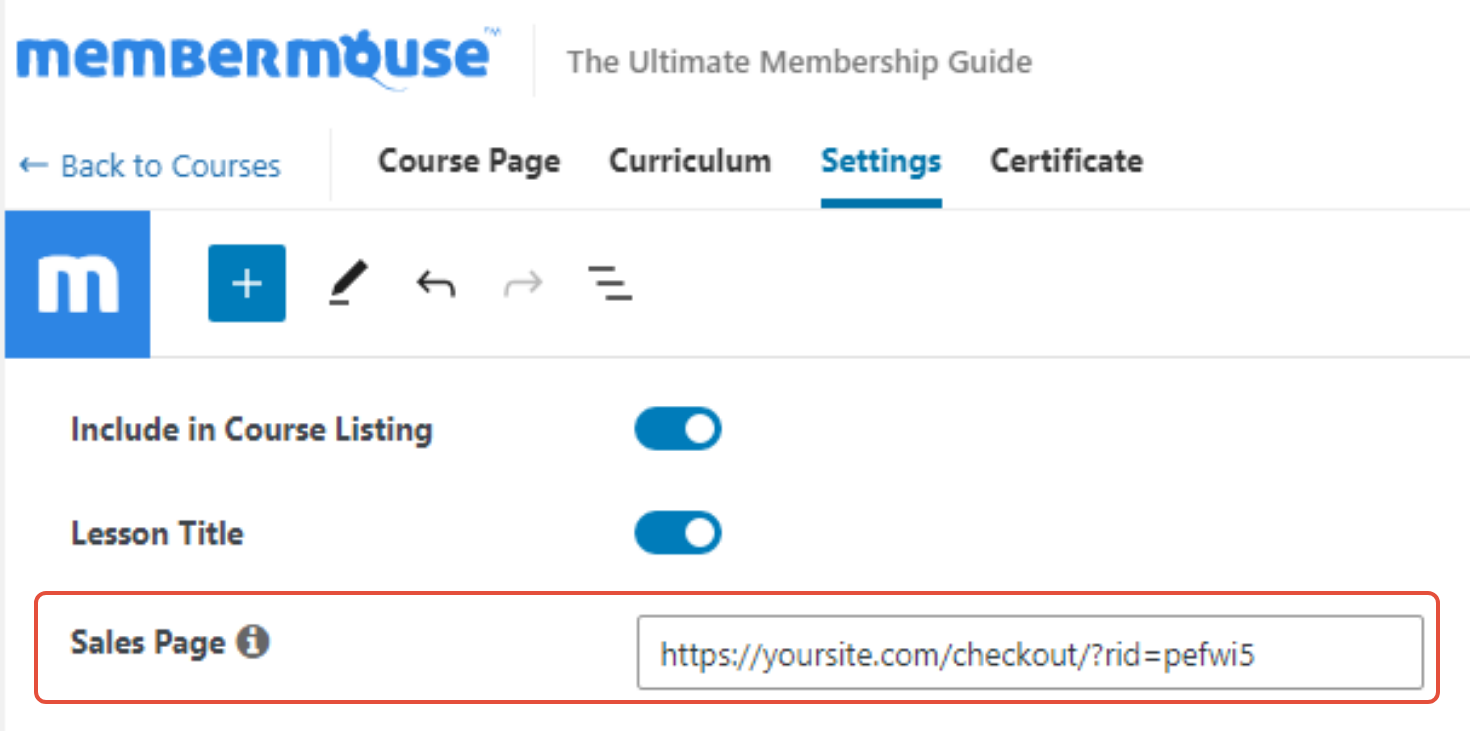
Note: Only a Static Purchase Link will work in the above option. SmartTag™ Purchase Links will not work for this option.
The fourth setting is Require Previous Lesson/Quiz. Enabling this option will require course participants to complete the previous lesson or quiz before proceeding to the next lesson or quiz.
The fifth setting is Show Question Results. With this option enabled, course participants will see whether the answer they provided on the quiz was correct: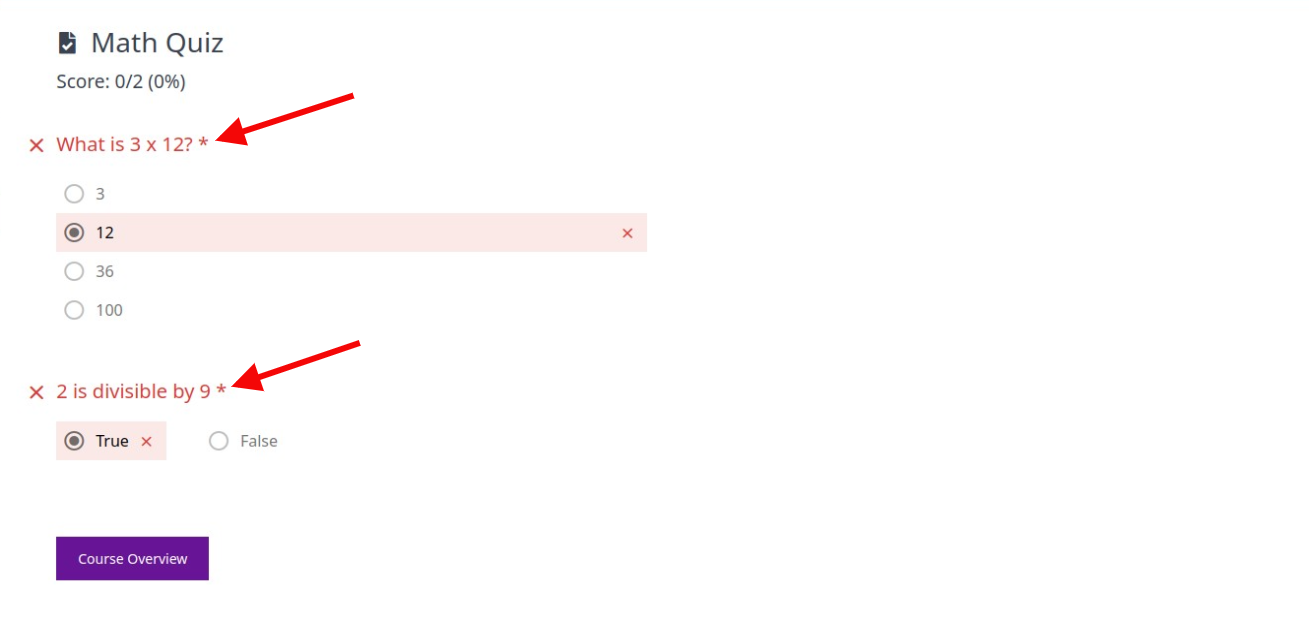
The last setting is Show Question Answers. With this option enabled, course participants will see the correct answers after they've completed their quiz: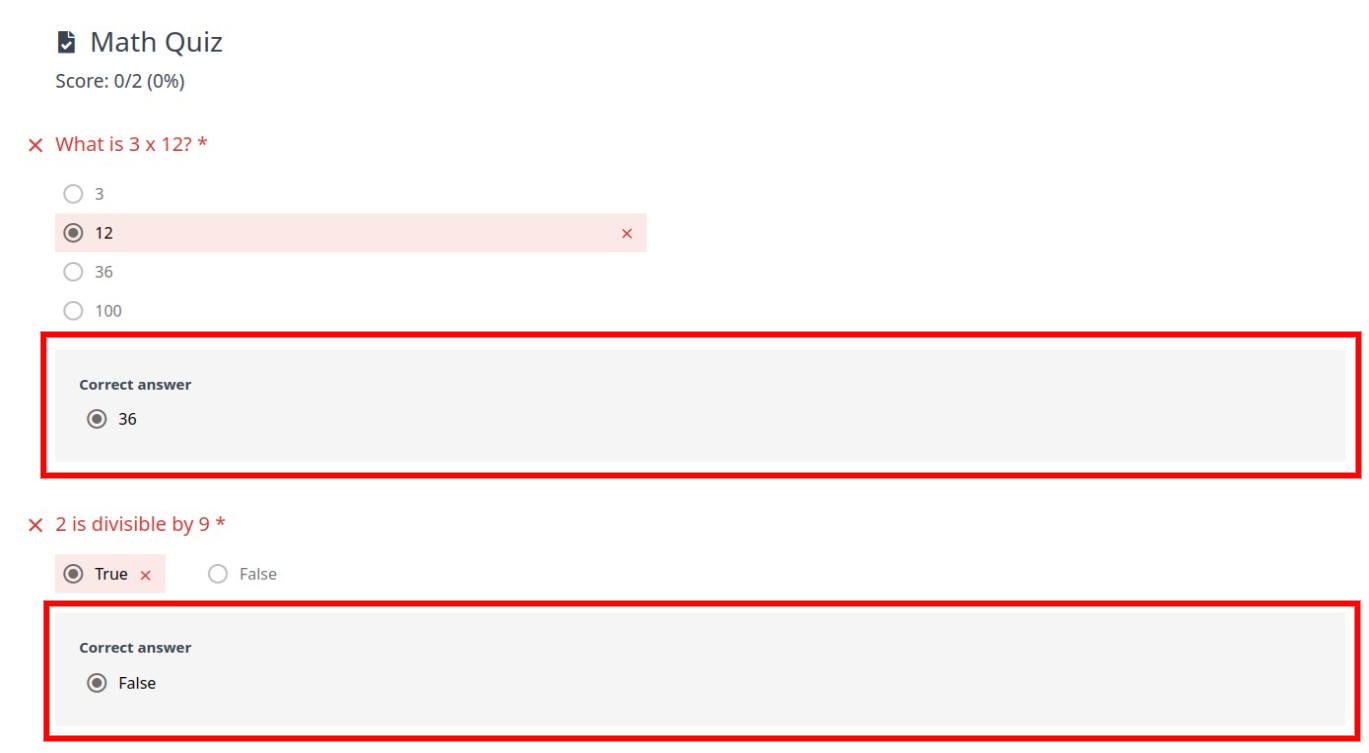
Global Course Settings
Global course settings can be found in the Courses area of MemberMouse, then clicking the Settings button.
Once you navigate to the Global Course Settings page, the first checkbox option you will see is to enable or disable the Courses Extension.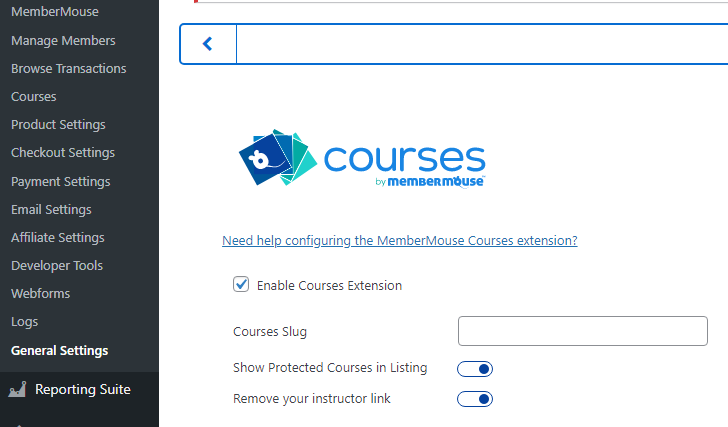
The second setting is Courses Slug. By default, the slug will be “courses” when the field is left blank.
You can use this optional field to change the slug to meet your needs by adding the wording desired with no spaces, slashes, or special characters aside from a dash.
Note: If you choose to change the slug, you need to also save the WordPress Settings > Permalinks page without making any changes to it. This will refresh the permalink structure and allow your new slug to work.
The second setting is Show Protected Courses in Listing. By default, protected courses are displayed on the Course Listing page, so members who do not have access yet are tempted into purchasing access. A padlock icon will appear before the course title if access is not available to that user. Disabling this option will hide protected courses from the Course Listing page.
The last setting is the Remove your instructor link. By default, a link to the instructor/author of the course will be displayed when viewing a course. Enabling this option will hide this link.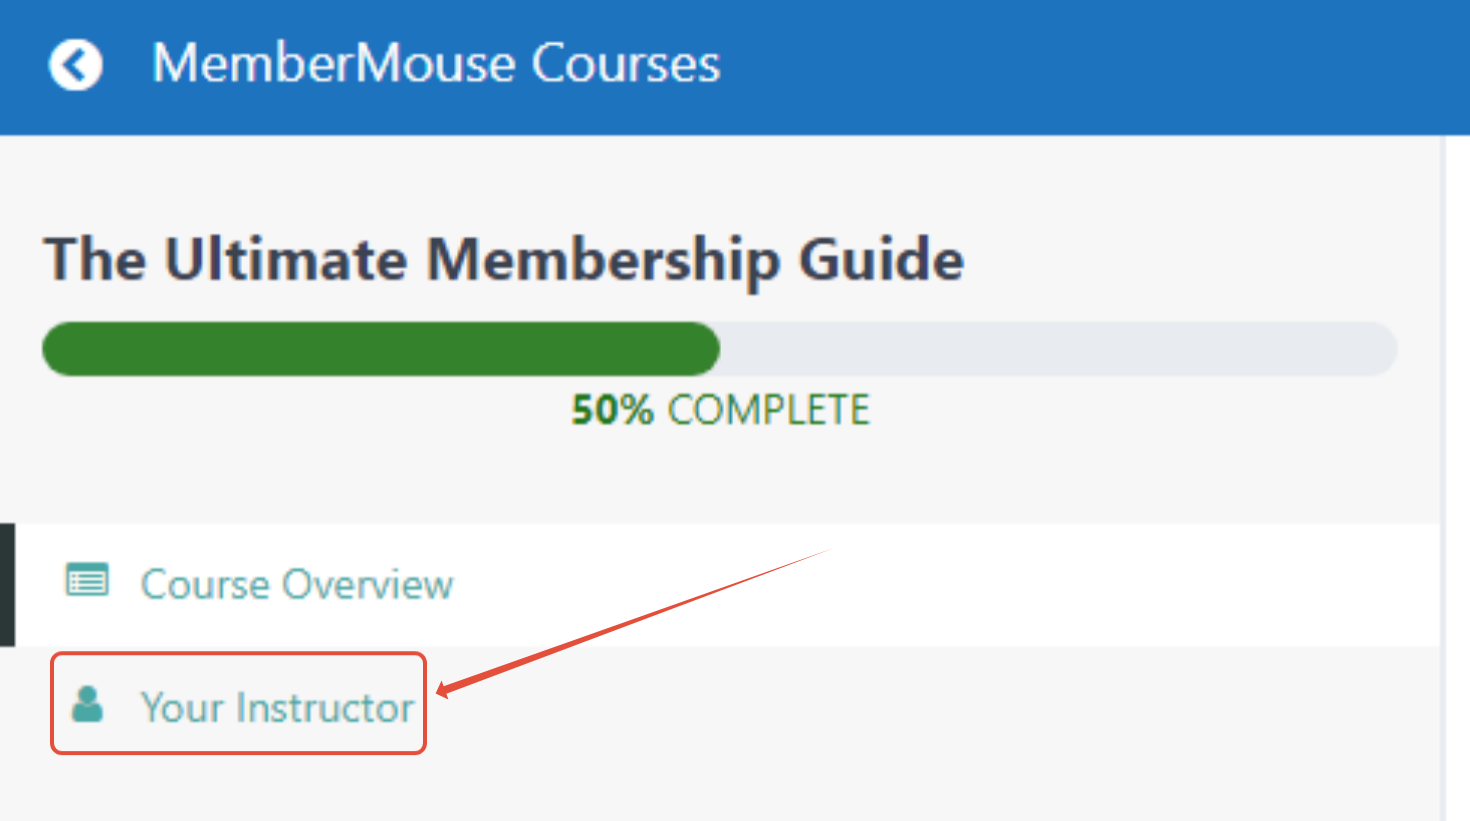
The Administrator/Editor who creates the Course will be the instructor listed. If the link is enabled, users can see the author and click the link to read more about the instructor. By default, MemberMouse will display the Administrators/Editors Gravatar and any data entered into their WordPress User profile.
Classroom Mode
Classroom mode is enabled by default. Classroom mode is a page template commonly used to display pages in a classroom style. It completely bypasses your current theme style and uses the options below. If you prefer to use your current theme style, then disable Classroom mode.
Lower on the Global Course Settings page are the settings for Classroom Mode. Here you can adjust the colors used while in Classroom Mode, CSS classes for control over CSS, and adjustment of the Lesson button location.
- Brand Color – Use this field to change the background color of the navigation bar.
- Accent Color – Use this field to change the accent color.
- Progress Bar – Use this field to change the color of the progress bar, which shows how far a participant has progressed on their course.
- Menu Text Color – Use this field to change the color of the text in menu items.
- Classroom Logo – Use this field to add a custom logo to your course header.
- Lesson Button Location – Choose where to position the continue/back buttons when viewing a lesson. This can be set to either “Top”, “Bottom”, or “Both”.
- Complete Link CSS – Use this field to add custom CSS classes to the “Complete Lesson/Section/Course” links in each of your lessons.
- Previous Link CSS – Use this field to add custom CSS classes to the “Previous Lesson/Section” links in each of your lessons.
- Breadcrumb Link CSS – Use this field to add custom CSS classes to the breadcrumb links in each of your lessons.
- WP Footer Hook – Use this field to enable/disable the WordPress footer hook. Enabling this option will allow scripts (and possibly styles) to be loaded by other plugins and your site's theme.
Adding a Course Image
You can add a Course Image to make it identifiable on your Course Listing page. Additionally, it will display in the left sidebar of the courses, above the accordion.
To add a featured image, edit your Course and click on the Course Page tab at the top. Then, in the right sidebar, look for the Featured Image option. You can add an image here by following the standard WordPress image addition process.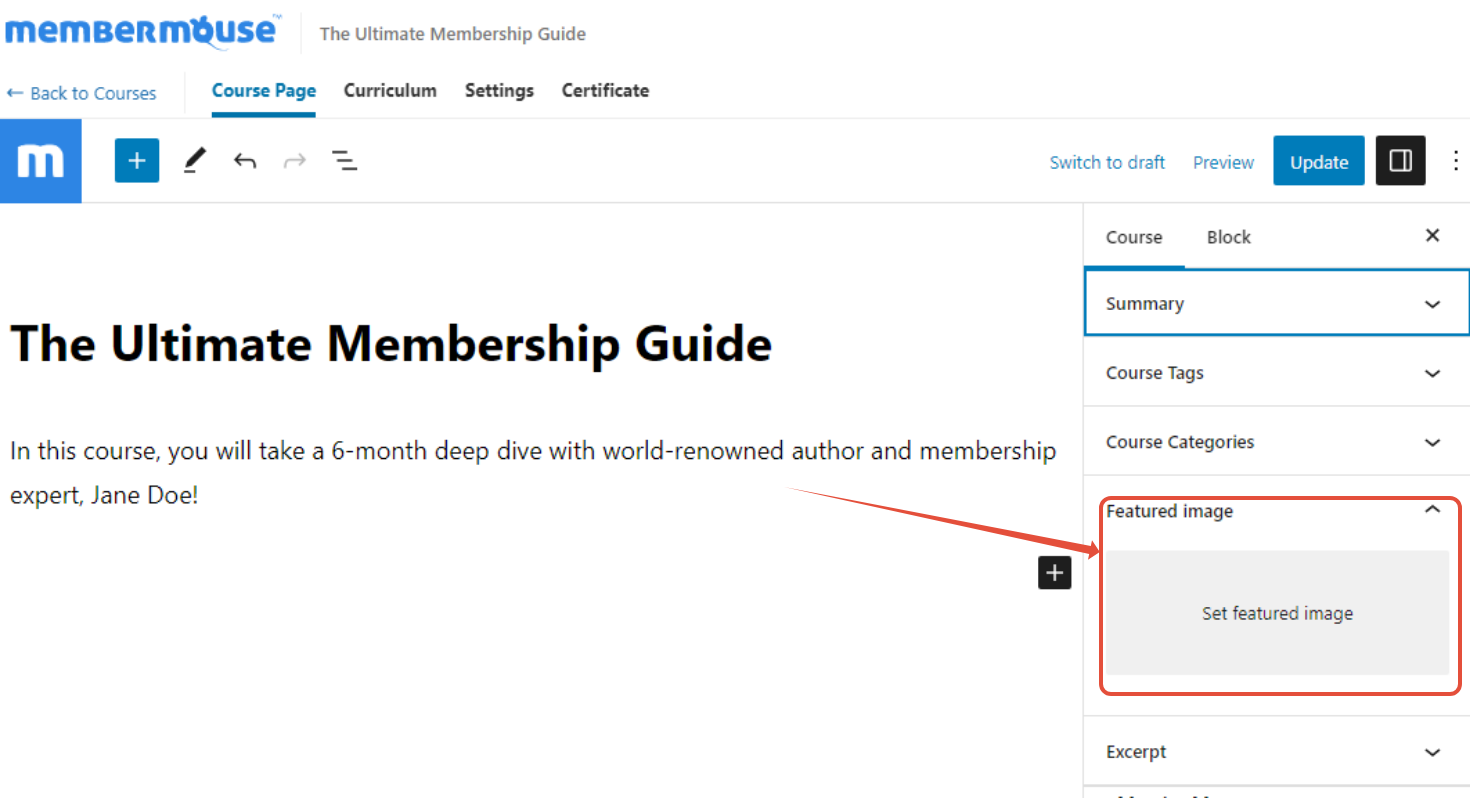
A featured Course image will show in the courses view, like this: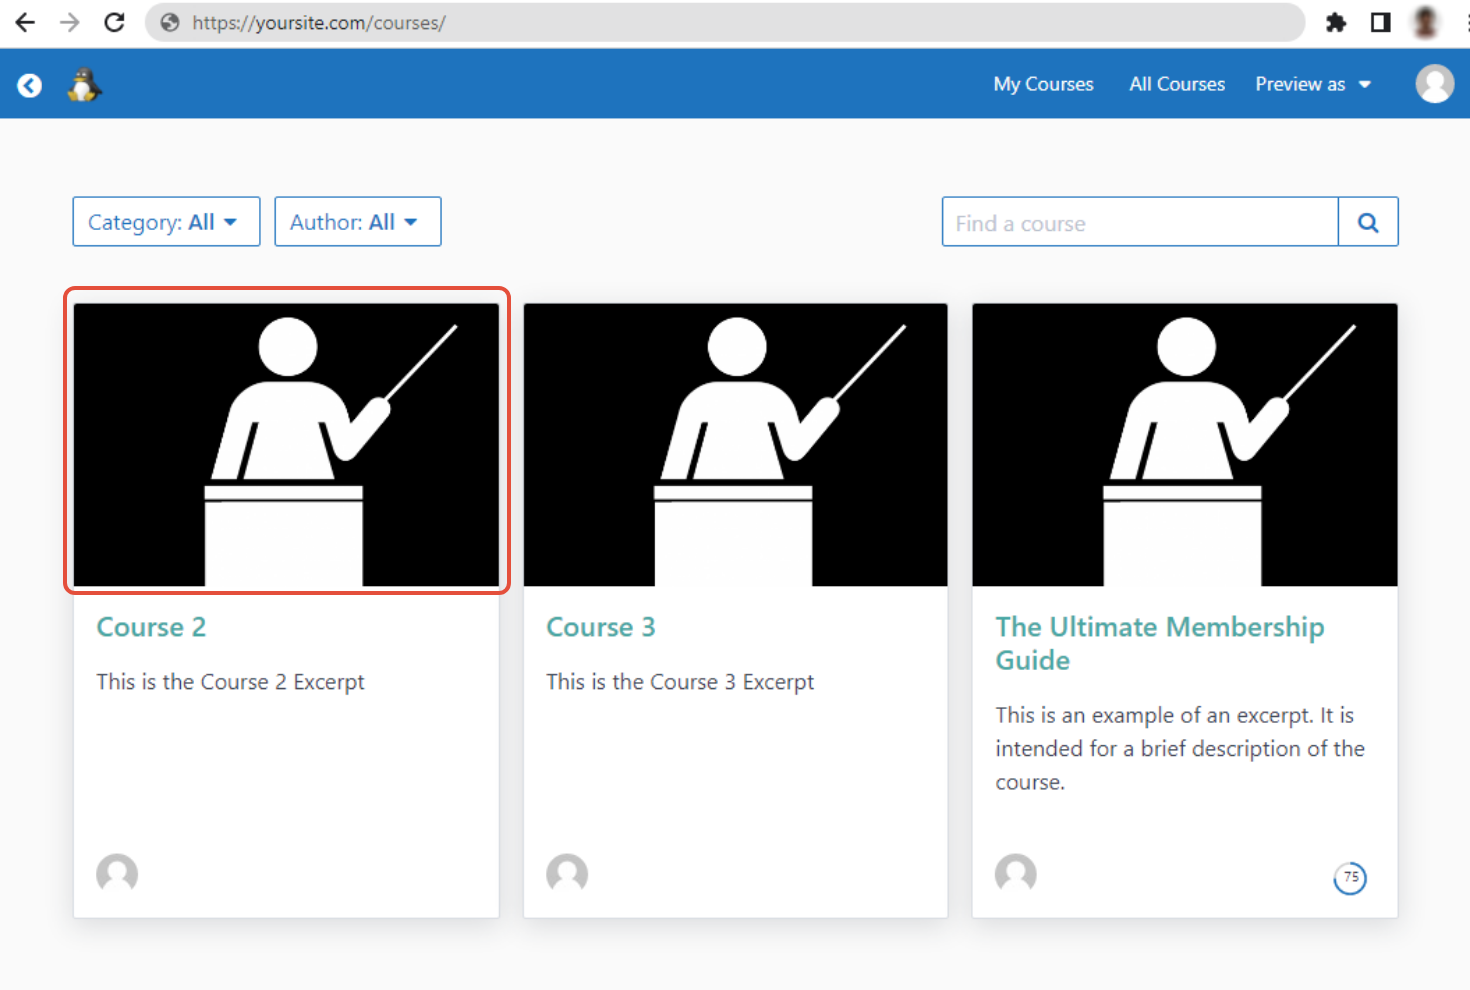
Adding a Lesson Image
Optionally, you can add a Lesson Image in each lesson, just like you would add the image for a course. This will override the Course Image in the left sidebar of that one lesson.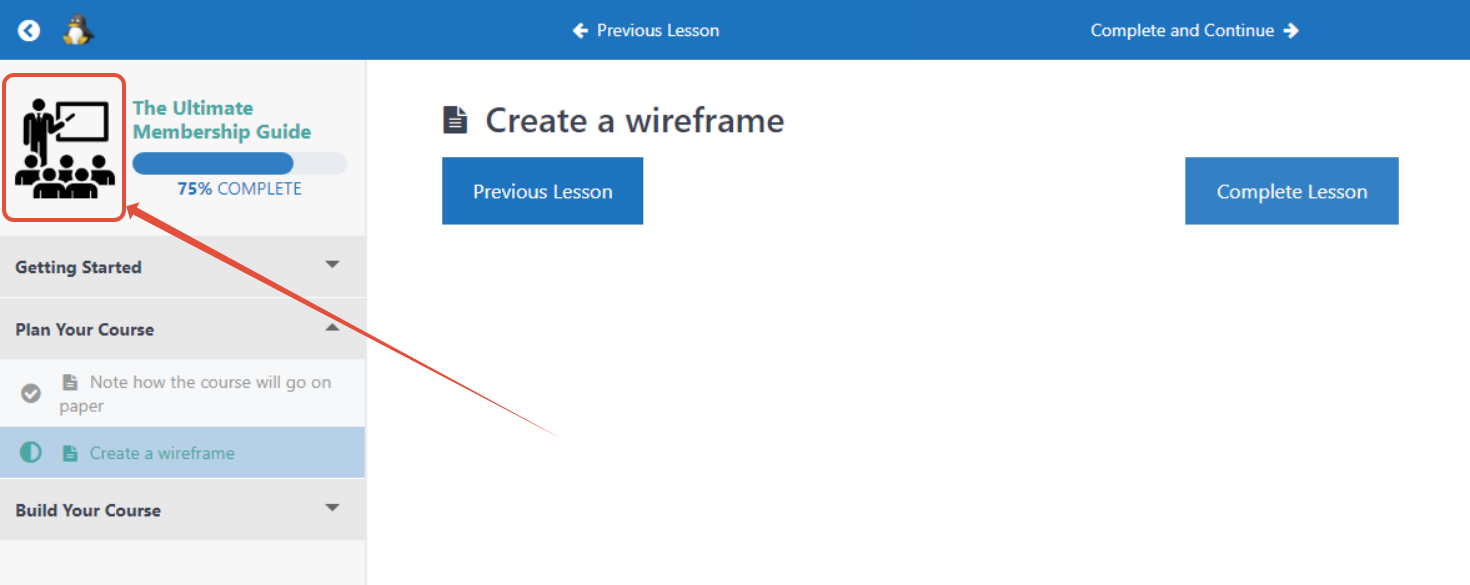
Adding an Excerpt
An Excerpt is used to provide a short description of the course. This area has limited design capabilities, so the description should be brief.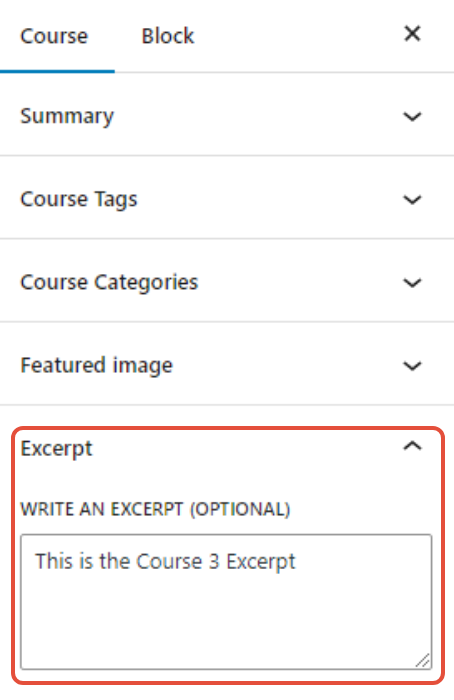
Here is how an excerpt displays on the front end.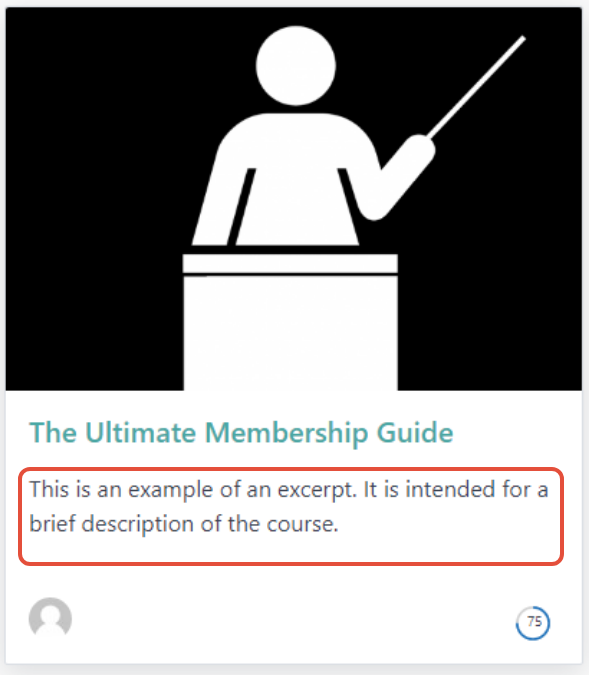
Tagging/Categorizing Your Courses
If you have multiple Courses, you can choose to Categorize or Tag them to help organize them.
On the MemberMouse > Courses page, you will see buttons at the top for Categories and Tags.
Click on either Categories or Tags to add usable Categories and Tags intended for your Courses. We recommend using just Categories unless you have a specific reason to use both Categories and Tags.
Note: Course Access Rights are not set via these Categories or Tags. Instead, access is set individually within each Course, which in turn, protects the Lessons and Quizzes within it. More details about Access Rights are below.
After clicking Categories or Tags, you can add your options there. Later, they can be added to your Courses.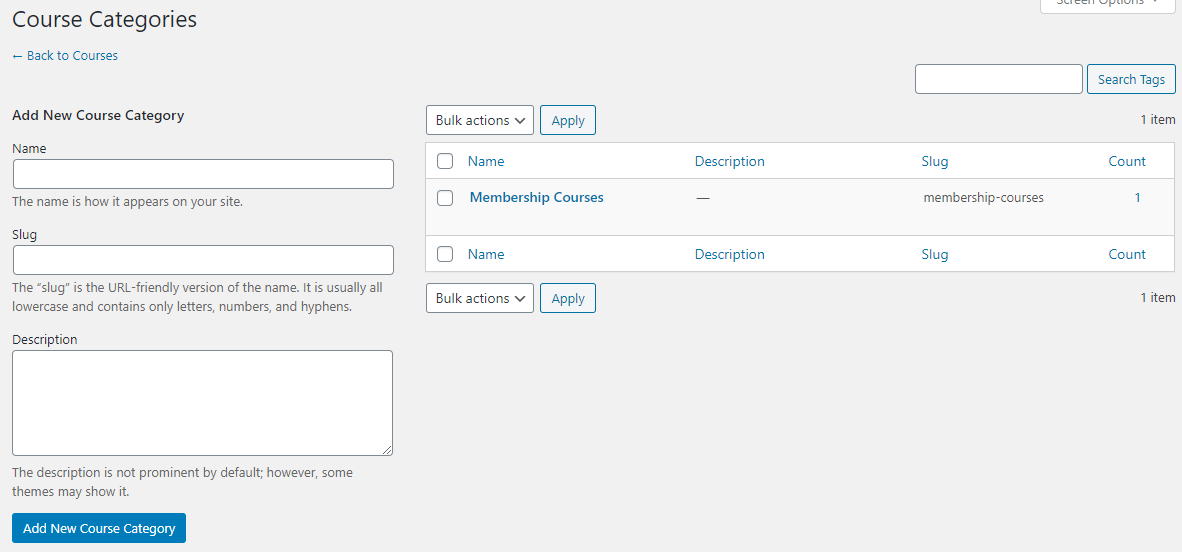
Once you have created your Categories or Tags, you can add them within the Course on the sidebar, under the Course Tags or Course Categories Panels. 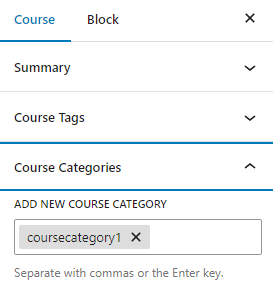
Protecting Your Course
Setting Access Rights for your Courses is the same as setting Access Rights for Pages. While on the Courses Page, in the MemberMouse Options panel, you can set access via Membership or Bundles. The access provided will protect all Lessons and Quizzes within that lesson.
If you're not familiar with the process, then please learn more in the Access Rights documentation.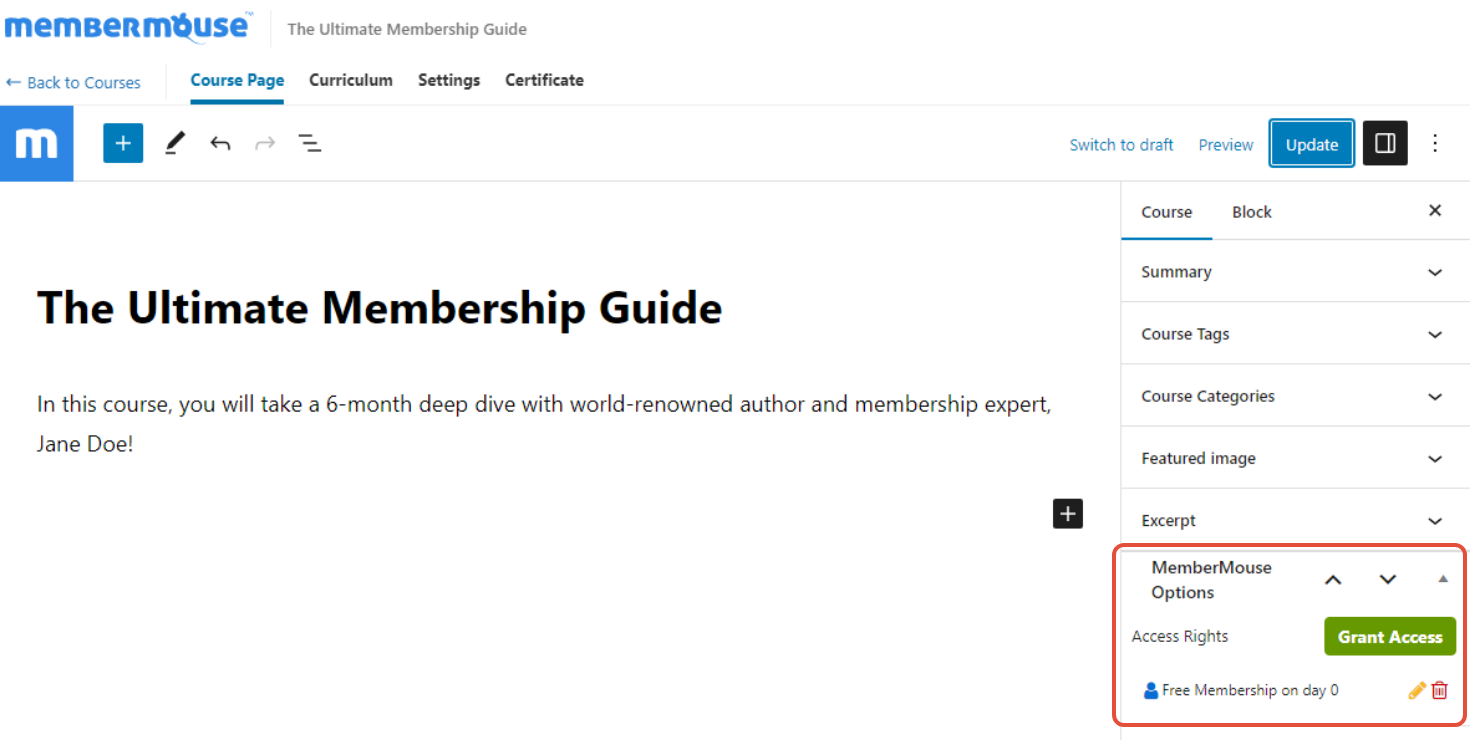
Note: If you do not set any Access Rights, the course will be freely available to the public.
Frequently Asked Questions about Courses
How Do Members Find My Courses?
Your Members will find your courses on the Courses listing page of your site. Unless you change the course slug, by default, the link will be https://yoursite.com/courses/
Your Members and guests will see your available Courses there: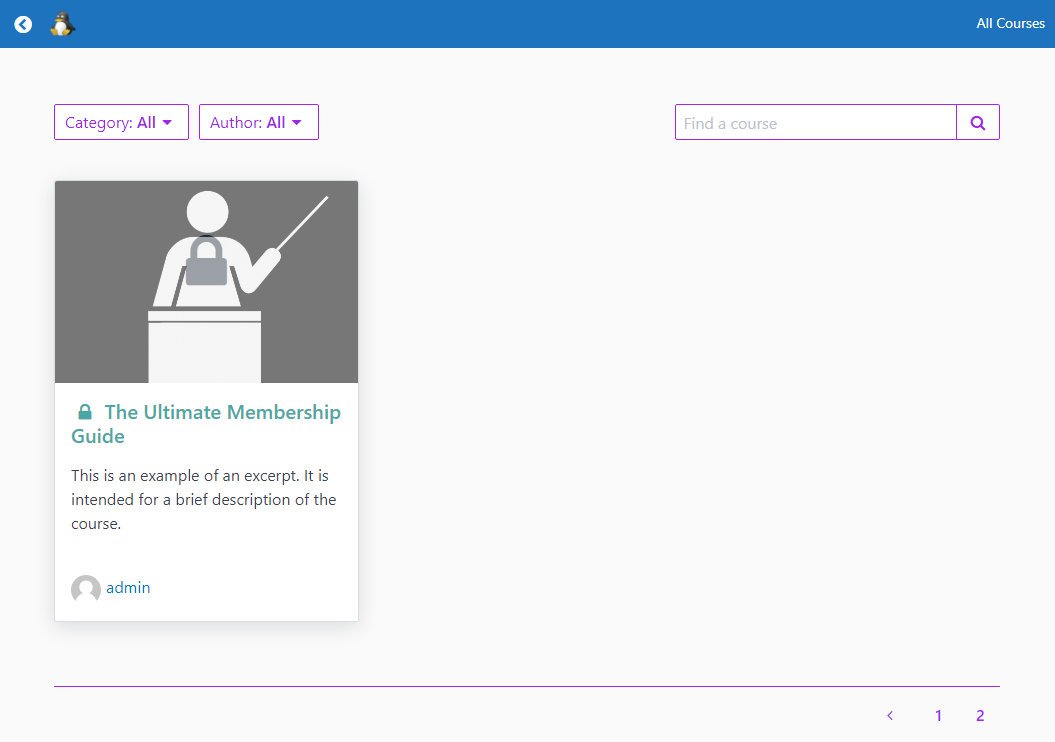
When a Member is logged in, they can click the My Courses link in the menu at the top to view only the Courses they have access to.
Clicking on one of the Courses will open the Course overview, which will look something like this: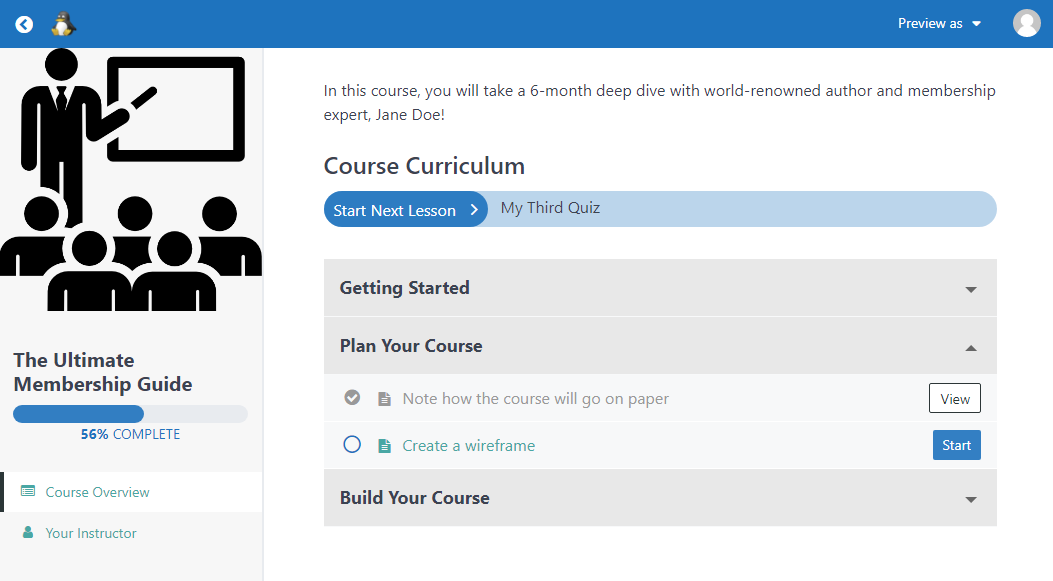
From here, your members can see the course overview, navigation, and instructor; they can also see their progress through the Course.
How Can I See a Member's Course Progress?
If you'd like to see how far along a particular Member is in one of your Courses, search for that Member from the WordPress Dashboard > Users page. Then click “Edit” on that User, and scroll down until you see the Course Information section.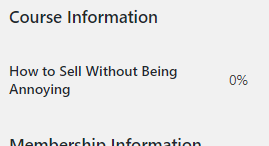
What if Smartphone Browser Tries to Download an Embedded PDF File Automatically?
It could be that you've added a PDF file to your course page using the standard Iframe method <iframe src=…></ifeame>. In such a case, the mobile phone browser will try to download the file automatically. To prevent that from happening, please use a plugin like EmbedPress. PDF files embedded that way will be shown on mobile browsers as well.
What if You See Classic Instead of Block Editor?
If you have both Classic and Block (Gutenberg) Editor installed and active and you see the Classic editor when you try to add a lesson or quiz, please go to your WordPress Dashboard > Settings > Writing and ensure that it is set up like this: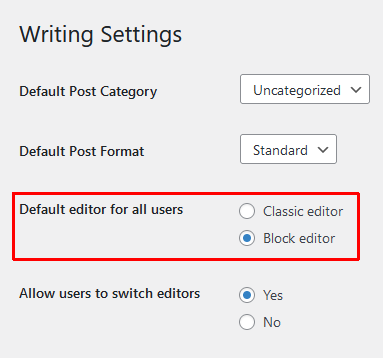
The Block editor needs to be set as the default one, and whether you'd want to allow or disallow switching is up to your preferences.
 Blog
Blog Podcast
 Support
 Customer Login


