MemberMouse allows you to manually sign up a customer by creating a new member. After the member is signed up they may log in to their My Account Page and add or change the rest of their information.
- In the MemberMouse menu, go to Manage Members.
- Next, click the Create Member button.
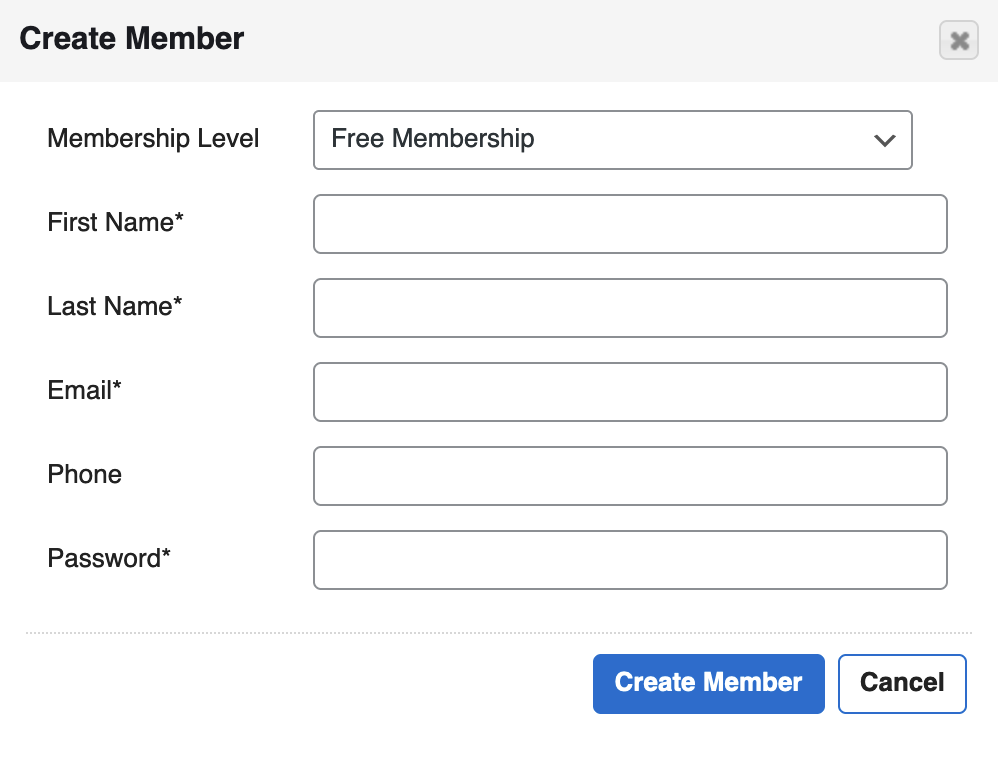
Note: after creating a member you may edit the settings at any time by clicking the pencil icon. - A dialog box containing all the options available for configuring a new member will pop up. To learn more about each option, consult the table below.

- After configuring the new member's details, click the Create Member button to create your member.
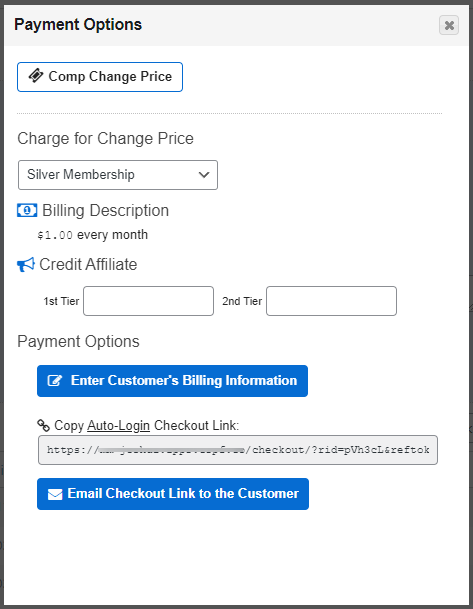
Note: If you add the member to a paid membership, you will be presented with a Payment Options dialogue box after clicking the Create Member button. You can choose to comp the member or enter their CC details yourself. Additionally, a link will presented that you can send to the user that will allow them to enter their own details and create their own account.

Create a Member Options
| OPTION | DESCRIPTION |
| Membership Level | Select the membership level for the member. |
| First Name* | This field is required. Enter the first name of the member. |
| Last Name* | This field is required. Enter in the last name of the member. |
| Email* | This field is required. Enter the member's email address. The email is stored as the member's username, unless changed, and will be used to receive emails about their membership. |
| Phone | Enter the member's phone number. You may use parentheses (453), or hyphens 488-9599. |
| Password | You may enter a unique password for the member to use and once the member logs in they will be able to change their password at any time in the My Account page. If you leave this field blank, use the Member Data SmartTags™ to send the member their password in the welcome email. |
 Blog
Blog Podcast
 Support
 Customer Login


