In Early 2020, Limelight was officially rebranded as Sticky.io. This also came with a new version of the API and a new integration in MemberMouse. Your login URL to Sticky.io may still be getlimelight.com or another limelight domain, but you will need to use the instructions here for Sticky.io.
Sticky.io has powerful payment structure options. Your product setup structure does not have to match what is set up in MemberMouse in this newer integration. You can use payment options in Sticky.io that don't appear in MemberMouse; you will just need to accept an alert telling you that your options do not match when mapping your Sticky.io product to the associated MemberMouse product. See Sticky.io's documentation on how to Create an Offer, or contact Sticky.io for details on what is available.
If you have any questions about the Sticky.io instructions or integration, please create a support ticket. We are happy to help.
Create an API User in Sticky.io
1. In your Sticky.io Admin section, hover over Settings. Then click Accounts and Permissions. When the section loads, click the API Accounts tab.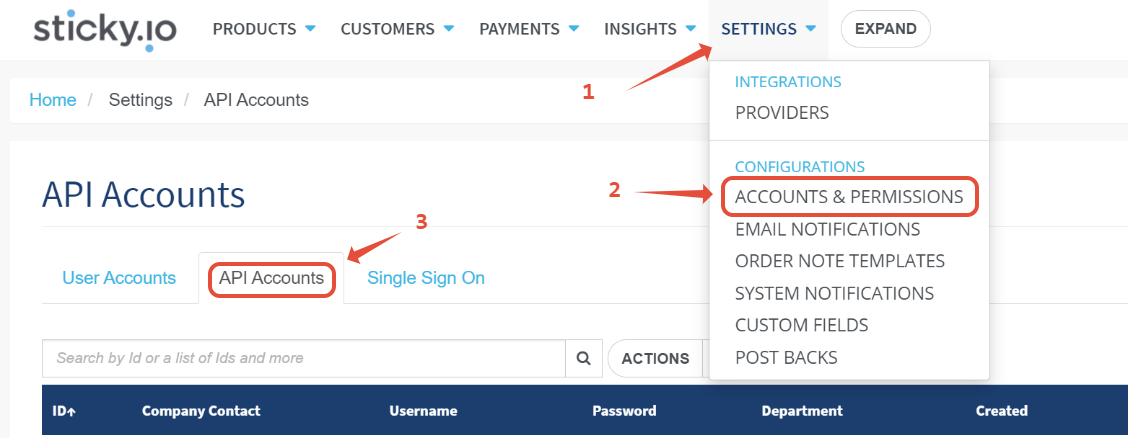
2. Click the arrow next to Actions, then Add API User.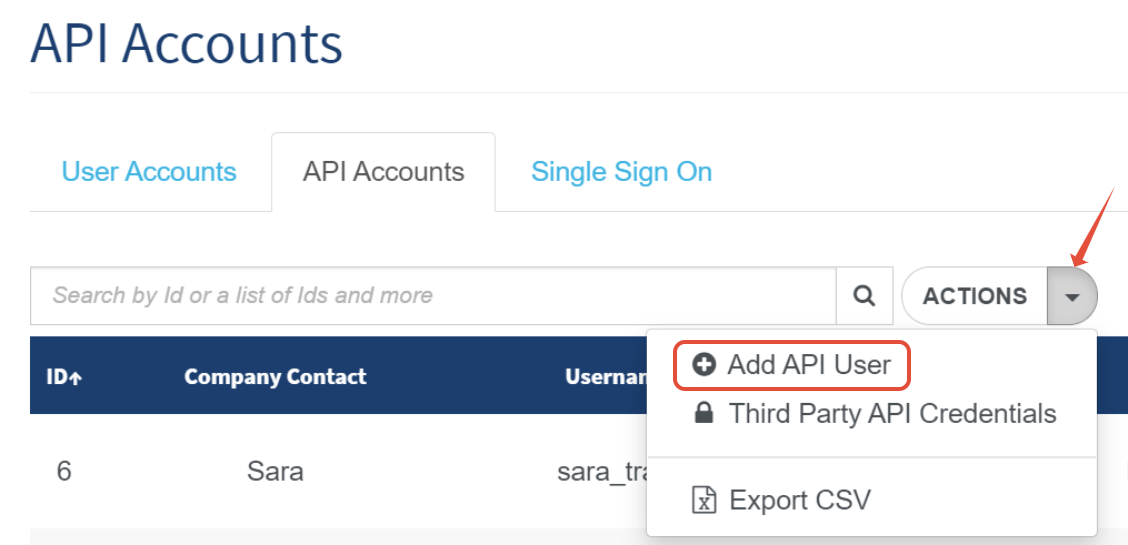
3. Create a new user in the popup with your desired credentials. Then save.
The following are required fields: Username, Contact, Email, Phone, Department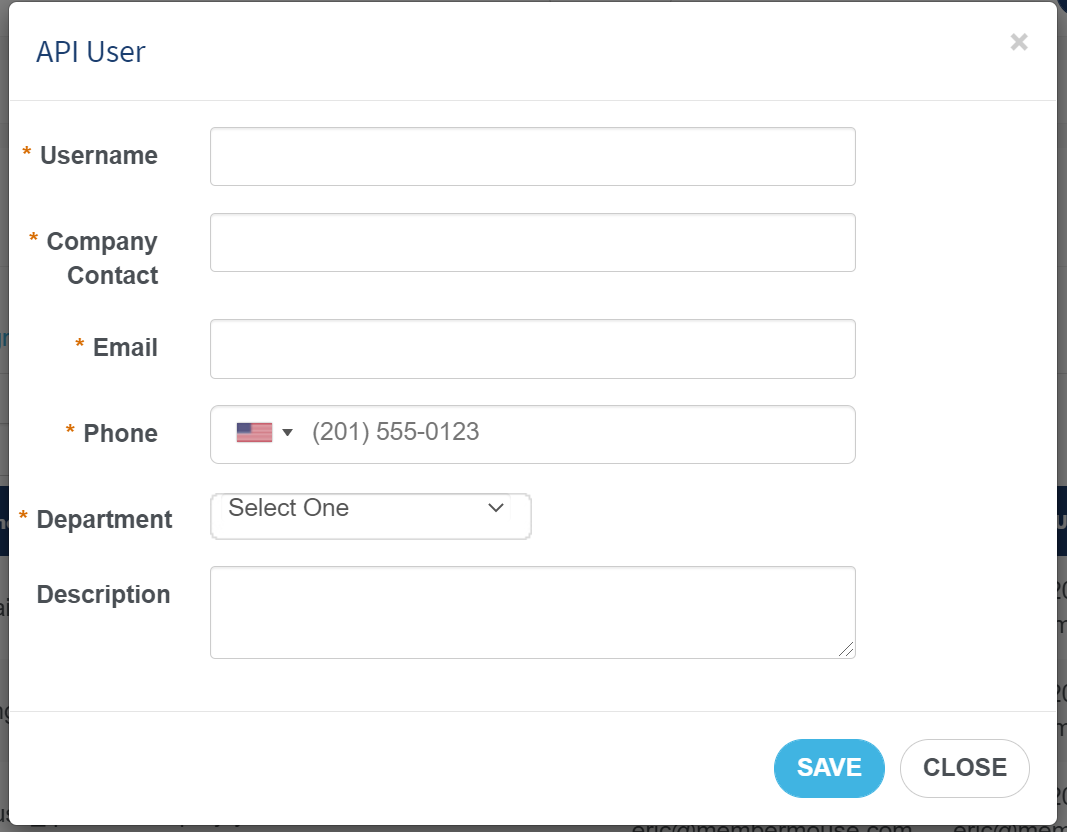
Once you save the above API User, you will see your new API user, including a generated password in the API User listing. Here is an example:
4. Now that the username and password have been created for the API User, the necessary permissions need to be set for that user so it can have, or be restricted from certain functions. To begin, click the gear icon under the Features column to see all the available permissions.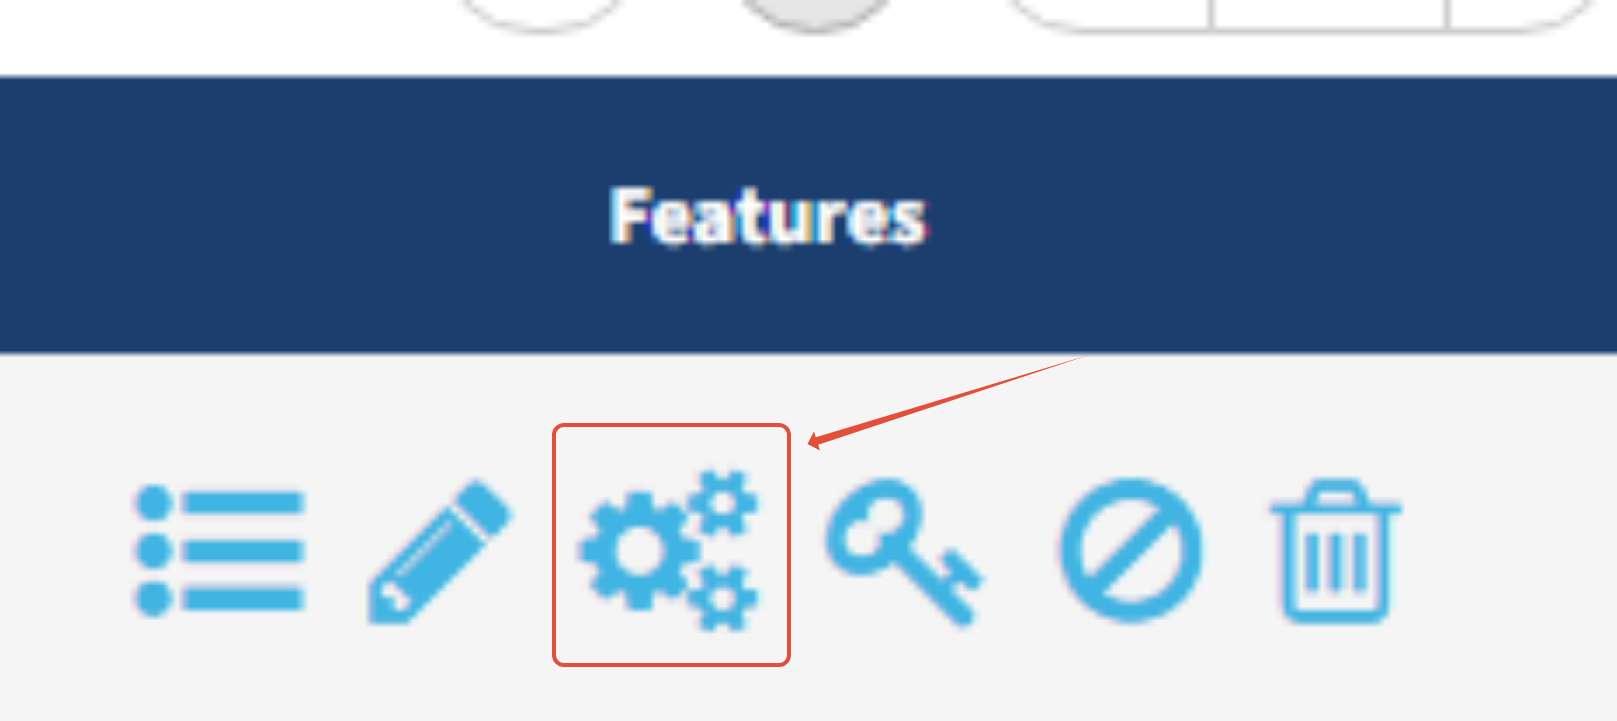
On the Permissions page, you will see many available permissions to enable or disable.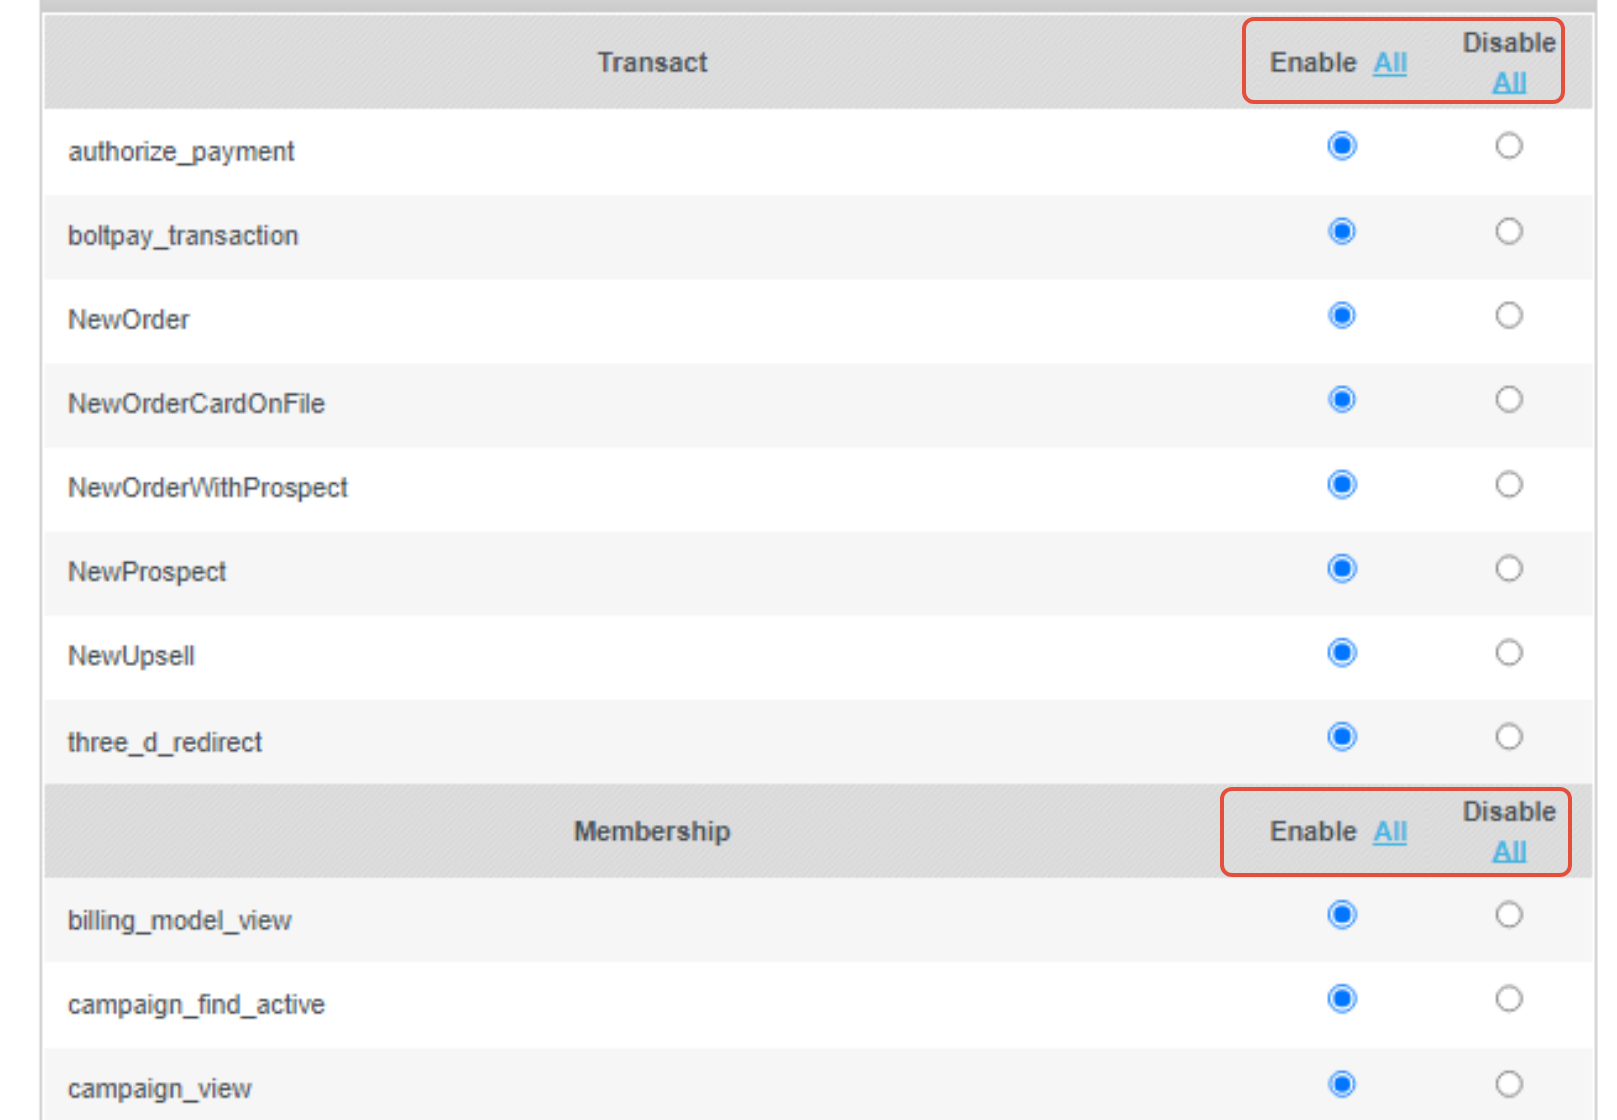
Which permissions to enable would be dependent on your development, configuration, and needs.
To connect Sticky.io to MemberMouse, we recommend enabling all of the Transact permissions, as well as the Membership permissions, to get started and complete a successful connection. If needed, you can come back later and test which permissions may not be needed and disable them.
Add your API information to MemberMouse
Now that you have created an API User within Sticky.io, you can apply those details to the MemberMouse Payment Settings to connect your site to Sticky.io.
1. In the MemberMouse menu, go to Payment Settings 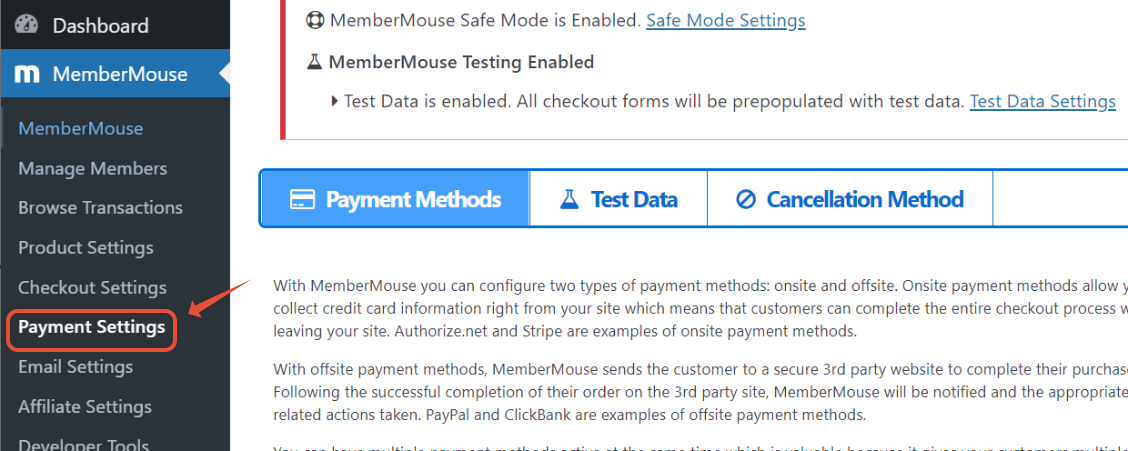
2. Select Sticky.io under Onsite Payment Method. Then, fill in the section there with the data created in the previous steps: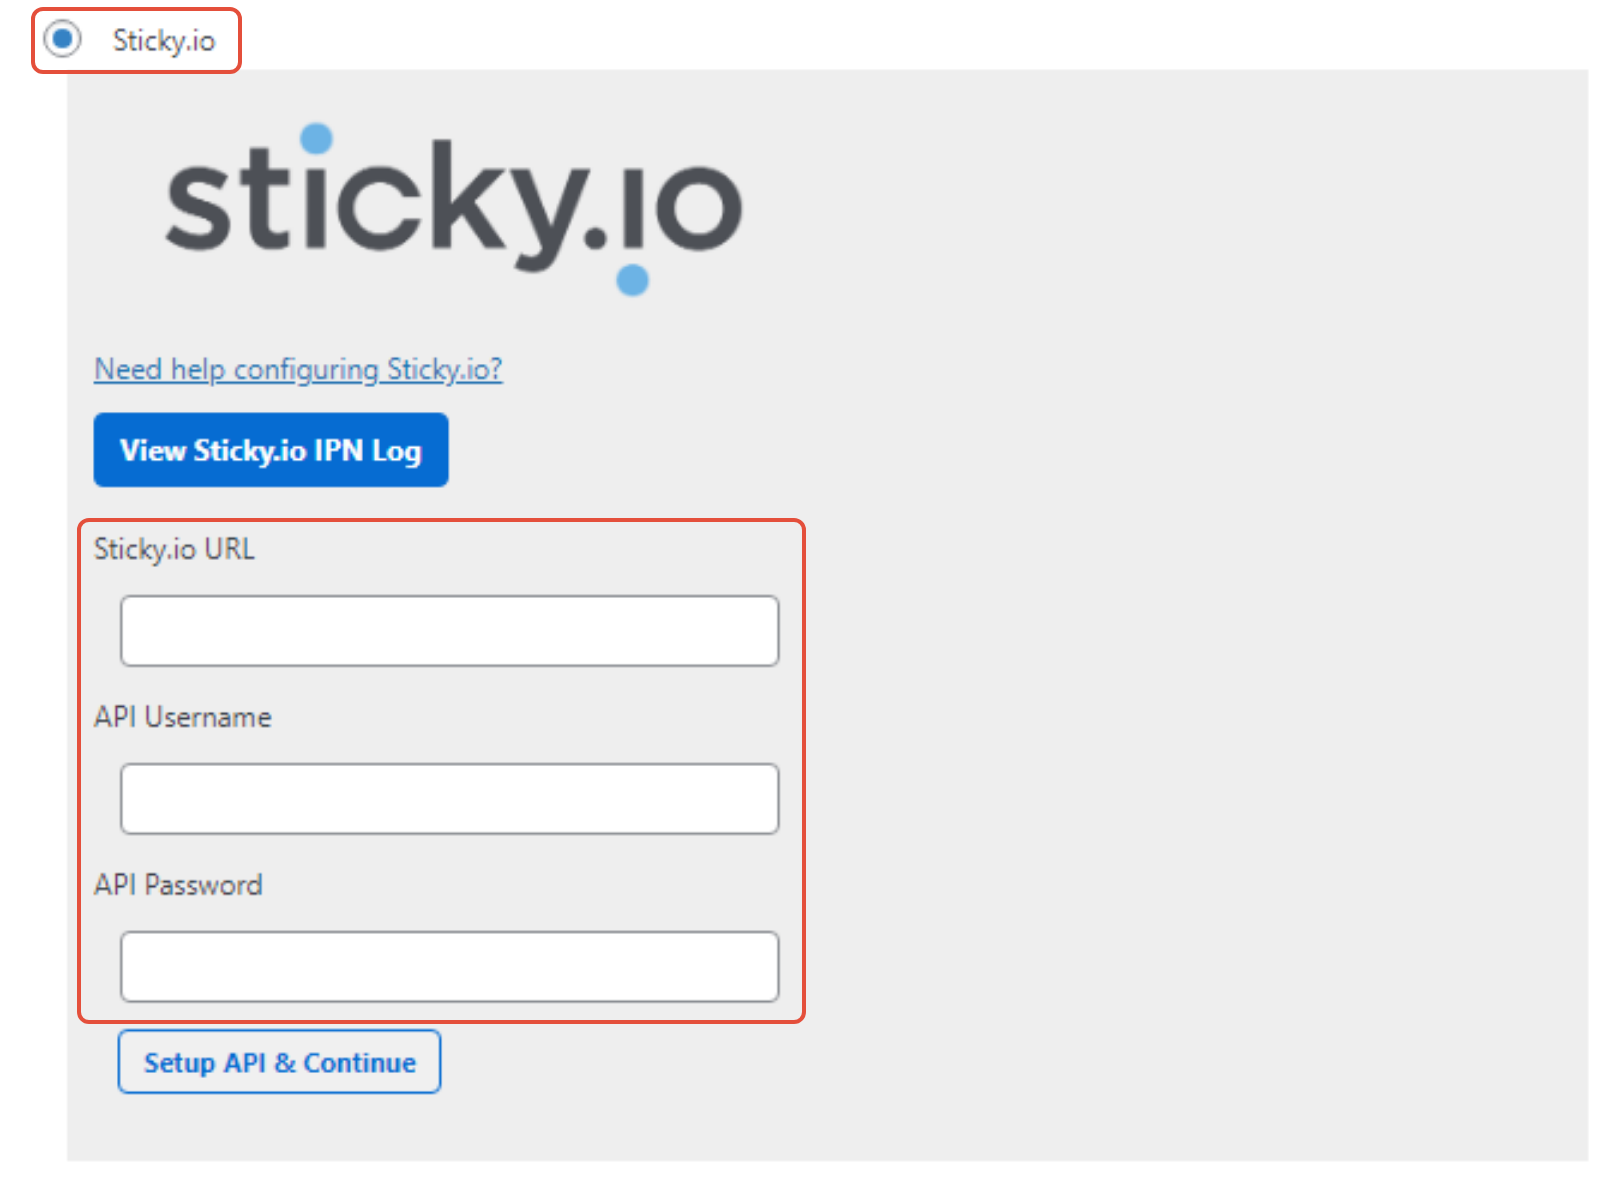
- Sticky.io URL: This will be the URL that you use to log in to sticky.io with. Here are two common examples:
https://yourcompany.sticky.io/
https://yourcompanygetlimelight.com/
- API Username: This is the username created in the previous steps. It can be found in Sticky.io under API Accounts. See the screenshot below for details.
- API Password: This is the password created in the previous steps. It can be found in Sticky.io under API Accounts. See the screenshot below for details.

Once complete, Click the ‘Setup API & Continue‘ button.
Once saved, you will see buttons open up to create mappings with your products and shipping methods with those created in Sticky.io. As well as the dropdown to set the default shipping option. You will need to have something selected here, so if you don't plan to use shipping, you will need to set up a $0 shipping option in Sticky — instructions for this are included further down.
Create a Provider profile for MemberMouse in Sticky.io
1. In the Sticky.io top menu, click on Settings, then Providers.
2. Click on Actions, and Add New Provider Profile.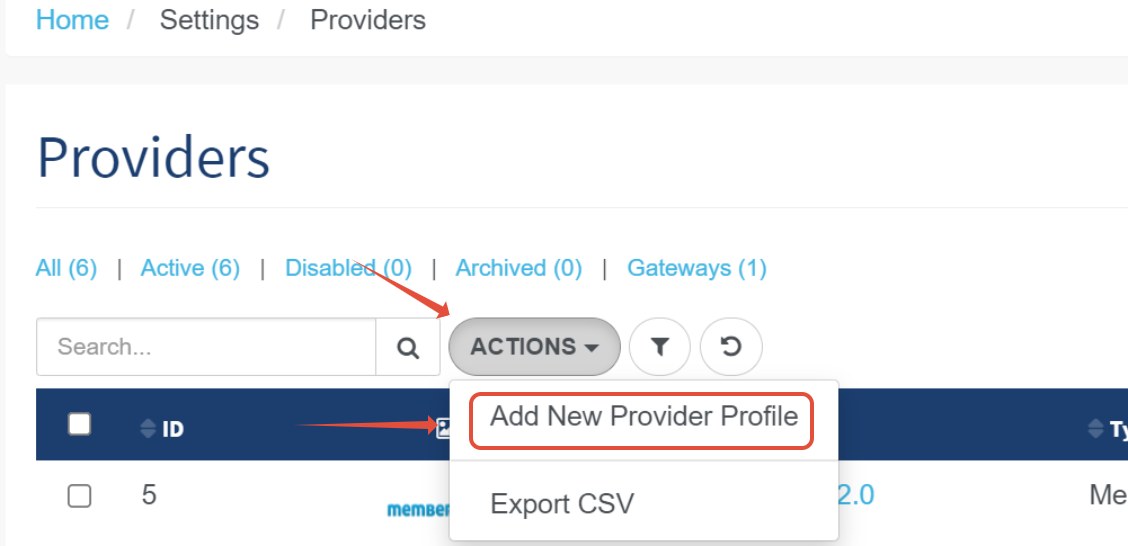
3. In the resulting popup, use the following settings, then click save: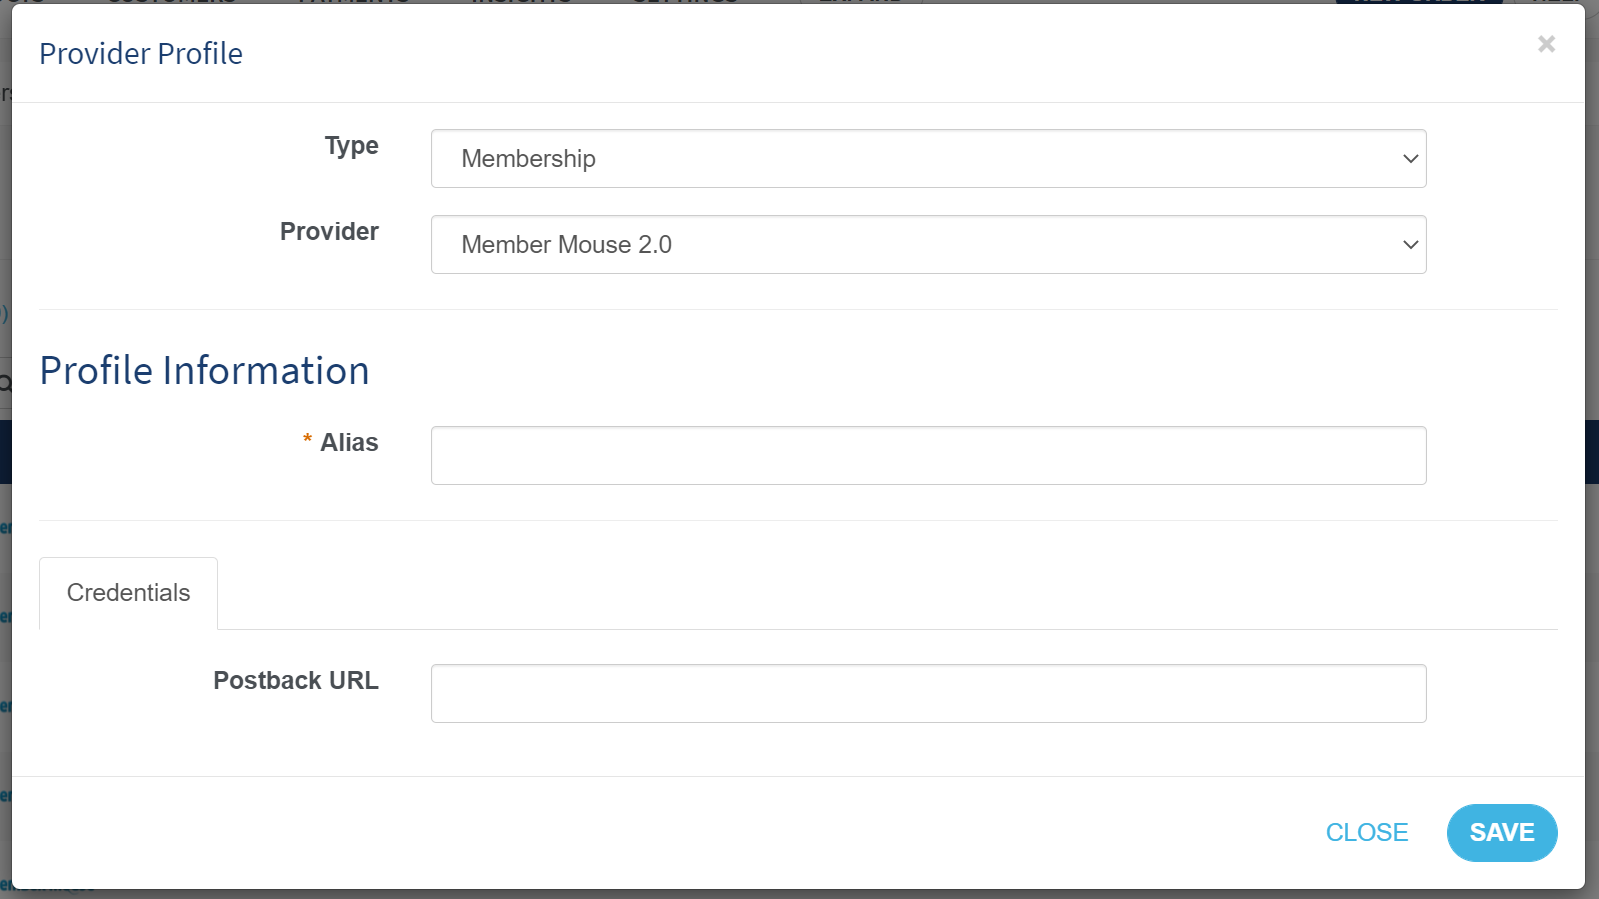
- Type: Membership
- Provider: MemberMouse 2.0
- Alias: any nickname you want to use for this Provider Profile
- Postback URL: Copied from Payment Settings in MemberMouse, just below the API Credentials section under Sticky.io. It will look something like:
https://yoursite.com/wp-content/plugins/membermouse/x.php?service=stickyio
Create Products in Sticky.io (Offers and Campaigns)
Click here for detailed instructions on how to Create Products in Sticky.io. The products you create here and in MemberMouse will then be mapped together to link the two platforms.
Create Products in MemberMouse
Use the links below to view detailed information on how to create membership levels, bundles, and products in MemberMouse. In MemberMouse, products function like price tags, assigning price or payment options to a membership level or a bundle (addon).
Map Sticky.io Products and Shipping Options to MemberMouse
NOTE: You must click ‘Save' at the bottom of the Payment Settings in MemberMouse before you can click the buttons to Map Products and Shipping.
For complete instructions on mapping Sticky.io products, see our article on how to Map Sticky.io Products to MemberMouse.
For complete instructions on mapping Sticky.io shipping options, see our article on how to Map Sticky.io Shipping Options to MemberMouse.
 Blog
Blog Podcast
 Support
 Customer Login


