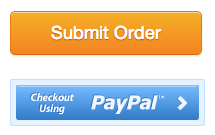
In MemberMouse's default checkout page template we include a SmartTag that automatically renders a button for each active payment method. Here's the SmartTag responsible for this:
[MM_Form_Button type='all']

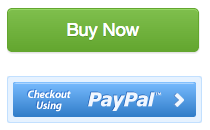
In order to provide this functionality it's necessary for us to control the styles of the buttons. There is some minor customization you can do via SmartTag attributes. For example, you can change the color and the button text as follows:
[MM_Form_Button type='all' label='Buy Now' color='green']

Having 2 Separate Buttons On A Checkout Page
Many times, you will want to have a unique button on your site for both your Onsite Payment Gateway as well as your Offsite Payment Gateway. To do that, you need to remove the [MM_Form_Button type='all'] from your code, and add a specific button for each payment gateway.
You can use this code for the Onsite Payment Gateway:

<a href="[MM_Form_Button type='submit' paymentMethod='default']"

class="mm-button blue large rounded">Sign Up With Stripe</a>
And this for the Offsite Payment Gateway:

<a href="[MM_Form_Button type='submit' paymentMethod='paypal']"

class="mm-button green large">Sign Up With PayPal</a>
You can also use an image for the button as well, using code like this:

<a href="[MM_Form_Button type='submit' paymentMethod='paypal']">

<img src="http://www.paypalobjects.com/en_US/i/btn/x-click-but5.gif"></a>
Use these snippets if you are looking to have your two buttons located at different locations on the checkout page, or if you just are looking for more control over the look and position of the buttons.
Complete Control Over Button Styles
If you want to have complete control over the button styles and layout you can use the following SmartTag configuration instead:
[MM_Form_Button type='submit' paymentMethod='paypal']
This will simply output a link that submits the form to the payment method you specified in the paymentMethod attribute. Since it only outputs a link it is your responsibility to determine how it will be displayed on the screen by using the SmartTag with an <a> tag or <button> tag. For example, you could do the following:
<a href="[MM_Form_Button type='submit' paymentMethod='paypal']">Checkout with PayPal</a>Note: Once you stop using the [MM_Form_Button type='all'] SmartTag which automatically creates a button for each active payment method, you're responsible for creating each button you want included on the checkout page by using the [MM_Form_Button type='submit' paymentMethod=''] SmartTag configuration.
Read this article for complete documentation on the Form_Button SmartTag.
This article details the attributes you can use to style the buttons on the Checkout page.
 Blog
Blog Podcast
 Support
 Customer Login


