 Blog
Blog Podcast
 Support
 Customer Login

How To Create Gated Content With WordPress: A Step-By-Step Guide
Have you ever seen something like this and wondered how you could replicate it on your own site?
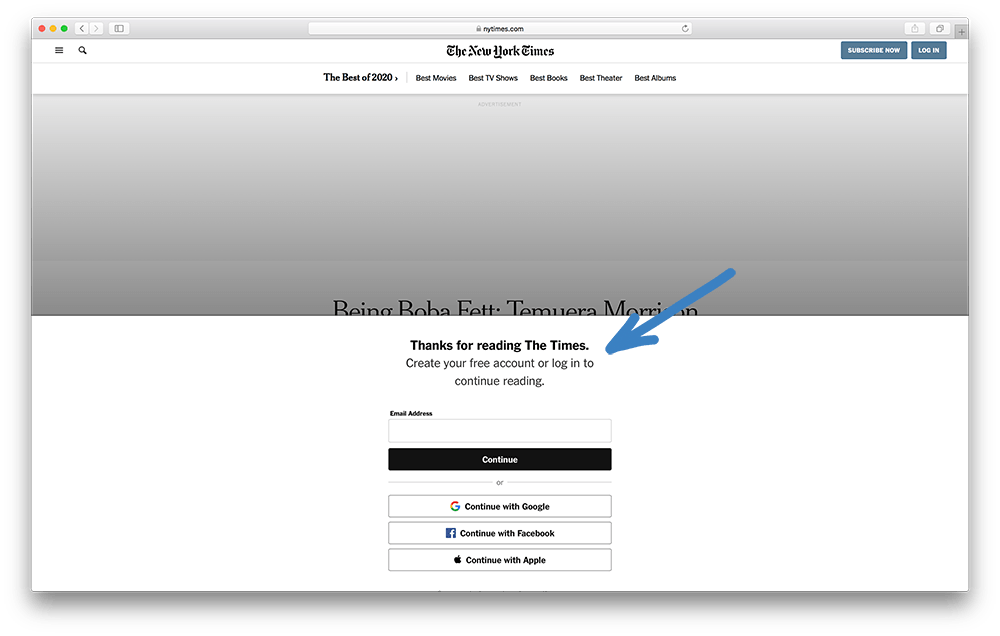
This content marketing strategy goes by a few different names you may be familiar with:
- Gated Content
- Teaser Content
- Paywall Content
If you do want to implement something like this, you're not alone.
Many of our customers ask us how to do this, and with good reason.
Creating gated content like this is a super effective way to engage with your website visitors and encourage them to sign up for your membership. Plus, it gives your current members a way to share your protected content with their communities.
You’re probably already using Facebook, Instagram, Twitter, and other social media platforms to spread the word about your site. But when you have a way for your members and visitors to share your content, you can tap into one of the most effective ways to supercharge your visibility.
But here’s the problem:
When your content is locked away behind a standard paywall, none of your organic visitors will be able to see anything. They’ll probably just see your standard error page and think they’ve hit a dead end. When this happens, you lose your opportunity to entice these visitors to stick around and engage with your content.
That’s why in this article, we'll show you the exact steps you can take to implement this strategy on your own website. From there, you'll know how to turn any piece of content you create into a powerful marketing tool.

Beyond Default Content Protection
MemberMouse’s default content protection mechanism is what we call a “hard block.” This can be useful in many circumstances. Especially when you don't want anyone except your paying members to access specific content — like your course modules, private forums, or exclusive videos.
The thing is, being able to share your content is a key ingredient in creating the kind of content that markets itself. If your content has a “hard block” on it, when a member tries to share it with a friend, they'll be redirected to an “Access Denied” error page. This wastes a great opportunity for you to engage with prospects and sign up new customers.

A default “hard block” error page
Granted, we don't want to leave your valuable, paid content wide open to the world, but we do want a way to give non-members a peek at what they're missing — just enough to get them interested in signing up for a membership.
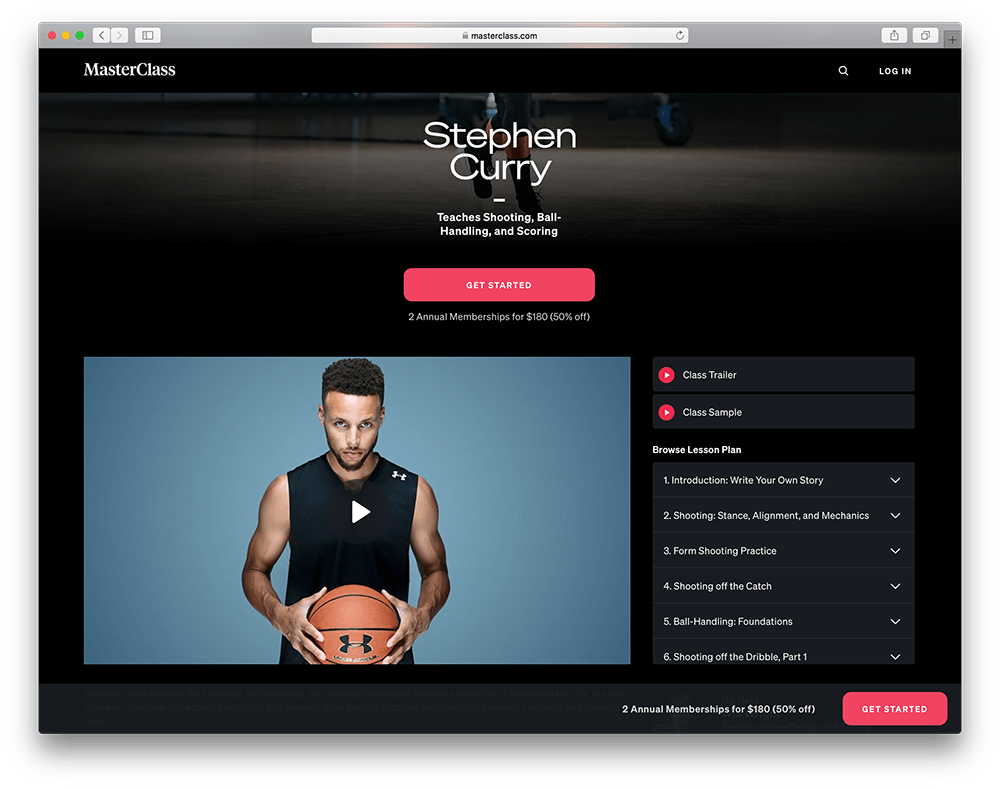
A perfect example of teaser content from MasterClass
This is where Conditional Access comes in.
Before we look at how to create this type of dynamic content, we need to get on the same page with the terminology we use to describe the state a user is in when they attempt to access protected content.
The 3 Types of Access
Just like Eskimos have many different words for snow, here at MemberMouse, we have specific terminology to describe different user access states.
Yes, it's a little bit nerdy… but hey, this is what we do!
MemberMouse lets you to display different content for 3 types of user states:
Current Access
- Members are in a current access state if they currently have access to the protected content.
Future Access
- Members are in an future access state if they don't currently have access to the protected content, but will at some point in the future based on their drip content schedule.
No Access
- Non-members and members are in a no access state if they don't have access to the protected content and won't have access in the future based on their current access rights.
When you know what relationship a member or non-member has to the protected content in terms of access rights, you can easily tailor specific content to target each state individually.
Now let’s look at the nuts and bolts and show you how to set this up on your site.

Gated Content: A Step-by-Step Walkthrough
In this example, the tool we’ll use to create highly shareable & marketable content is called the Access Decision SmartTag™. This allows you to create shareable content that will be displayed in full to members who have access and will show special messaging to users who don't have access.
We've broken the process down to 4 easy steps.
Step 1:
The first thing we need to do is create a new protected post or page. This article gives you step-by-step instructions for creating a protected post or page in WordPress. After doing this, that piece of content is protected by MemberMouse's default content protection mechanism, “hard blocking.”
Step 2:
The next thing we need to do is create the content that everyone will see no matter what their access rights are. Here’s an example:
<h1>Day 5: The Most Important Thing You'll Ever Learn!</h1>

<!-- placeholder for dynamic content -->

<p>Coming Up: In the next article we'll teach a simple trick to turn lead into gold.</p>
At this point we've set up our headline at the top of the page and our plug for the next article to be visible by everyone who can access this page.
Step 3:
In this step we'll replace the <!-- placeholder for dynamic content --> that we added in Step 2.
This is where the magic happens.
The Access Decision SmartTag has three different attribute values that you can use to specify the content you want shown for each case. Here's a simple example:
<h1>Day 5: The Most Important Thing You'll Ever Learn!</h1>


<!-- content for members with current access goes here -->


<p>Coming Up: In the next article we'll teach a simple trick
to turn lead into gold.</p>
When viewing this page, the visitor will only be shown the content inside the SmartTag that correlates to their access value in addition to the content that's available for everyone (i.e. not contained within the access='true', access='future' or access='false' parameters).
Step 4:
Finally, let's complete the example with some sample content:
<h1>Day 5: The Most Important Thing You'll Ever Learn!</h1>


Here's the video you paid for:

<iframe width="640" height="390"

src="http://www.youtube.com/embed/PdIbF0q0mI4"

frameborder="0" allowfullscreen>

</iframe>


<p>Coming Up: In the next article we'll teach a simple trick
to turn lead into gold.</p>
Here's what the results will look like:
Current Access
- Members with current access will be able to watch the protected video.
Future Access
- Members with future access will be displayed a message letting them know that they will have access to the video on a specific day. This content utilizes the Content Data SmartTag™ which calculates the date the current member will get access and prints it on the screen.
No Access
- Non-members and members with no access will see a message saying that they don't have access and then display a link for how they can sign up. This content utilizes the Purchase Link SmartTag™ which generates a special link that when clicked will automatically take the visitor to a checkout page where they can purchase access.
As you can see, the Access Decision SmartTag gives you a lot of flexibility in controlling who can access your content and what they'll see based on their access rights. All you need to do is follow the example above and place your pre-sales content within the MM_Access_Decision access='false' SmartTag.
Now when your members share this page with friends, post a link on Facebook or share it on Twitter, everyone who's not a member will see your pre-sales content instead of being redirected to an Access Denied error page.
And that's how you create content that markets itself!
How To Emulate A Real-Life Example
Now that we've covered all the basics, let’s apply everything you just learned to replicate the sort of strategy you’d see on The Wall Street Journal or The New York Times’s website.
Take this page from The New Yorker, for example:
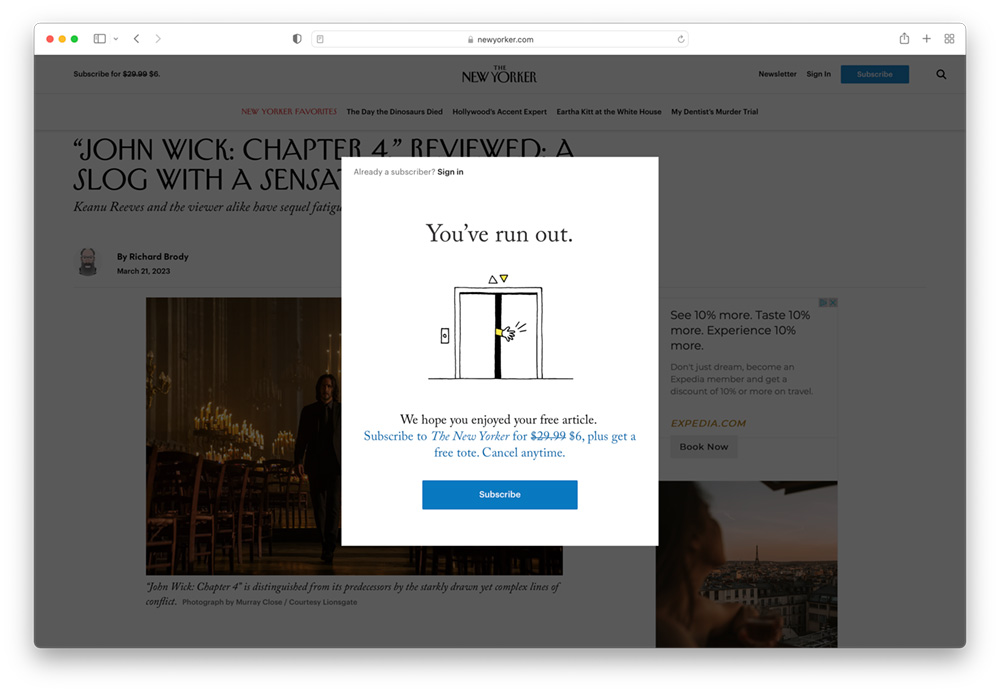
As you can see, when you attempt to read this article, you’re met with a “content gate” that shows you a bit of teaser content before asking you to login or subscribe. If you're dying to discover what the intelligentsia think of Keanu's latest performance as John Wick, chances are you'll subscribe to keep reading.
Here’s how you can implement this strategy on your own site:
Step 1:
Determine the page (or pages) where you want to do this. This could be a blog post, the first module of your online course, or any other page created through WordPress.
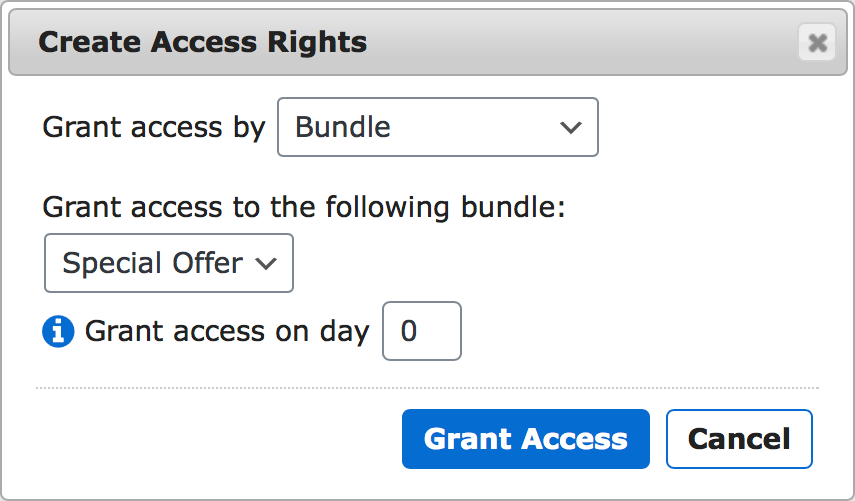
Step 2:
Grant access to this page based on a certain membership level or bundle. Pick the thing that represents whatever it is that you want people to do in order to see this page.
For example, if you want your readers to sign up for a free account – grant access based on a free membership level. Or, if you want people to purchase a subscription, you can grant access based on the associated membership level or bundle.
Step 3:
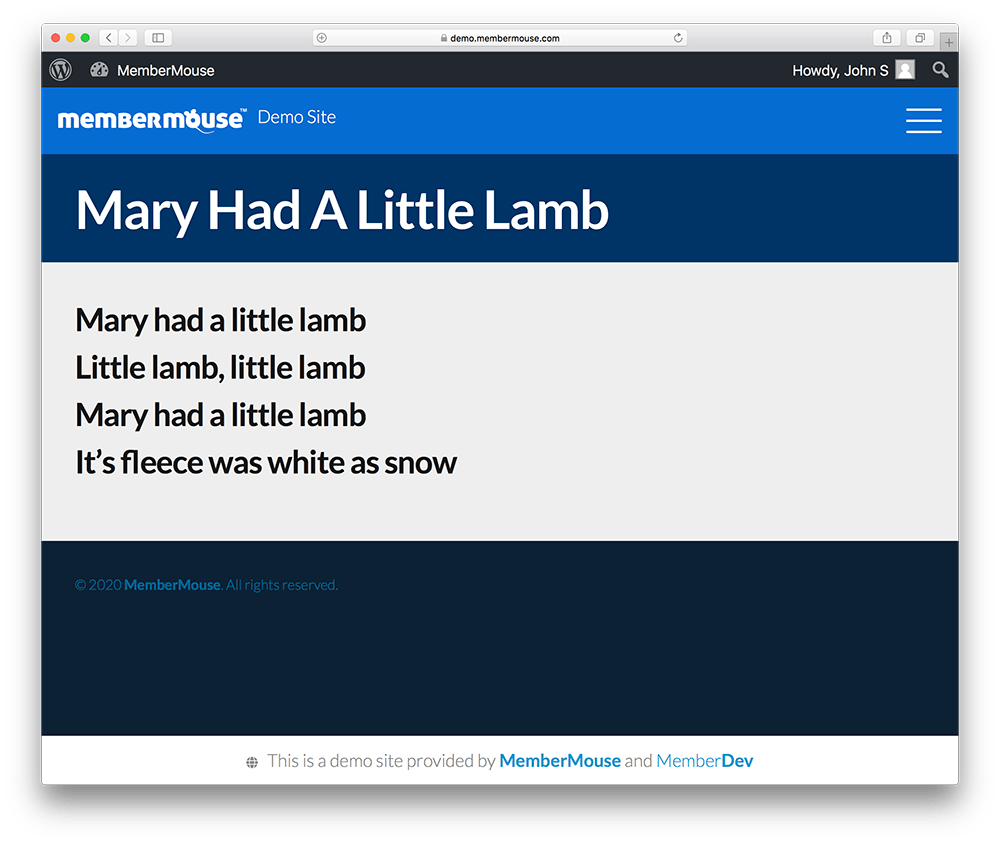
Next, you'll simply add an Access Decision SmartTag to the code of your page for the visitors who do have access:
Mary had a little lamb
Little lamb, little lamb
Mary had a little lamb
Its fleece was white as snow
The content displayed within the parameters of this SmartTag will be displayed to your logged-in members who have access to this content.
It'll look something like this:
Step 4:
Finally, you'll just need to add another Access Decision SmartTag to the same page for the visitors who don't have access:
Here's how that “teaser page” would look:
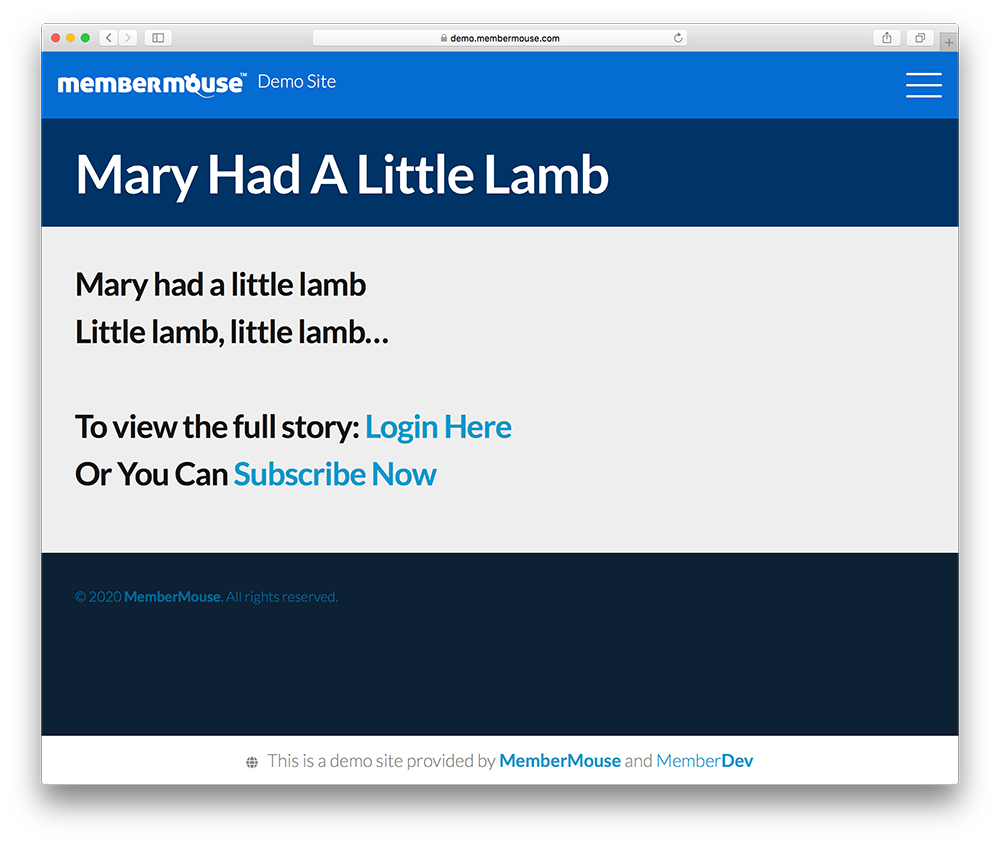
The content displayed within the parameters of this SmartTag will be shown to everyone who does not have access to this page. In order to see the full content on the page, your visitor will simply need to purchase the product associated with access to the page.
The purchase link you see in the example above will take them to a checkout page. After they complete their purchase, they’ll be able to view all of the protected content on that page.
If you have a handful of pages on your site where you’d like to implement this strategy, this way of doing things is a great solution for you.
How To Do This At Scale
However, if you're looking to do this across your entire site — on dozens or hundreds of private blog posts, course modules, or other protected pages — we'll recommend another method for you that could make your life much easier.
The way to accomplish this on a large number of pages is to use our bypass content protection filter. This article from our support center details how you can use this feature of our platform.
To summarize, you can use this filter to determine what access someone has through PHP. From there, you can apply this to the PHP template you use for all of your content. So, you'd only have to do this once at the top of your PHP template — rather than doing it manually on every single page you want to protect.
When you use the bypass content protection filter, you'll be able to choose whether to show someone the full content or simply preview content. When configured, MemberMouse will automatically execute this filter and show your visitors preview content rather than an error page.
We know this is just a tad bit technical, so if you have any questions about this process at all, leave us a comment below. We'd be happy to hear from you and help you out in any way we can.

Final Thoughts On Gated Content
By utilizing the ability to customize the content you display to visitors without access, you’re able to transform your protected content into a powerful marketing tool.
Whenever you or your members share your content, instead of being hidden behind a pay-wall, your pages become what we call “self-promoting.” Putting the power of the Access Decision SmartTag™ to use on your site is a great way to make your protected content work for you.
If you’d like more information on how to customize what your members and visitors see in RSS feeds, Archive Listings and most importantly, Search Results, check out this article from our support center.

Blair Williams
Employee account created by MemberMouse


